Amazon Redshift data sharing allows you to securely share live, transactionally consistent data in one Amazon Redshift data warehouse with another Amazon Redshift data warehouse within the same AWS account, across accounts, and across Regions, without needing to copy or move data from one cluster to another. As the organization grows and democratizes the data, administrators want the ability to manage the datashare centrally for governance and auditing, and to enforce fine-grained access control. Amazon Redshift data sharing integration with AWS Lake Formation, enables Amazon Redshift customers to centrally manage access to their Amazon Redshift datashares using Lake Formation. We say/do/show how to centrally manage access and permissions for Amazon Redshift data sharing with Lake Formation in this demo guide.
The data mesh is a decentralized, domain-oriented architecture that emphasizes separating data producers from data consumers via a centralized, federated Data Catalog. Typically, the producers and consumers run within their own account.
The following steps provide an overview of how Amazon Redshift data sharing can be governed and managed by Lake Formation in the central governance pattern of a data mesh architecture:
| Say | Do | Show | |
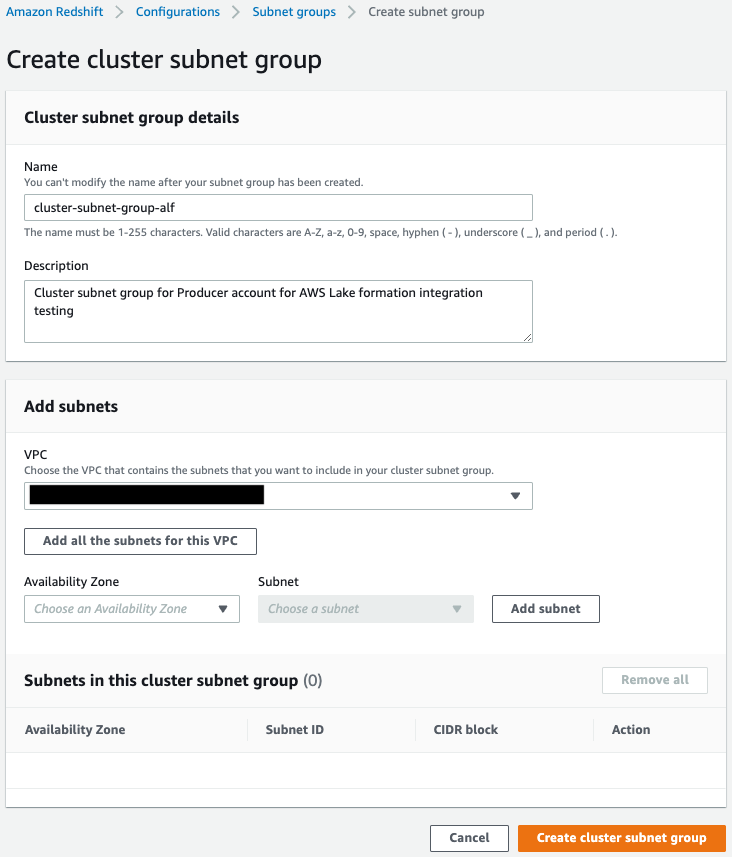
Create cluster subnet group in the data producer account.
|
On the Amazon Redshift console, create a cluster subnet group.
For more information, refer to Managing cluster subnet groups using the console.
|
|
|
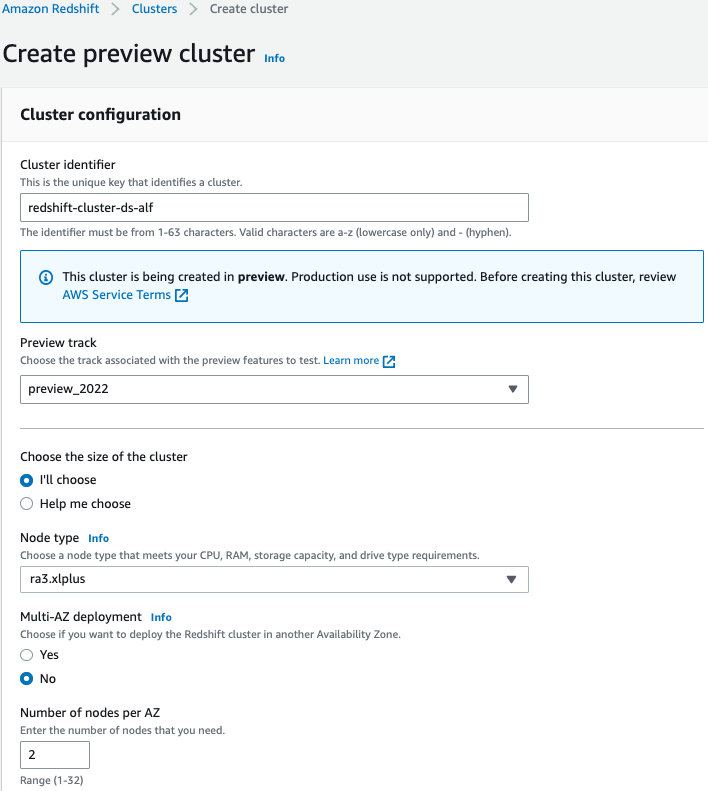
Create cluster in the data producer account
|
Create an Amazon Redshift cluster using the RA3 node type with encryption enabled.
- On the Amazon Redshift console, choose Create cluser.
- For Cluster identifier, provide the cluster name of your choice.
- For Preview track, choose preview_2022.
- For Node type, choose one of the RA3 node types as this feature is only supported on the RA3 node type.
- For Number of nodes, enter the number of nodes that you need for your cluster.
|
|
|
|
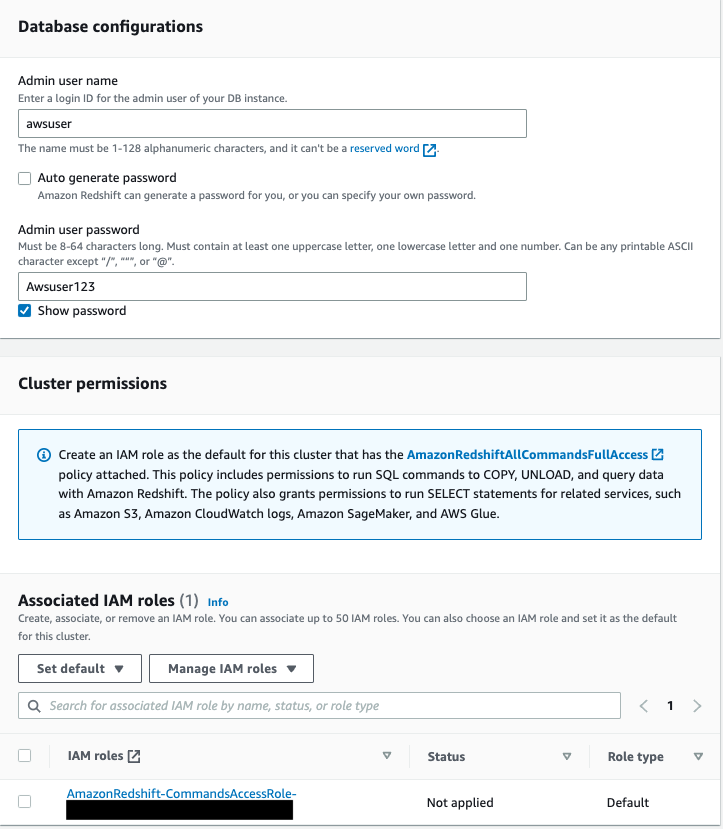
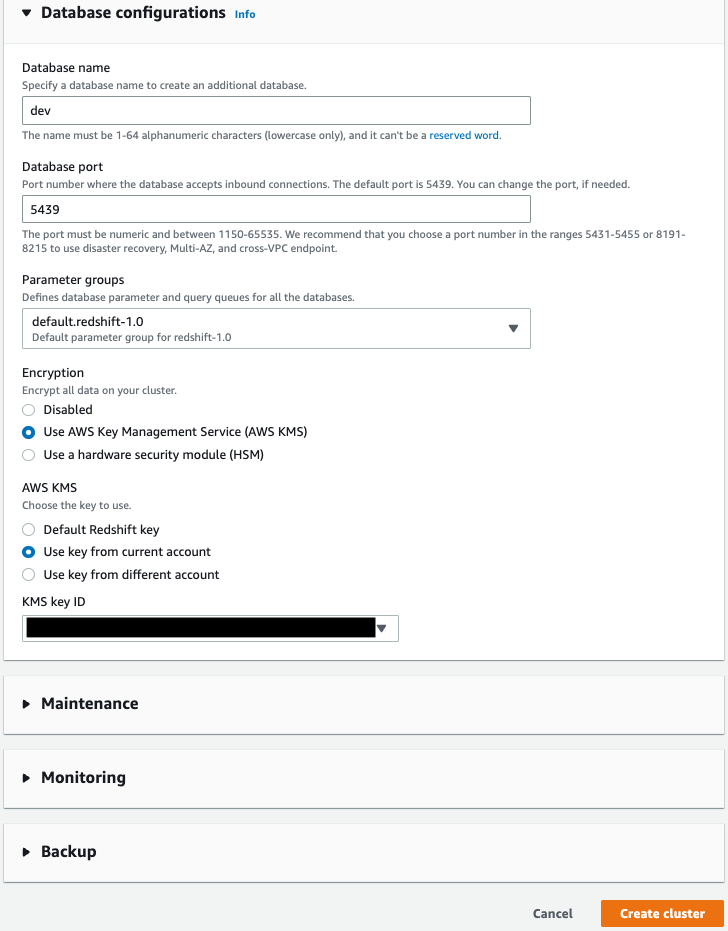
- Under Database configurations, choose the admin user name and admin user password.
- Under Cluster permissions, you can select the IAM role and set it as the default.
|
|
|
|
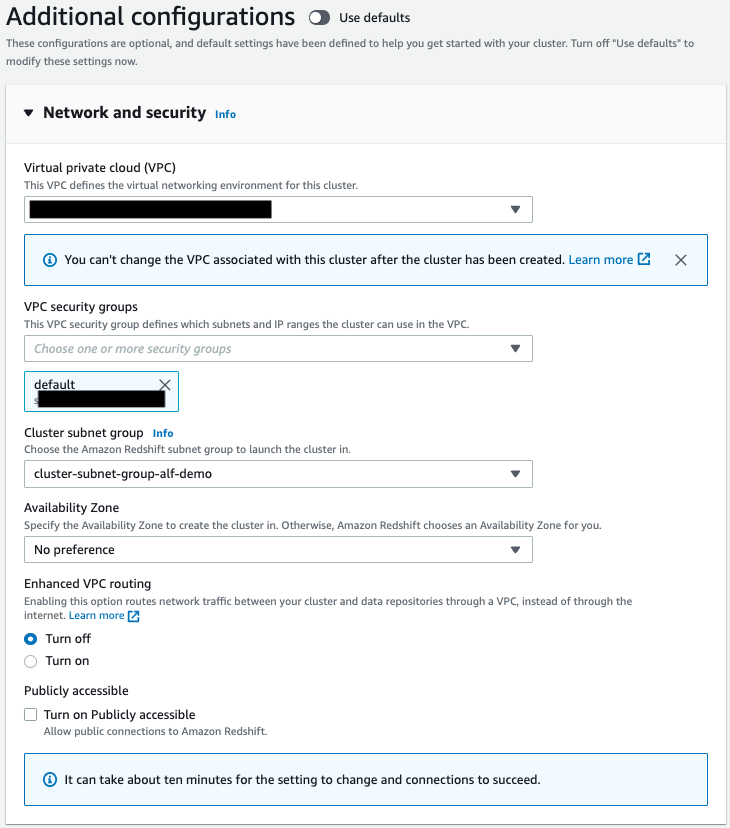
- Turn off the Use defaults option next to Additional configurations to modify the default settings.
- Under Network and security, specify the following:
- For Virtual private cloud (VPC), choose the VPC you would like to deploy the cluster in.
- For VPC security groups, either leave as default or add the security groups of your choice.
- For Cluster subnet group, choose the cluster subnet group you created.
|
|
|
|
- Under Database configuration, in the Encryption section, select Use AWS Key Management Service (AWS KMS) or Use a hardware security module (HSM). Encryption is disabled by default.
- For Choose an AWS KMS key, you can either choose an existing AWS Key Management Service (AWS KMS) key, or choose Create an AWS KMS key to create a new key. For more information, refer to Creating keys.15. Choose Create cluster.
|
|
|
Create tables in the producer Amazon Redshift cluster using Query editor v2 from Redshift console and logging into the database using admin credentials defined during cluster creation.
|
create table customer_address
(
 ca_address_sk int4 not null ,
  ca_address_id char(16) not null ,
  ca_street_number char(10) ,
  ca_street_name varchar(60) ,
  ca_street_type char(15) ,
  ca_suite_number char(10) ,
  ca_city varchar(60) ,
  ca_county varchar(30) ,
  ca_state char(2) ,
  ca_zip char(10) ,
  ca_country varchar(20) ,
  ca_gmt_offset numeric(5,2) ,
  ca_location_type char(20)
  ,primary key (ca_address_sk)
) distkey(ca_address_sk);

create table customer_demographics
(
  cd_demo_sk int4 not null ,
  cd_gender char(1) ,
  cd_marital_status char(1) ,
  cd_education_status char(20) ,
  cd_purchase_estimate int4 ,
  cd_credit_rating char(10) ,
  cd_dep_count int4 ,
  cd_dep_employed_count int4 ,
  cd_dep_college_count int4
  ,primary key (cd_demo_sk)
)distkey (cd_demo_sk);

create table customer
(
  c_customer_sk int4 not null ,
  c_customer_id char(16) not null ,
  c_current_cdemo_sk int4 ,
  c_current_hdemo_sk int4 ,
  c_current_addr_sk int4 ,
  c_first_shipto_date_sk int4 ,
  c_first_sales_date_sk int4 ,
  c_salutation char(10) ,
  c_first_name char(20) ,
  c_last_name char(30) ,
  c_preferred_cust_flag char(1) ,
  c_birth_day int4 ,
  c_birth_month int4 ,
  c_birth_year int4 ,
  c_birth_country varchar(20) ,
  c_login char(13) ,
  c_email_address char(50) ,
  c_last_review_date_sk int4 ,
  primary key (c_customer_sk)
) distkey(c_customer_sk);

create view customer_view
as
select
  c_customer_sk,
  c_customer_id,
  c_birth_year,
  c_birth_country,
  c_last_review_date_sk,
  ca_city,
  ca_state,
  ca_zip,
  ca_country,
  ca_gmt_offset,
  cd_gender,
  cd_marital_status,
  cd_education_status
from customer c, customer_address ca, customer_demographics cd
where
c.c_current_addr_sk=ca.ca_address_sk
and c.c_current_cdemo_sk=cd.cd_demo_sk;
|
|
|
Load data into the producer Amazon Redshift cluster
|
copy customer_address from 's3://redshift-downloads/TPC-DS/2.13/3TB/customer_address/' iam_role default gzip delimiter '|' EMPTYASNULL region 'us-east-1';

copy customer_demographics from 's3://redshift-downloads/TPC-DS/2.13/3TB/customer_demographics/' iam_role default gzip delimiter '|' EMPTYASNULL region 'us-east-1';

copy customer from 's3://redshift-downloads/TPC-DS/2.13/3TB/customer/' iam_role default gzip delimiter '|' EMPTYASNULL region 'us-east-1';
|
| Say | Do | Show | |
Sign in to the Central Governance account.
|
|
|
|
Set up Lake Formation permissions
|
- Sign in to the Lake Formation console as admin.
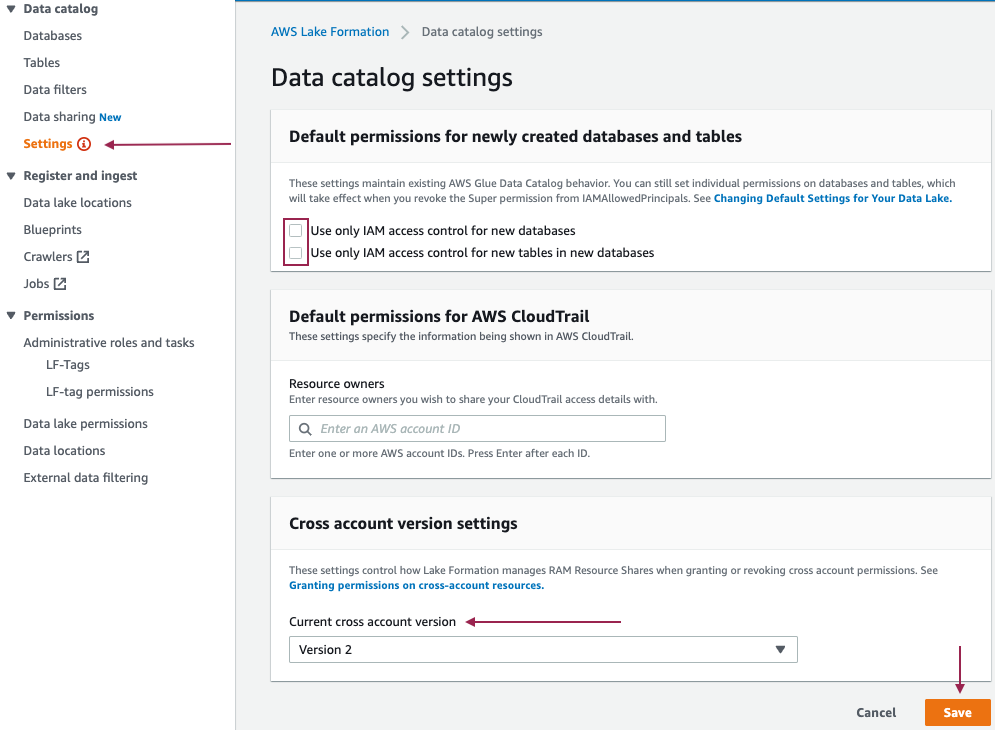
- In the navigation pane, under Data catalog, choose Settings.
- Deselect Use only IAM access control for new databases.
- Deselect Use only IAM access control for new tables in new databases.
- Choose Version 2 for Cross account version settings.
- Choose Save.
|
|
|
Set up an IAM user as a data lake administrator:
If you’re using an existing data lake administrator user or role, add managed policies
|
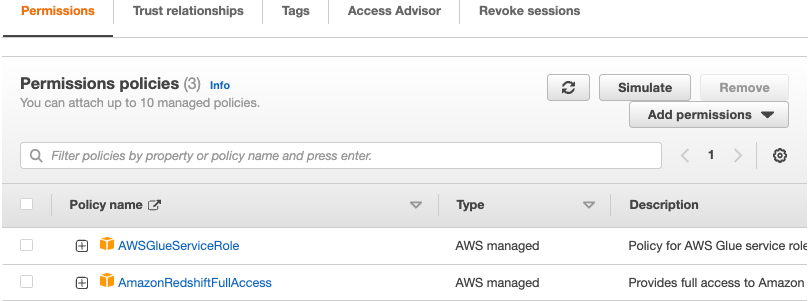
Add the following managed policies
AWSGlueServiceRole
AmazonRedshiftFullAccess
|
|
|
If you’re not using an existing data lake administrator user or role, set up an IAM user as a data lake administrator
|
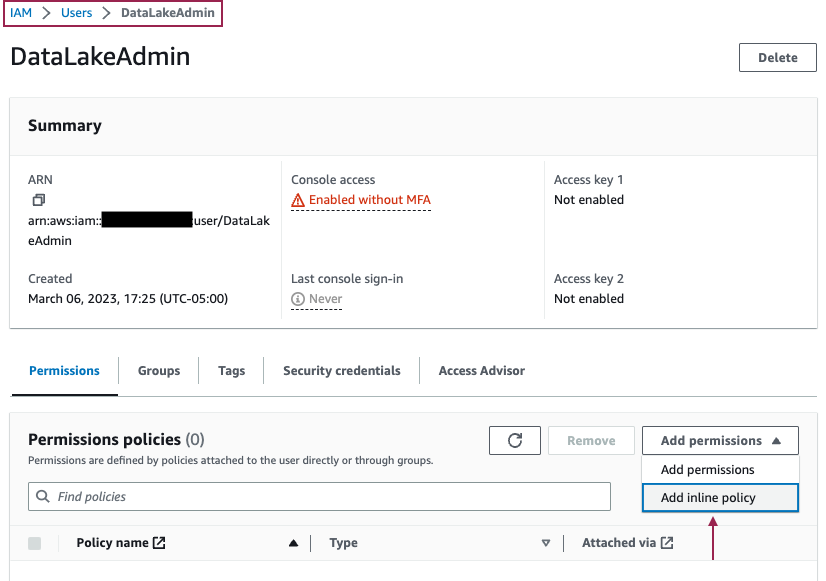
Complete the following steps to set up an IAM user:
- On the IAM console, choose Users in the navigation pane.
- Select the IAM user who you want to designate as the data lake administrator.
- Choose Add an inline policy on the Permissions tab.
|
|
|
|
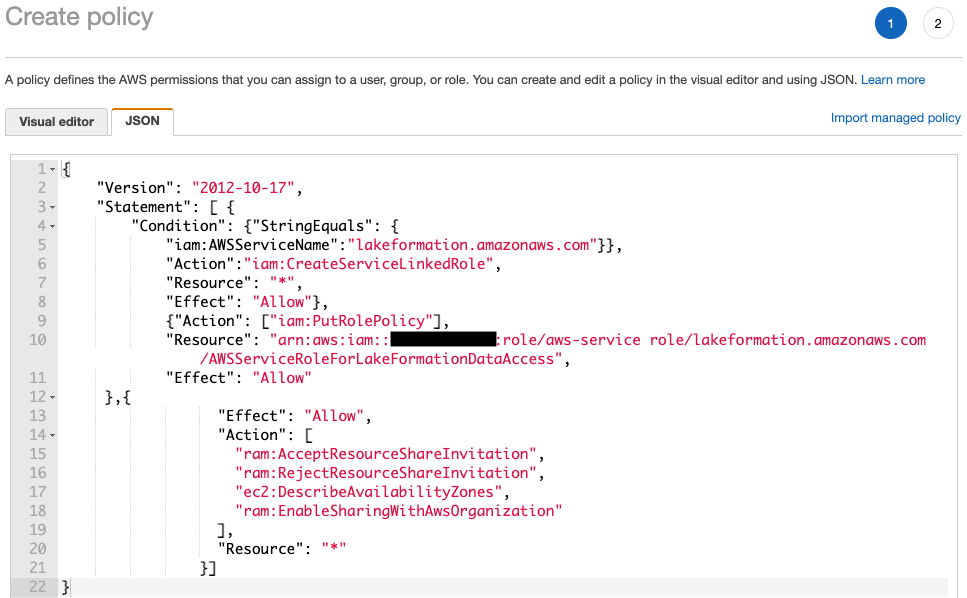
- Replace with your own account ID and add the following policy:
{ "Version": "2012-10-17", "Statement": [ { "Condition": {"StringEquals": { "iam:AWSServiceName":"lakeformation.amazonaws.com"}}, "Action":"iam:CreateServiceLinkedRole", "Resource": "*", "Effect": "Allow"}, {"Action": ["iam:PutRolePolicy"], "Resource": "arn:aws:iam::<AccountID>:role/aws-service role/lakeformation.amazonaws.com/AWSServiceRoleForLakeFormationDataAccess", "Effect": "Allow" },{ "Effect": "Allow", "Action": [ "ram:AcceptResourceShareInvitation", "ram:RejectResourceShareInvitation", "ec2:DescribeAvailabilityZones", "ram:EnableSharingWithAwsOrganization" ], "Resource": "*" }] }
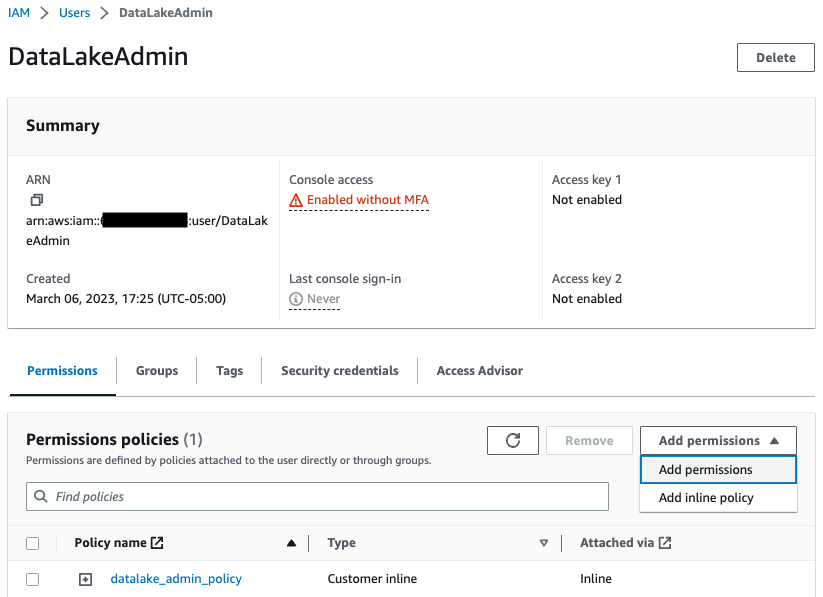
- Provide a policy name.
- Review and save your settings.
|
|
|
|
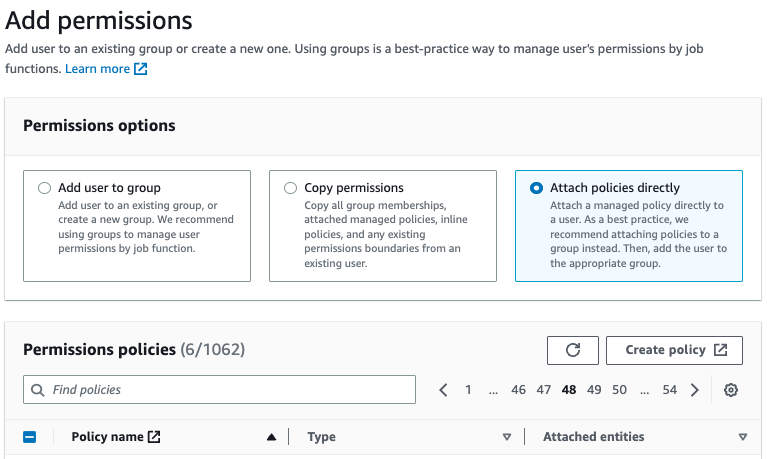
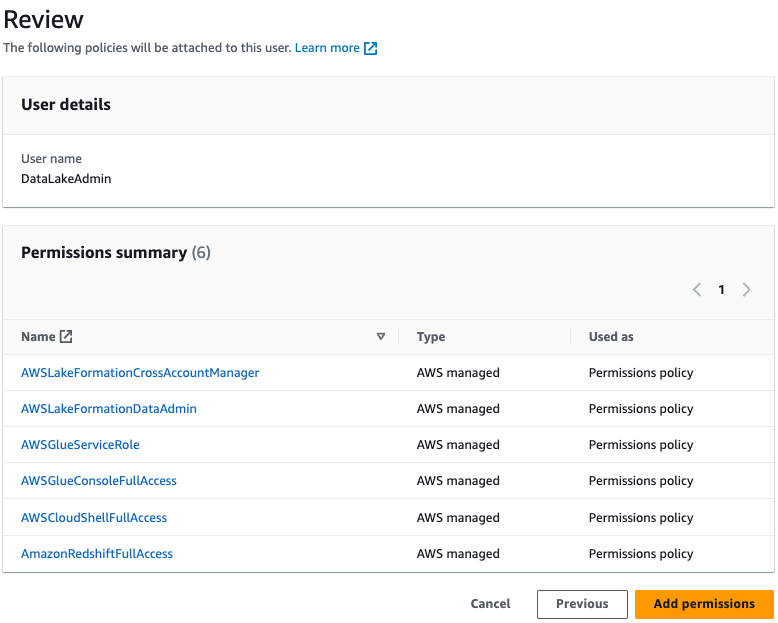
- Choose Add permissions, and choose Attach existing policies directly.
|
|
|
|
- Add the following policies:
AWSLakeFormationCrossAccountManager
AWSGlueConsoleFullAccess
AWSGlueServiceRole
AWSLakeFormationDataAdmin
AWSCloudShellFullAccess
AmazonRedshiftFullAccess
|
|
|
|
- Choose Next: Review and add permissions.
|
|
| Say | Do | Show | |
Sign in to the Data Producer account.
Create a datashare using the console
|
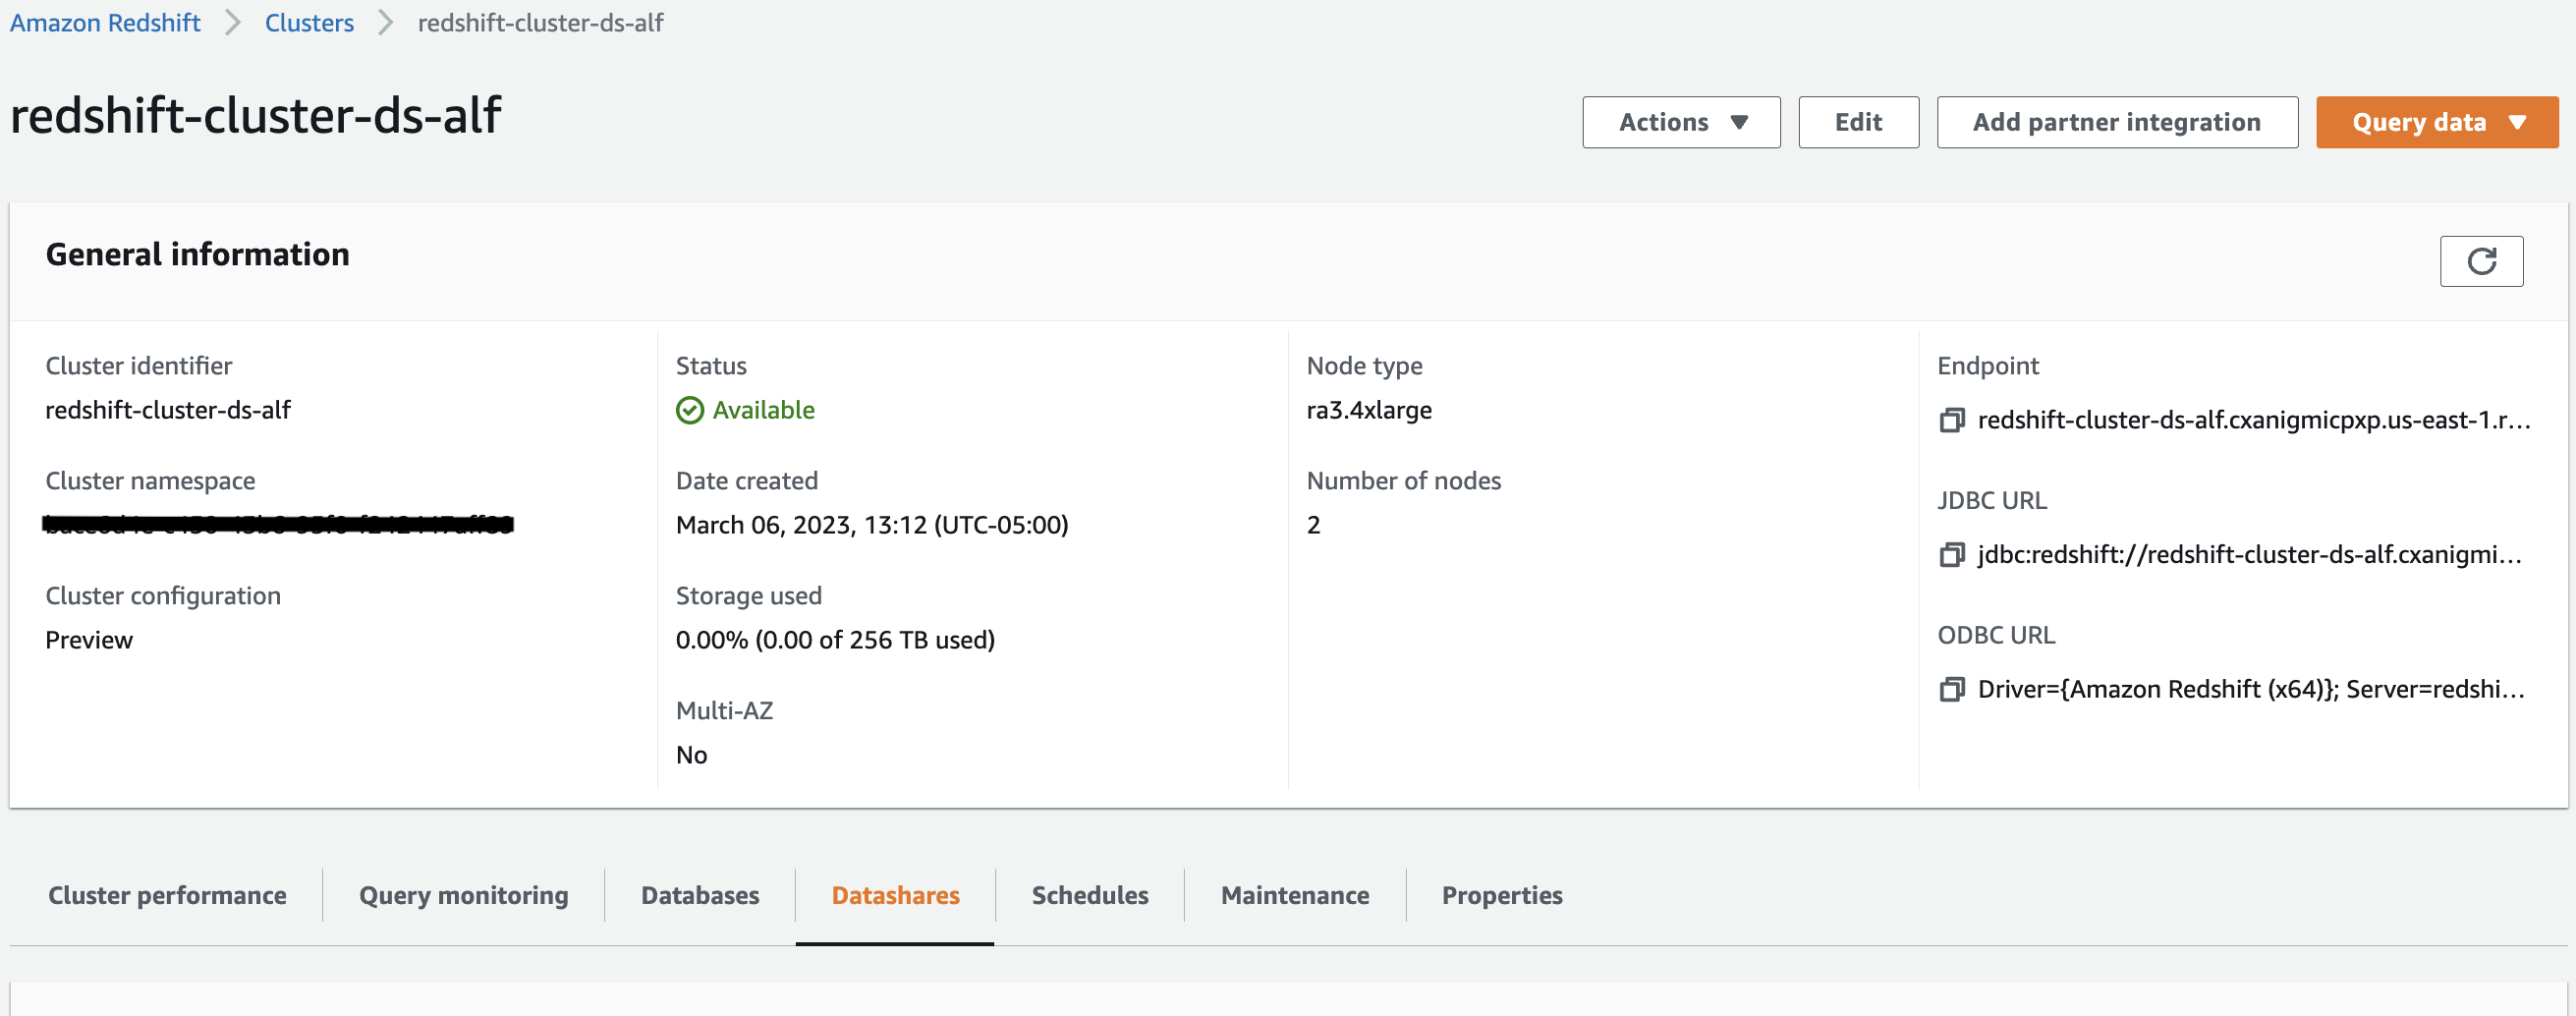
- On the Amazon Redshift console, choose the cluster to create the datashare.
- On the cluster details page, navigate to the Datashares tab.
|
|
|
|
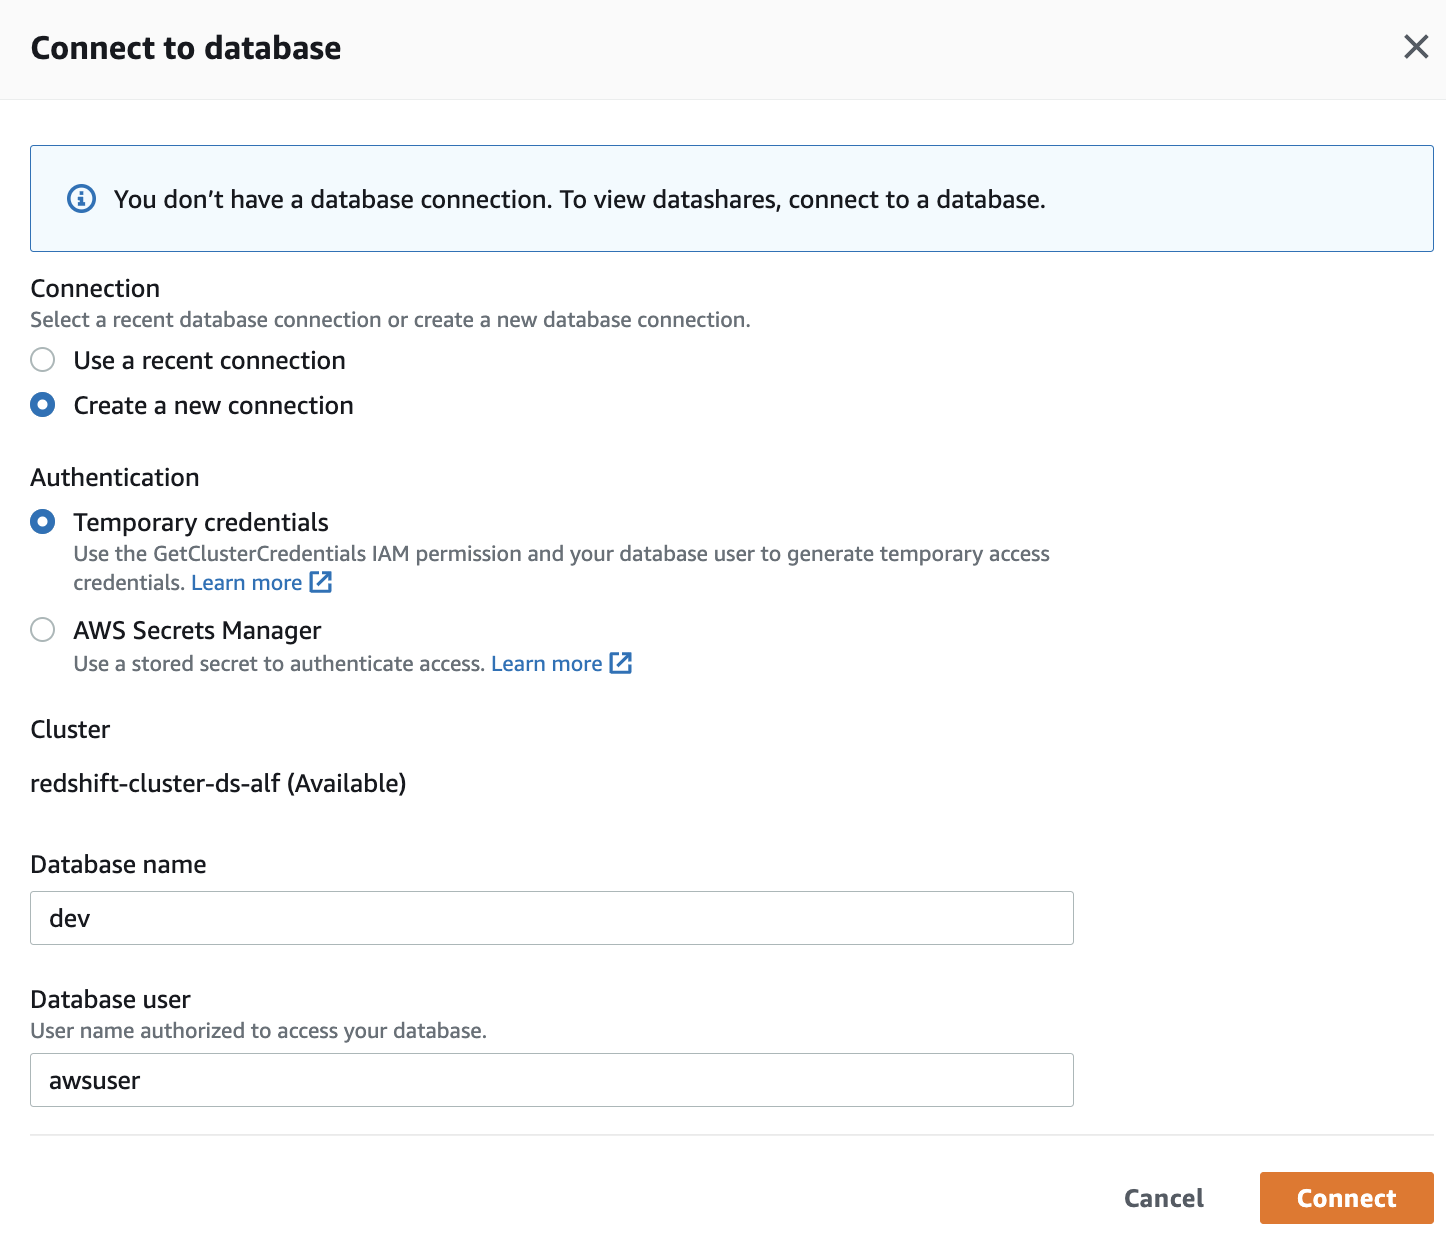
- Under Datashares created in my namespace, choose Connect to database.
|

|
|
|
|
|
|
|
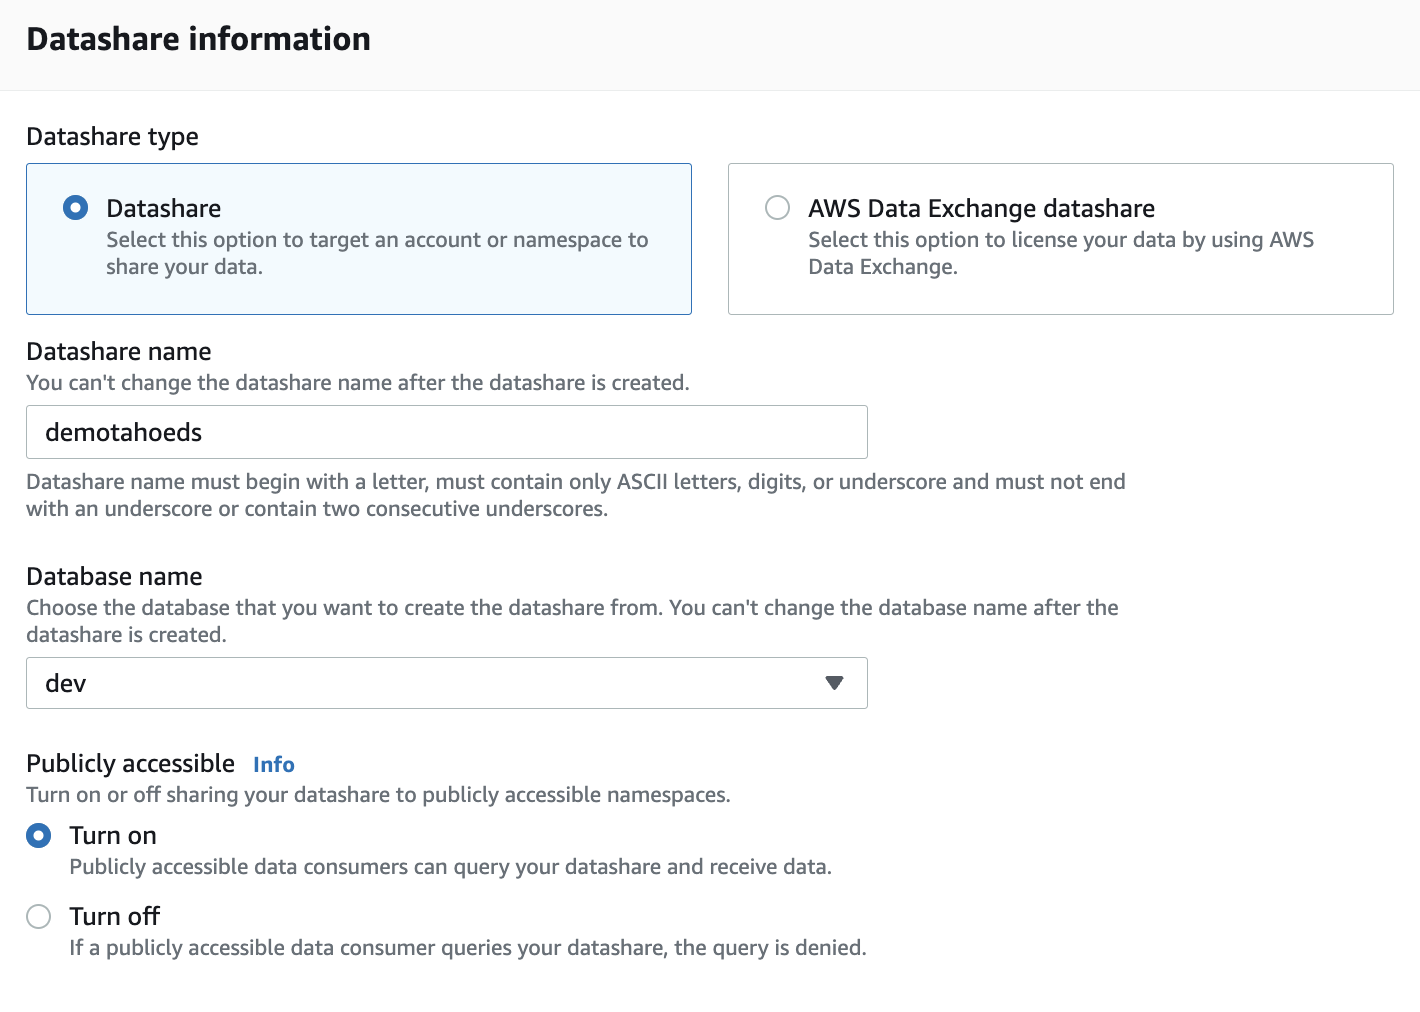
- Choose Create datashare.
|

|
|
|
- For Datashare type, choose Datashare.
- For Datashare name, enter the name (for this post, demotahoeds).
- For Database name, choose the database from where to add datashare objects (for this post, dev).
- For Publicly accessible, choose Turn off (or choose Turn on to share the datashare with clusters that are publicly accessible).
|
|
|
|
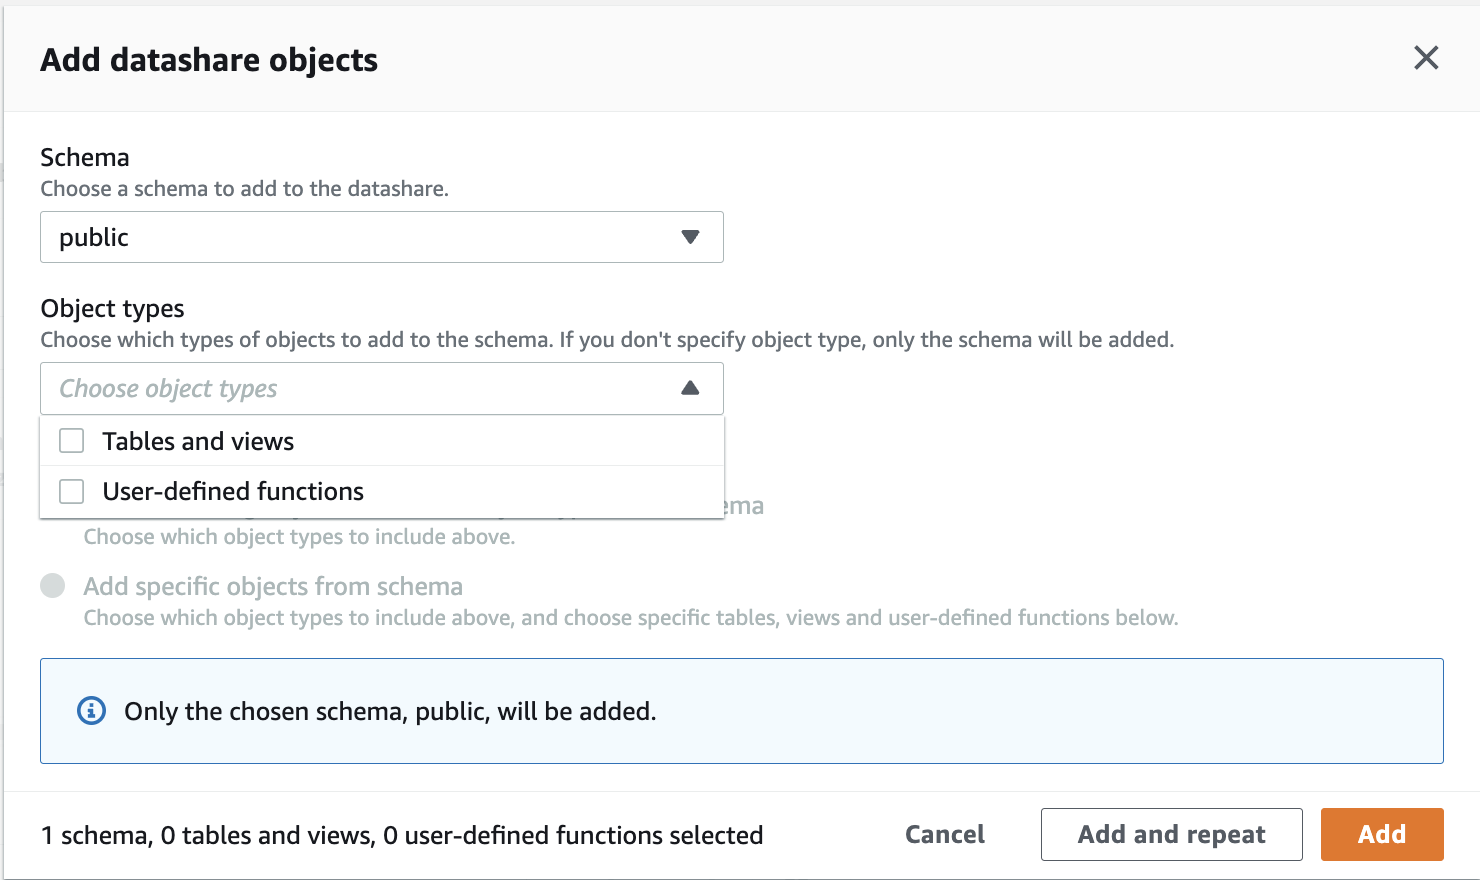
- Under DataShare objects, choose Add to add the schema to the datashare (in this post, the public schema).
Under Tables and views, choose Add to add the tables and views to the datashare (for this post, we add the table customer and view customer_view).
- Under DataShare objects, choose Add to add the schema to the datashare (in this post, the public schema).
Under Tables and views, choose Add to add the tables and views to the datashare (for this post, we add the table customer and view customer_view).
|
|
|
|
- Under Data consumers, choose Publish to AWS Data Catalog.
- For Publish to the following accounts, choose Other AWS accounts.
- Provide the AWS account ID of the consumer account. For this post, we provide the AWS account ID of the Lake Formation central governance account.
- To share within the same account, choose Local account.
- Choose Create datashare.
- After the datashare is created, you can verify by going back to the Datashares tab and entering the datashare name in the search bar under Datashares created in my namespace.
- Choose the datashare name to view its details.
|

|
|
Authorize the datashare access to the consumer account data catalog
|
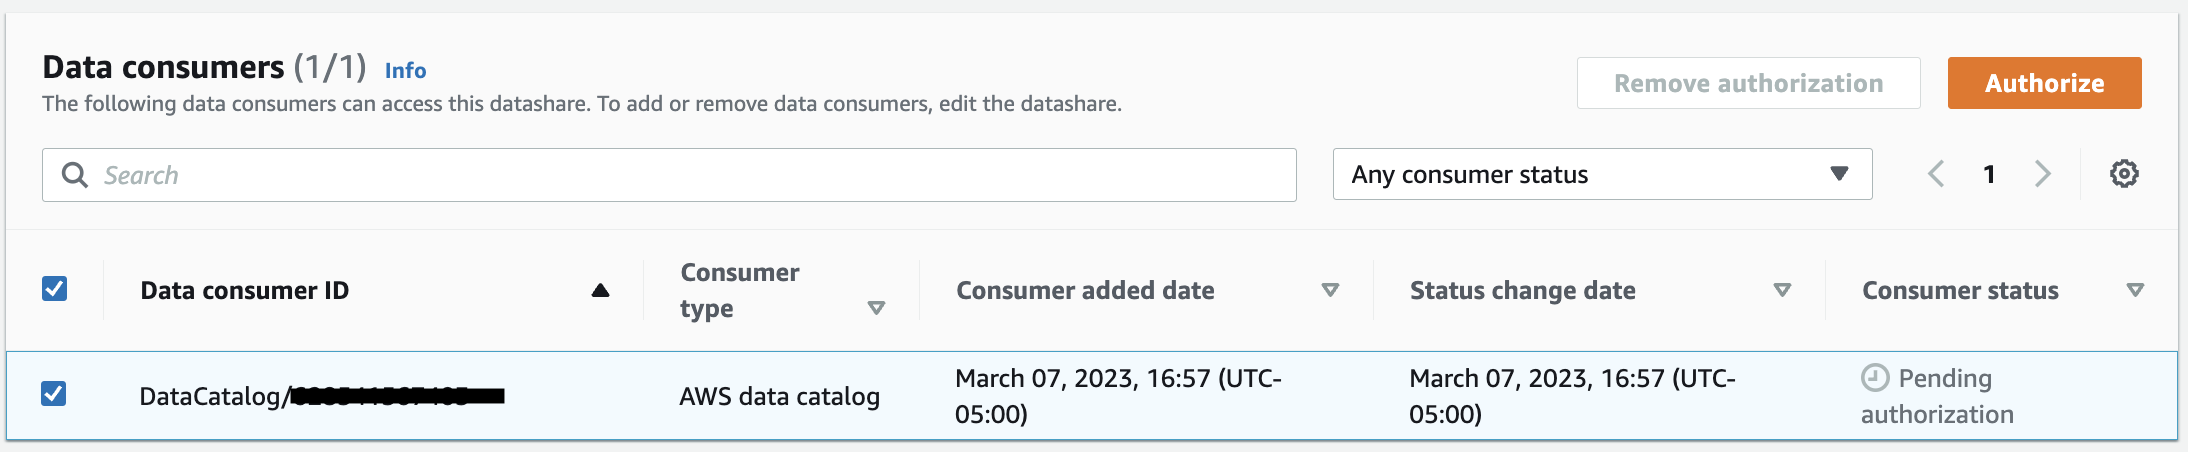
- Under Data consumers, you will see the consumer status of the consumer data catalog account as Pending Authorization.
- Choose the checkbox against the consumer data catalog which will enable the Authorize option.
- Click Authorize to authorize the datashare access to the consumer account data catalog, consumer status will change to Authorized.
|
|
| Say | Do | Show | |
Sign in to the Central Governance account. The data lake admin accepts and registers the datashare with Lake Formation in the central governance account
|
- Sign in to the console as the data lake administrator IAM user or role.
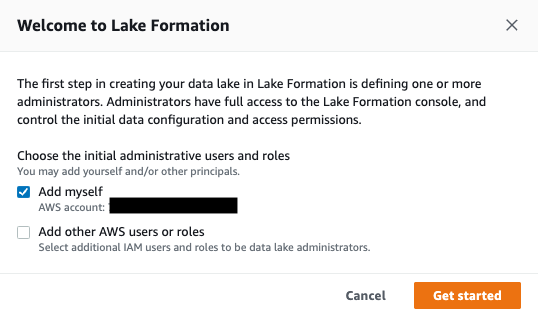
- If this is your first time logging in to the Lake Formation console, select Add myself and choose Get started.
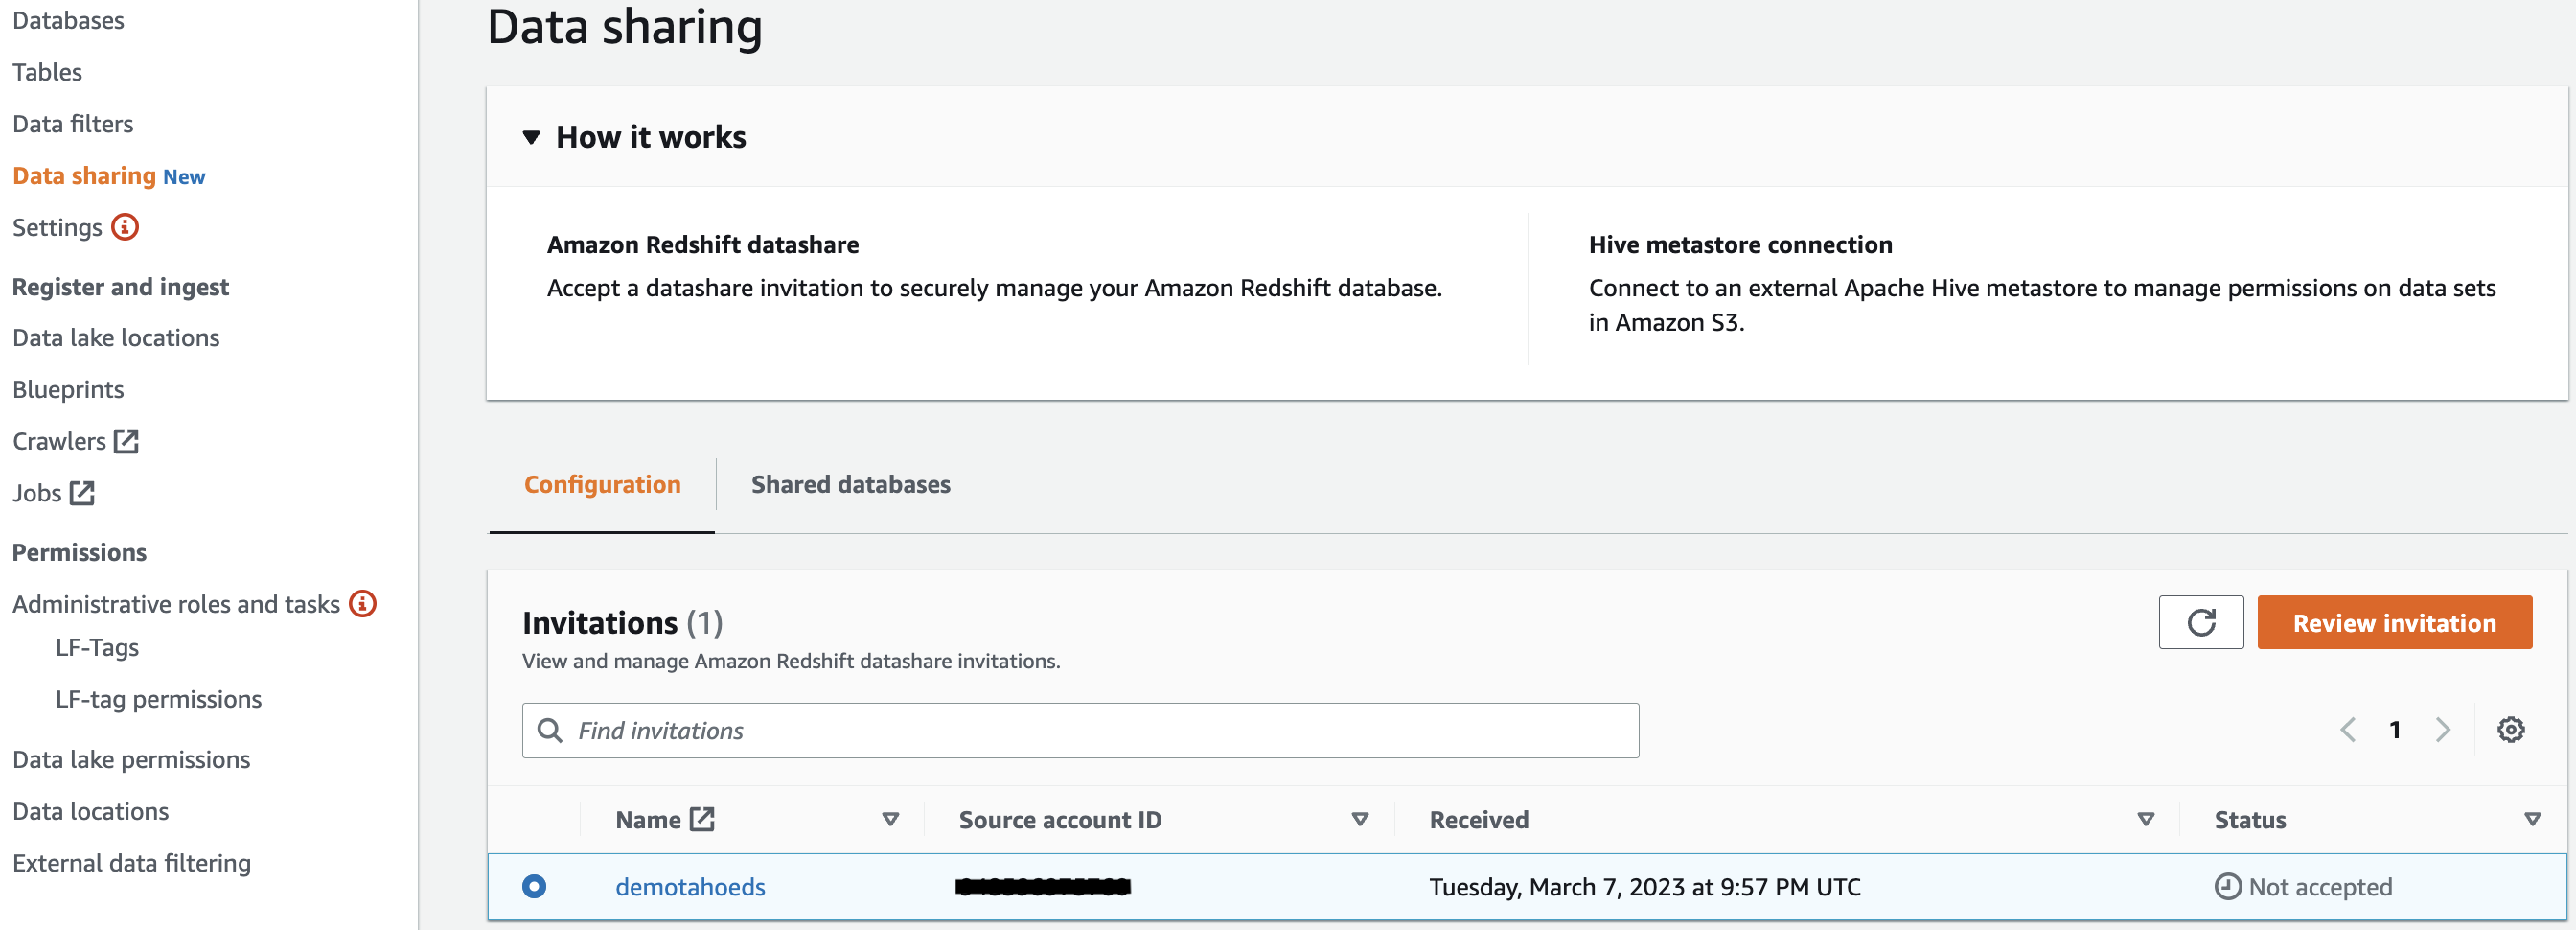
- Under Data catalog in the navigation pane, choose Data sharing and view the Amazon Redshift datashare invitations on the Configuration tab.
|
|
|
|
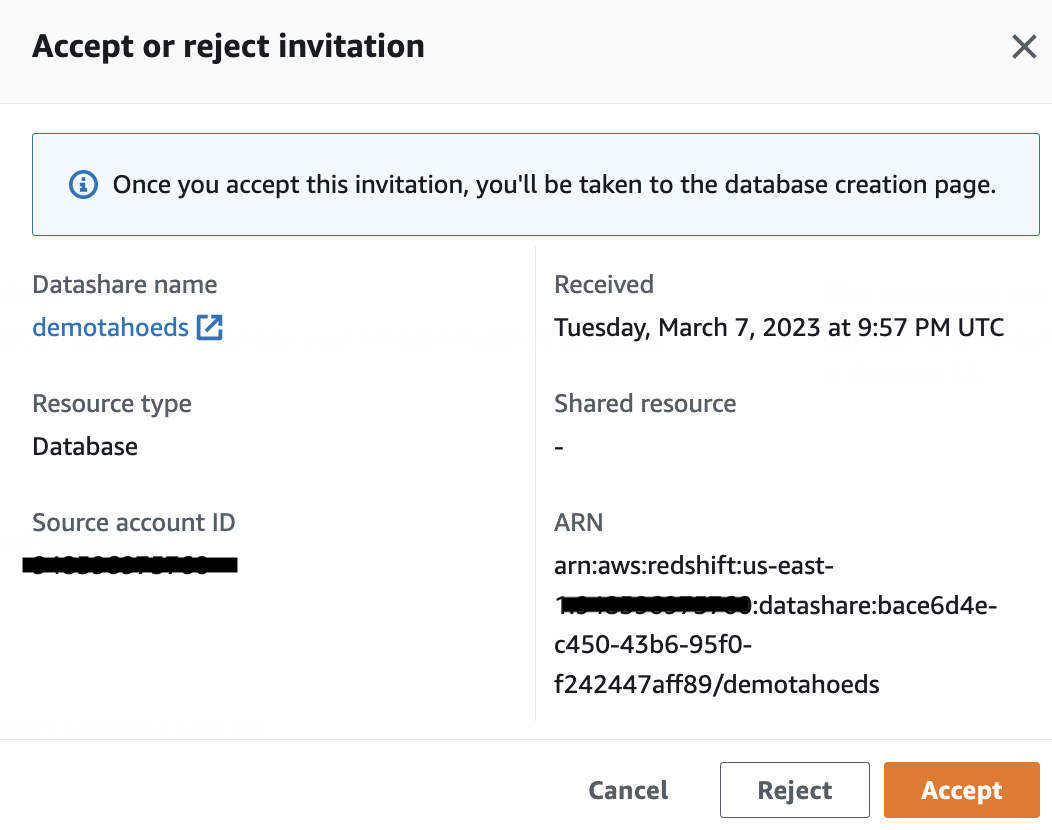
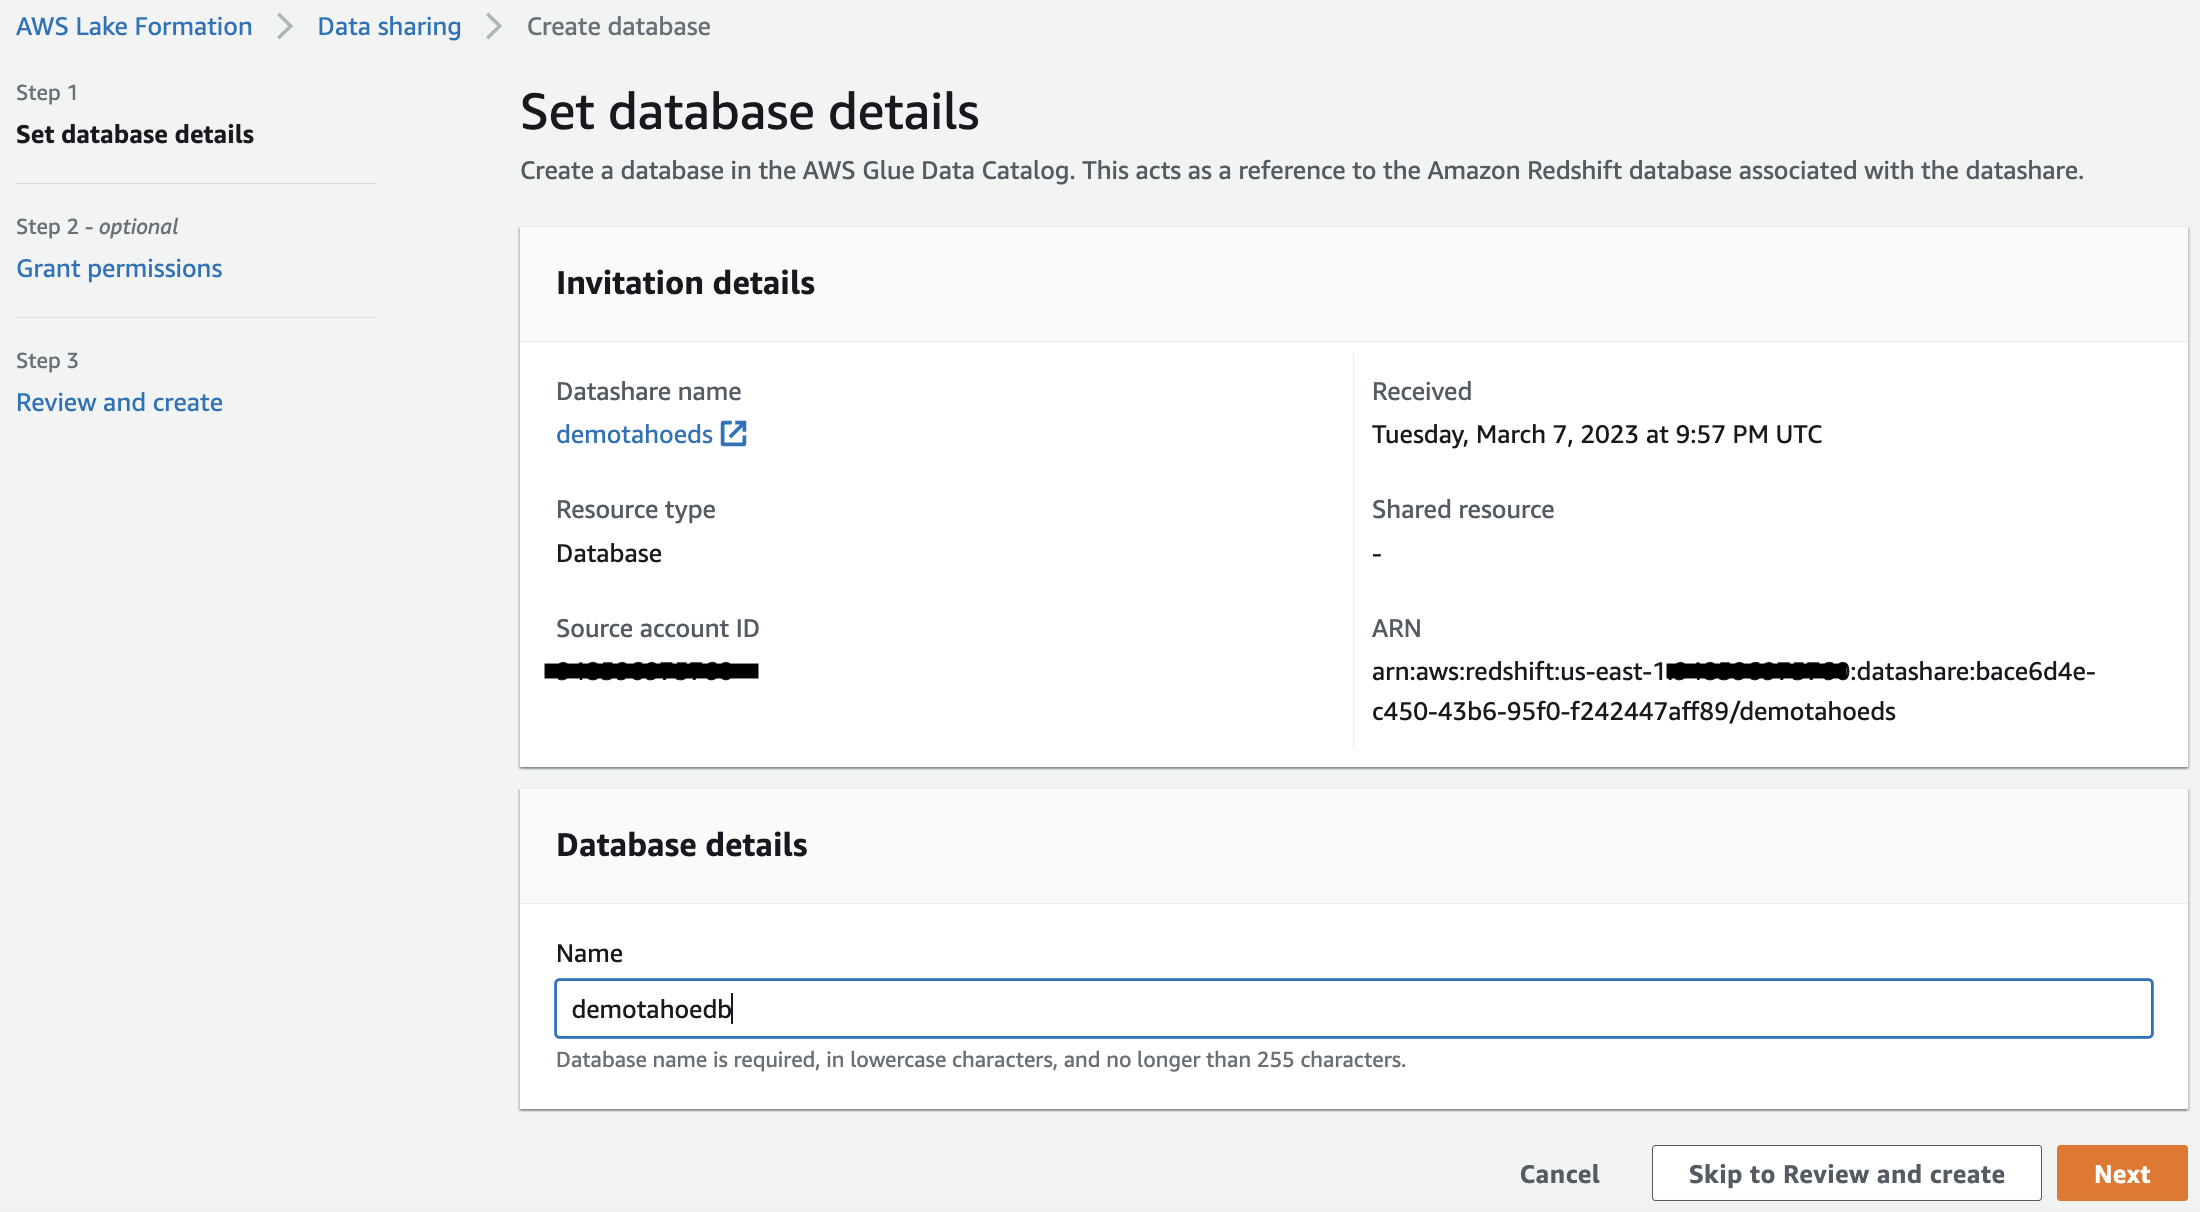
- Select the datashare and choose Review Invitation. A window pops up with the details of the invitation.
- Choose Accept to register the Amazon Redshift datashare to the AWS Glue Data Catalog.
|
|
|
|
- Provide a name for the AWS Glue database and choose Skip to Review and create.
|
|
|
|
- Review the content and choose Create database.
|

|
|
|
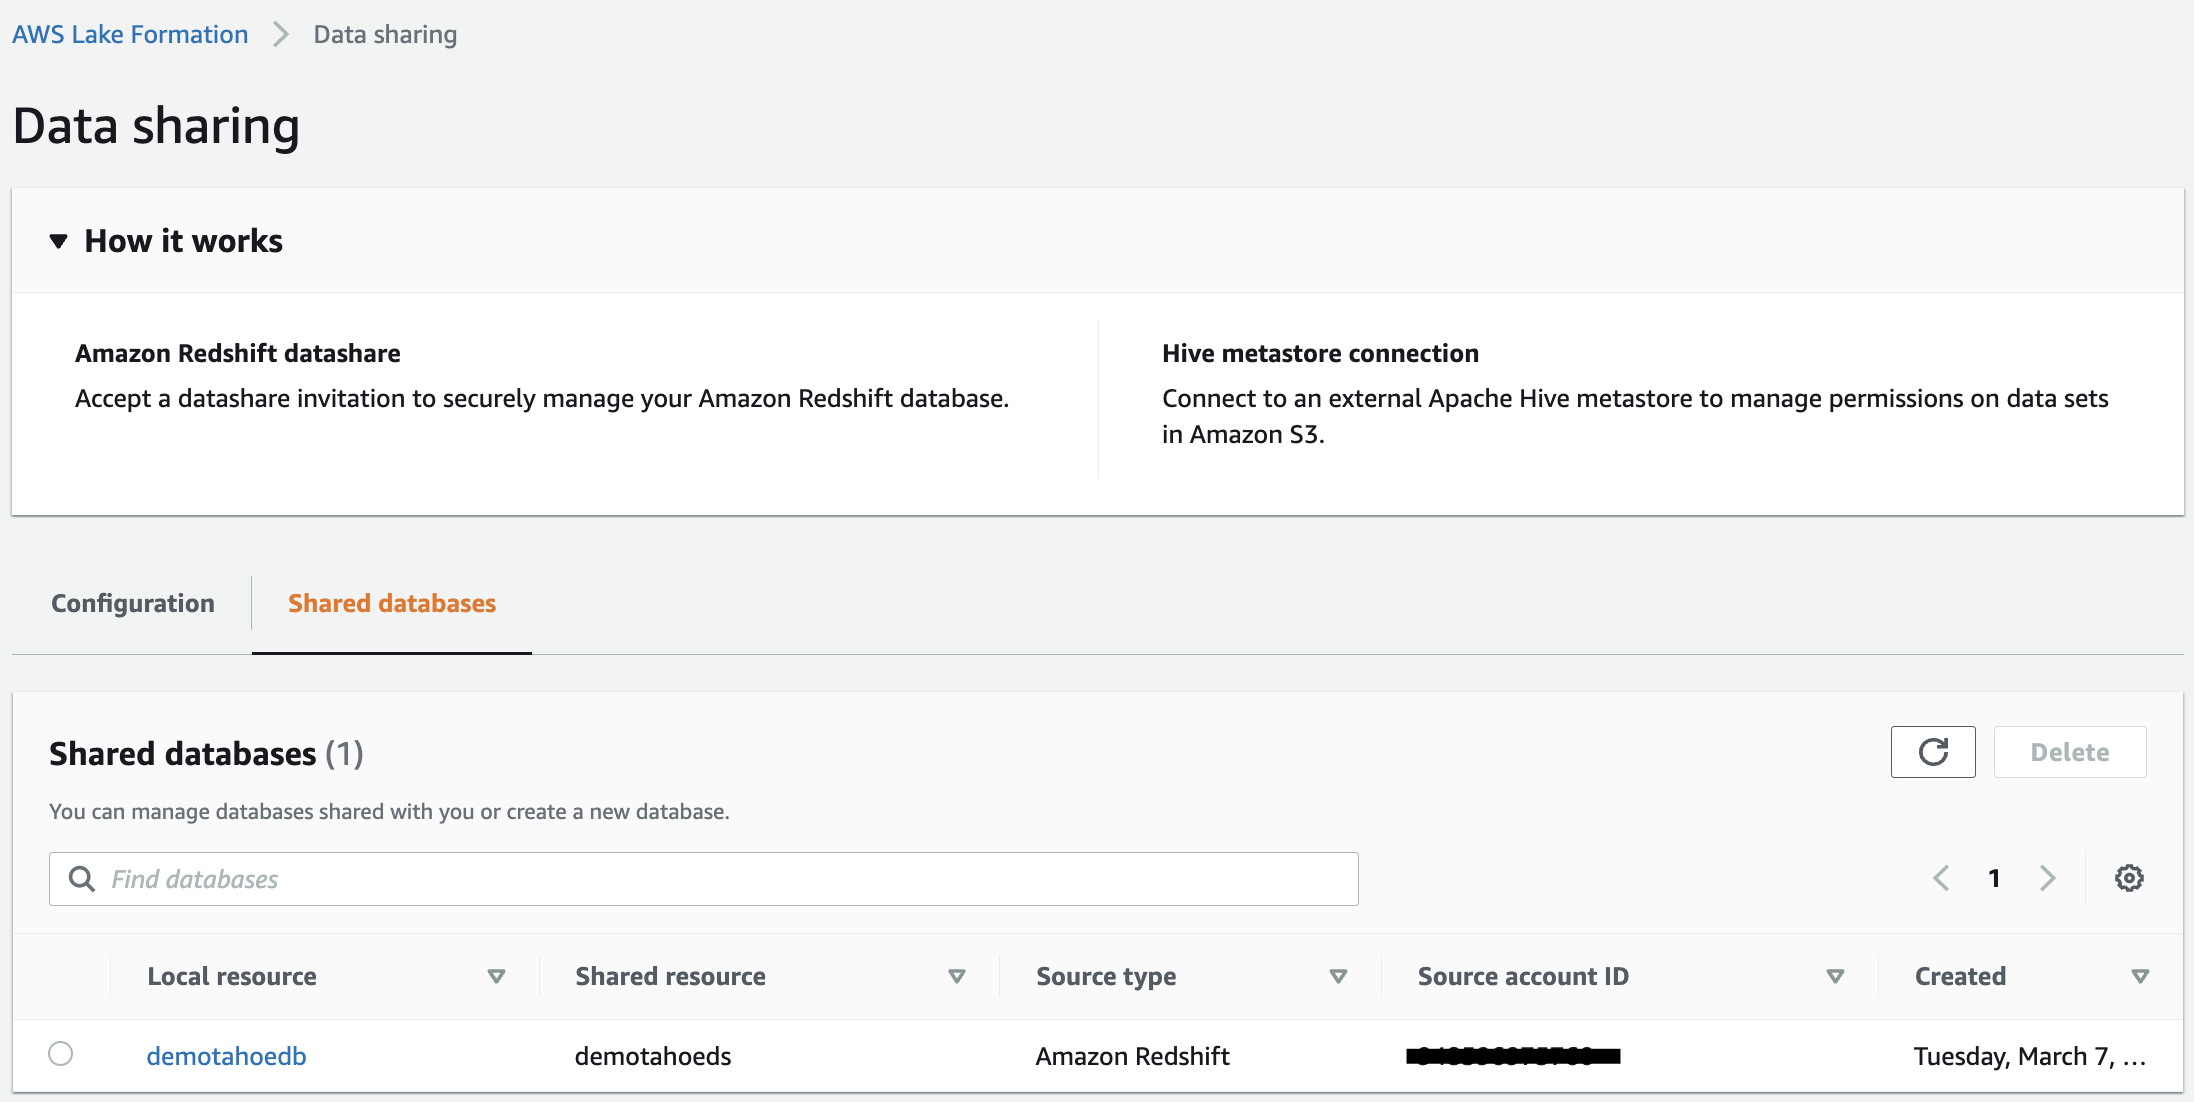
- After the AWS Glue database is created on the Amazon Redshift datashare, you can view them under Shared Databases.
|
|
|
You can also use the AWS CLI to register the datashare and create the database
|
-
Describe the Amazon Redshift datashare that is shared with the central account:
aws redshift describe-data-shares
-
Accept and associate the Amazon Redshift datashare to Data Catalog:
aws redshift associate-data-share-consumer \ --data-share-arn 'arn:aws:redshift:<producer-region>:<producer-aws-account-id>:datashare:<producer-cluster-namespace>/demotahoeds' \ --consumer-arn arn:aws:glue:us-east-1:<central-aws-account-id>:catalog
-
Register the Amazon Redshift datashare in Lake Formation:
aws lakeformation register-resource \ --resource-arn arn:aws:redshift:<producer-region>:<producer-aws-account-id>:datashare:<producer-cluster-namespace>/demotahoeds
-
Create the AWS Glue database that points to the accepted Amazon Redshift datashare:
aws glue create-database --region <central-catalog-region> --cli-input-json '{ "CatalogId": "<central-aws-account-id>", "DatabaseInput": { "Name": "demotahoedb", "FederatedDatabase": { "Identifier": "arn:aws:redshift:<producer-region>:<producer-aws-account-id>:datashare:<producer-cluster-namespace>/demotahoeds", "ConnectionName": "aws:redshift" } } }'
|
|
|
Grant datashare access to the data consumer
|
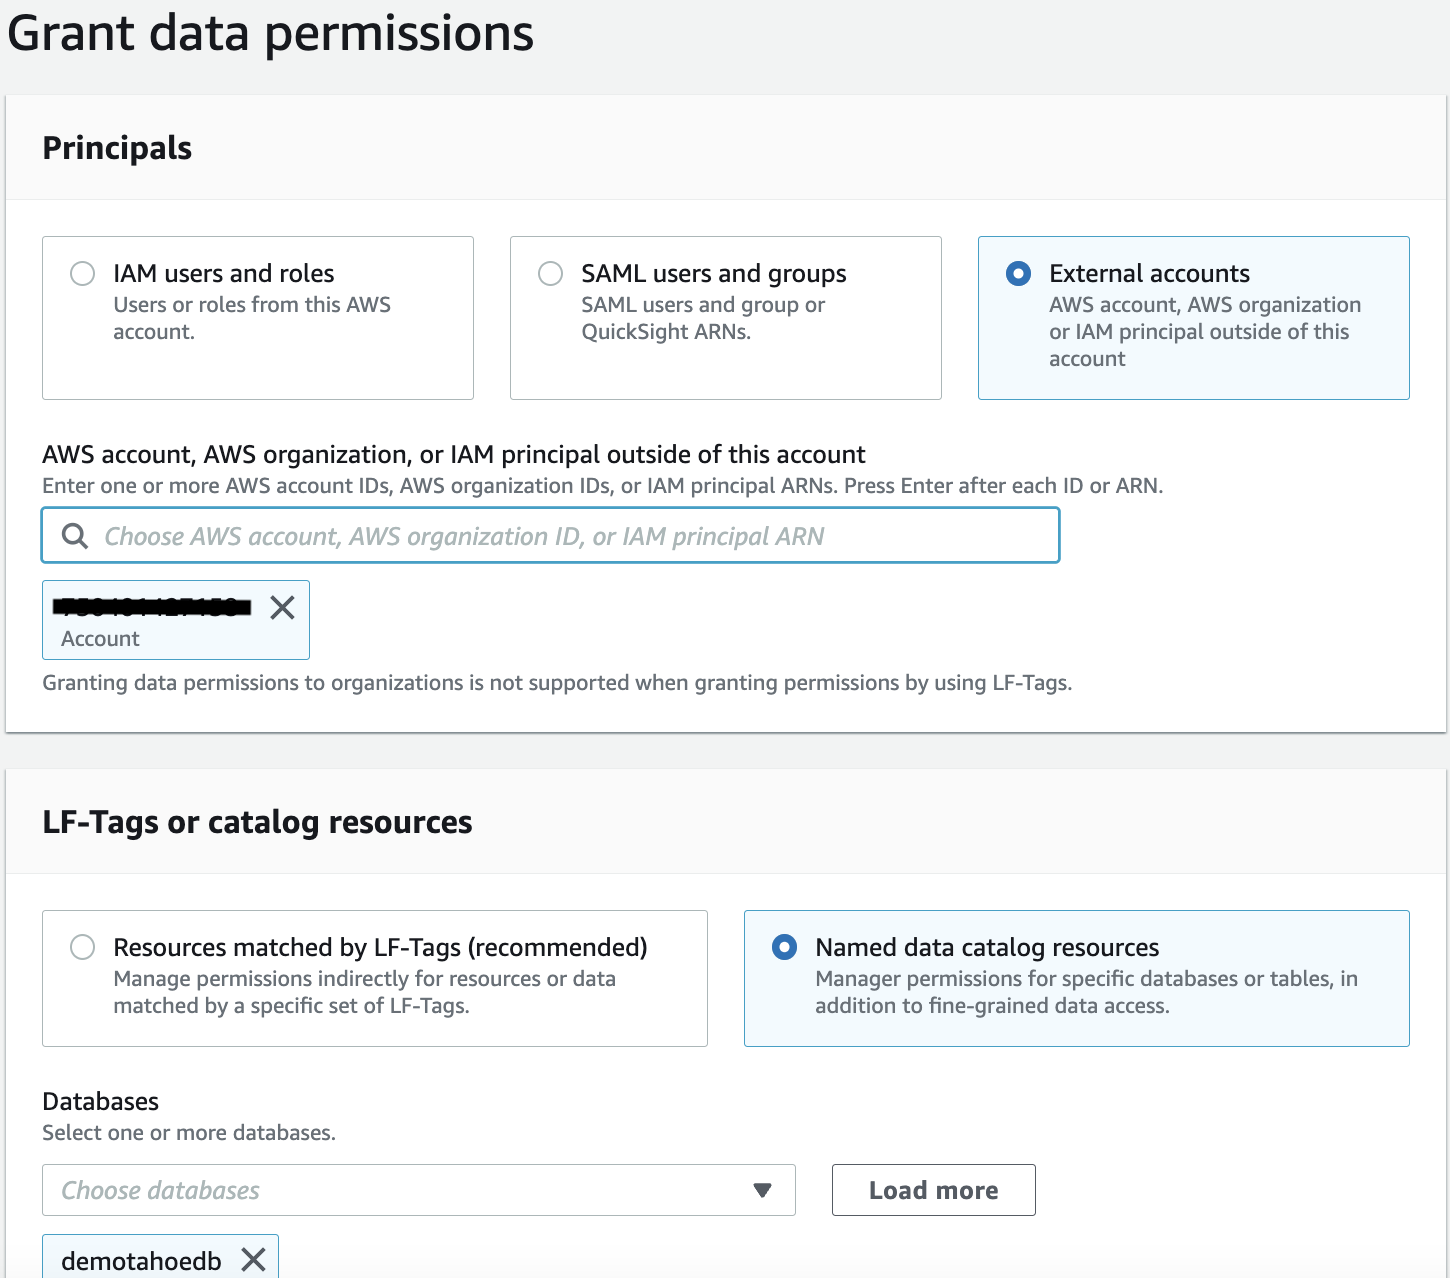
Now the data lake administrator of the central governance account can view and share access on both the database and tables to the data consumer account using the Lake Formation cross-account sharing feature.
- On the Lake Formation console, under Permissions in the navigation pane, choose Data Lake permissions.
- Choose Grant.
- Under Principals, select External accounts.
- Provide the data consumer account ID (for this post, 665544332211).
- Under LF_Tags or catalog resources, select Named data catalog resources.
- For Databases, choose the database demotahoedb.
- Select Describe for both Database permissions and Grantable permissions.
- Choose Grant to apply the permissions.
|
|
|
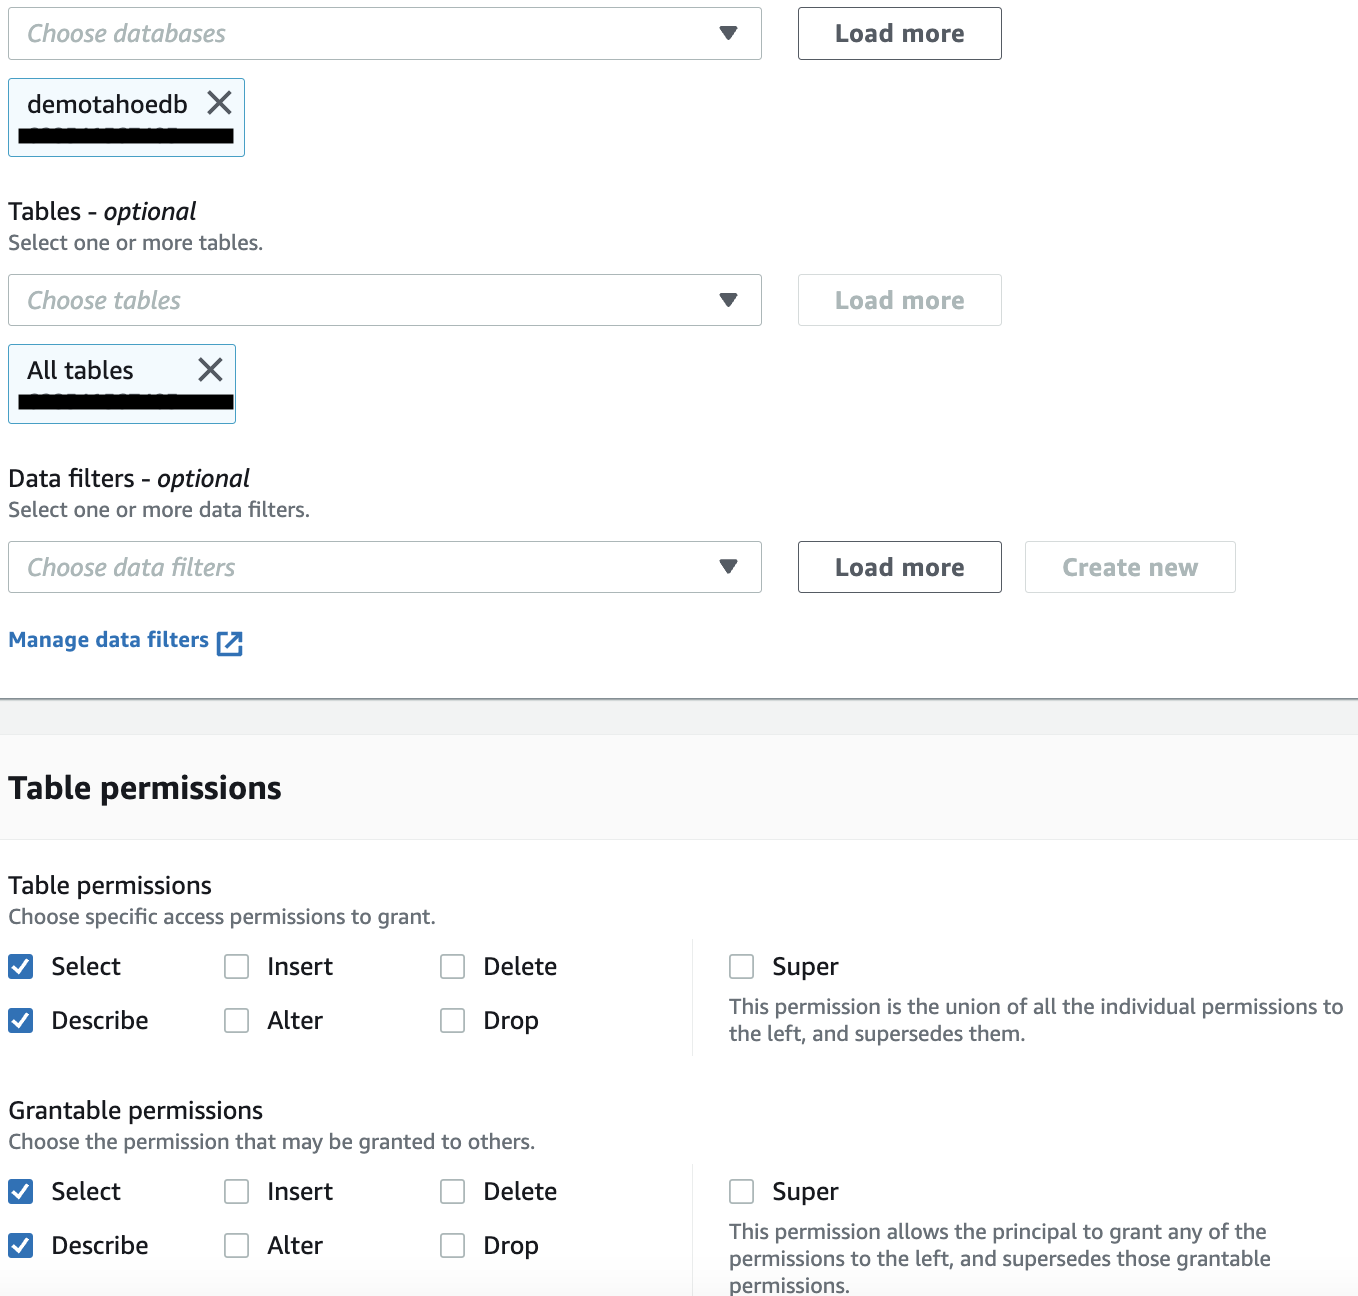
Grant the data consumer account permissions on tables
|
- On the Lake Formation console, under Permissions in the navigation pane, choose Data Lake permissions.
- Choose Grant.
- Under Principals, select External accounts.
- Provide the consumer account (for this post, we use 665544332211).
- Under LF-Tags or catalog resources, select Named data catalog resources.
- For Databases, choose the database demotahoedb.
- For Tables, choose All tables.
- Select Describe and Select for both Table permissions and Grantable permissions.
- Choose Grant to apply the changes.
|
|
| Say | Do | Show | |
Sign in to the Data Consumer account and accept the resources shared with the consumer account from the central governance account.
|
- Sign in to the console as the data lake administrator IAM user or role.
- If this is your first time logging in to the Lake Formation console, select Add myself and choose Get started.
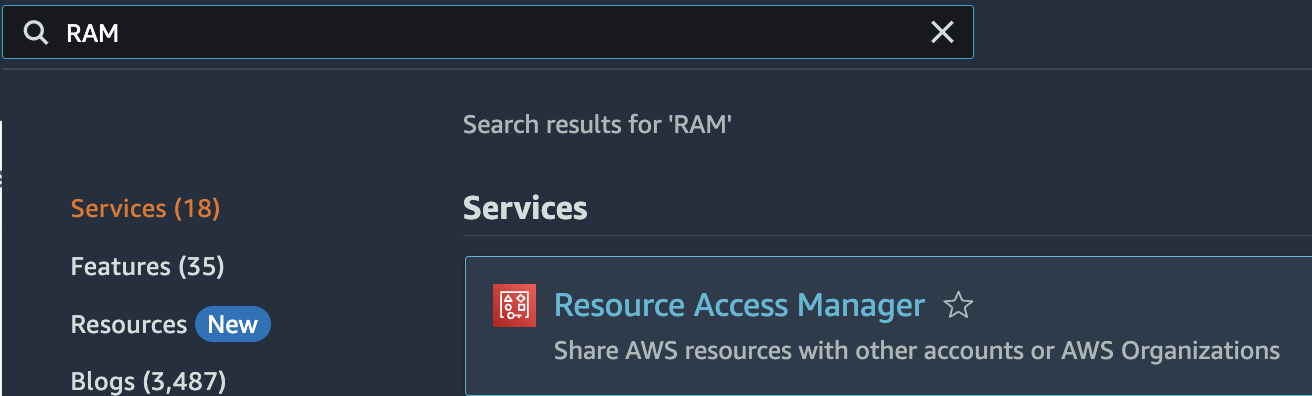
- Sign in to the AWS RAM console.
|
|
|
|
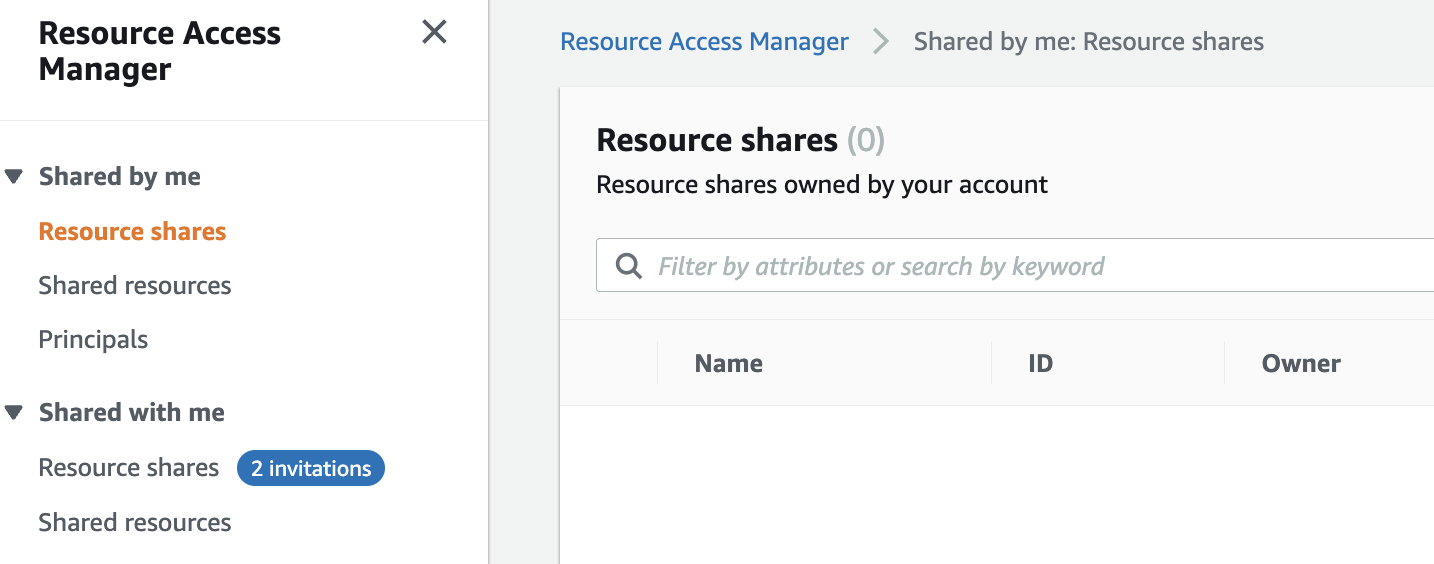
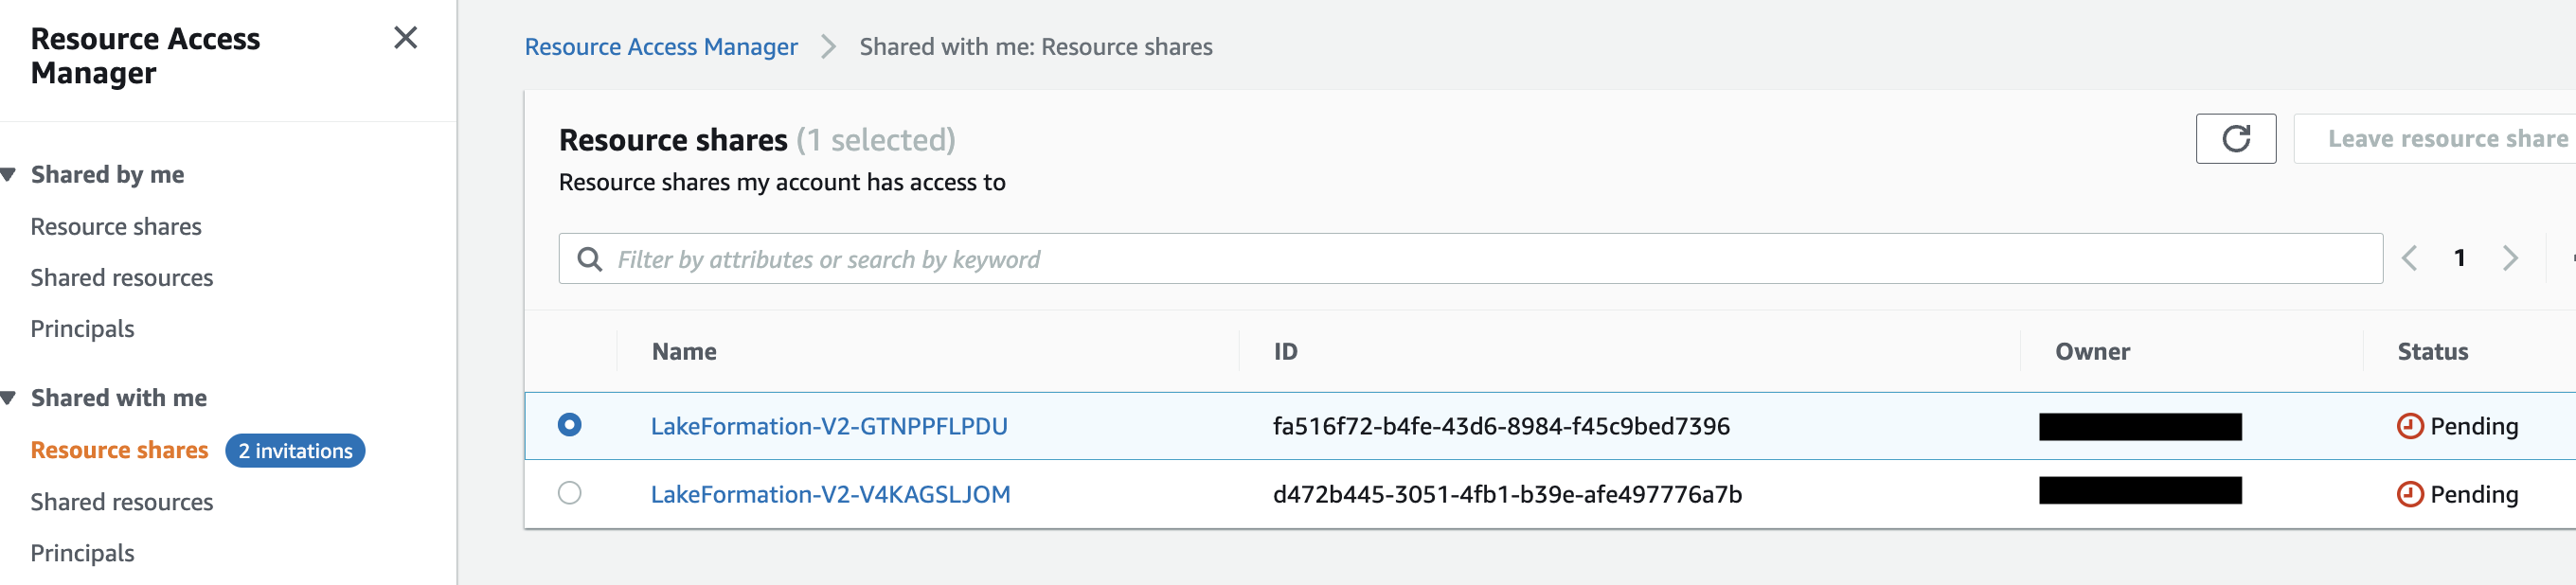
- In the navigation pane, under Shared with me, choose Resource shares to view the pending invitations. You will receive 2 invitations.
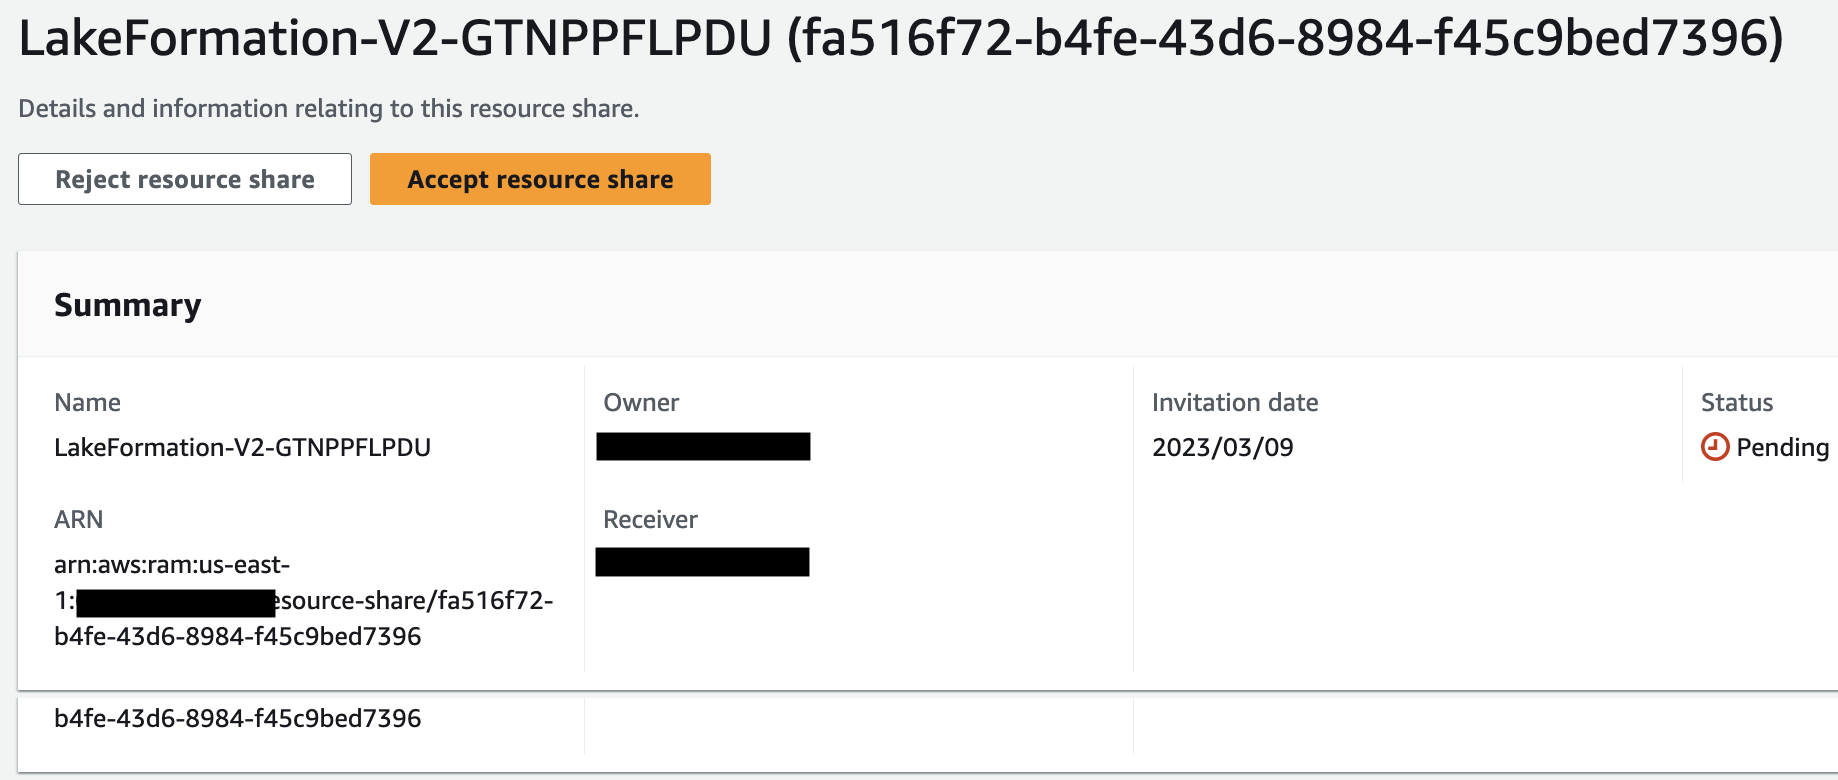
- Choose the pending invitations and accept the resource share.
- On the Lake formation console, under Data catalog in the navigation pane, choose Databases to view the cross-account shared database.
|
|
|
Grant access to the data analyst and IAM users using Lake Formation
Now the data lake admin in the data consumer account can delegate permissions on the shared database and tables to consumer1 and consumer2 users in the consumer account.
|
Grant database permissions to consumer1 and consumer2:
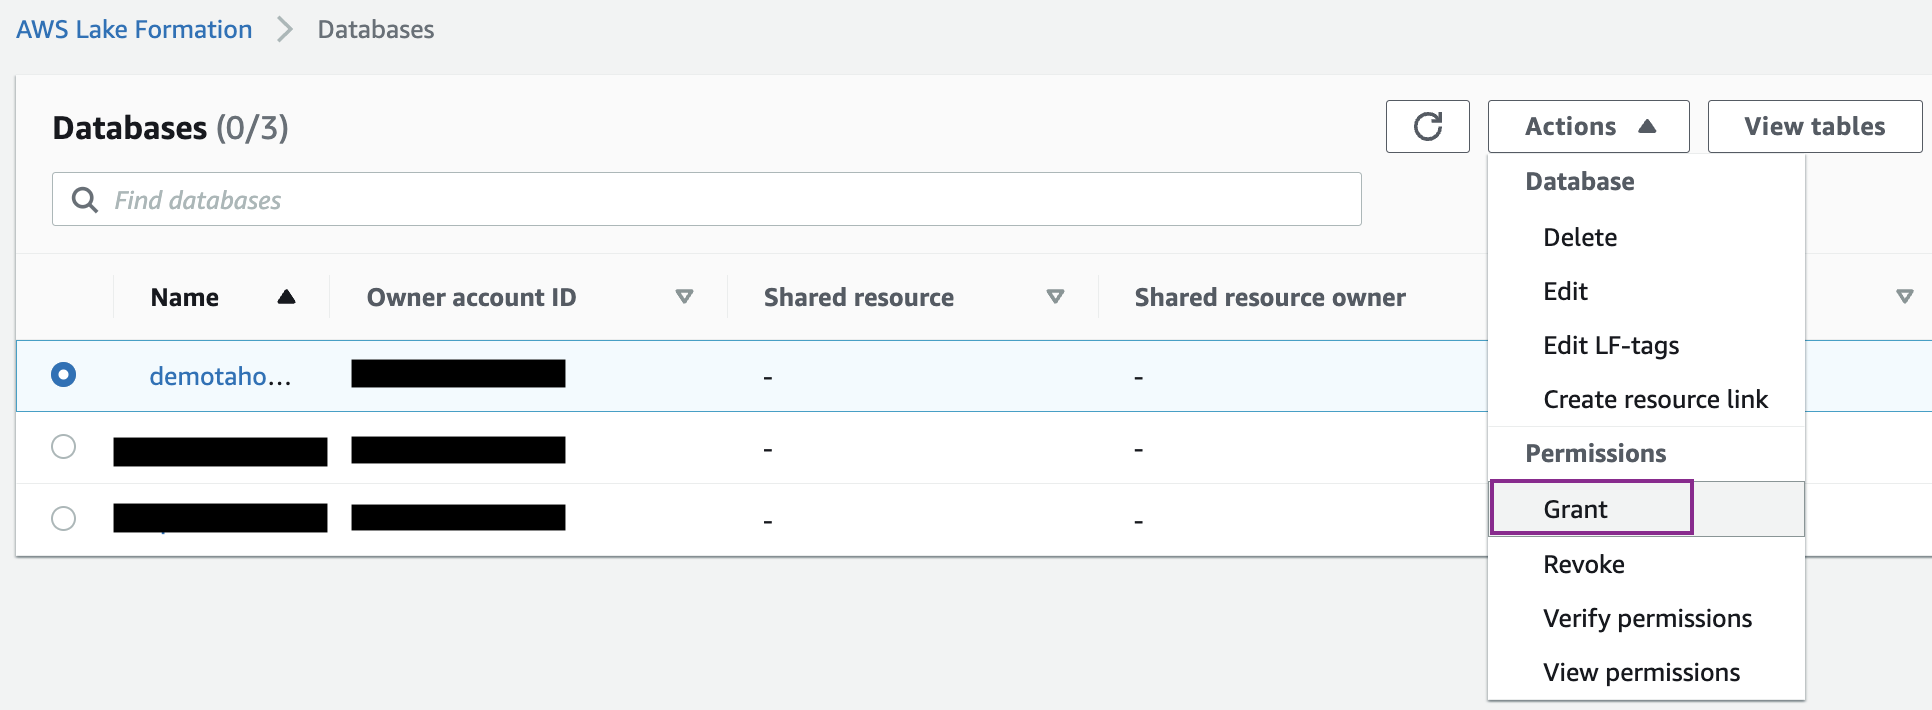
- On the Lake Formation console, under Data catalog in the navigation pane, choose Databases.
- Select the database demotahoedb and on the Actions menu, choose Grant.
|
|
|
|
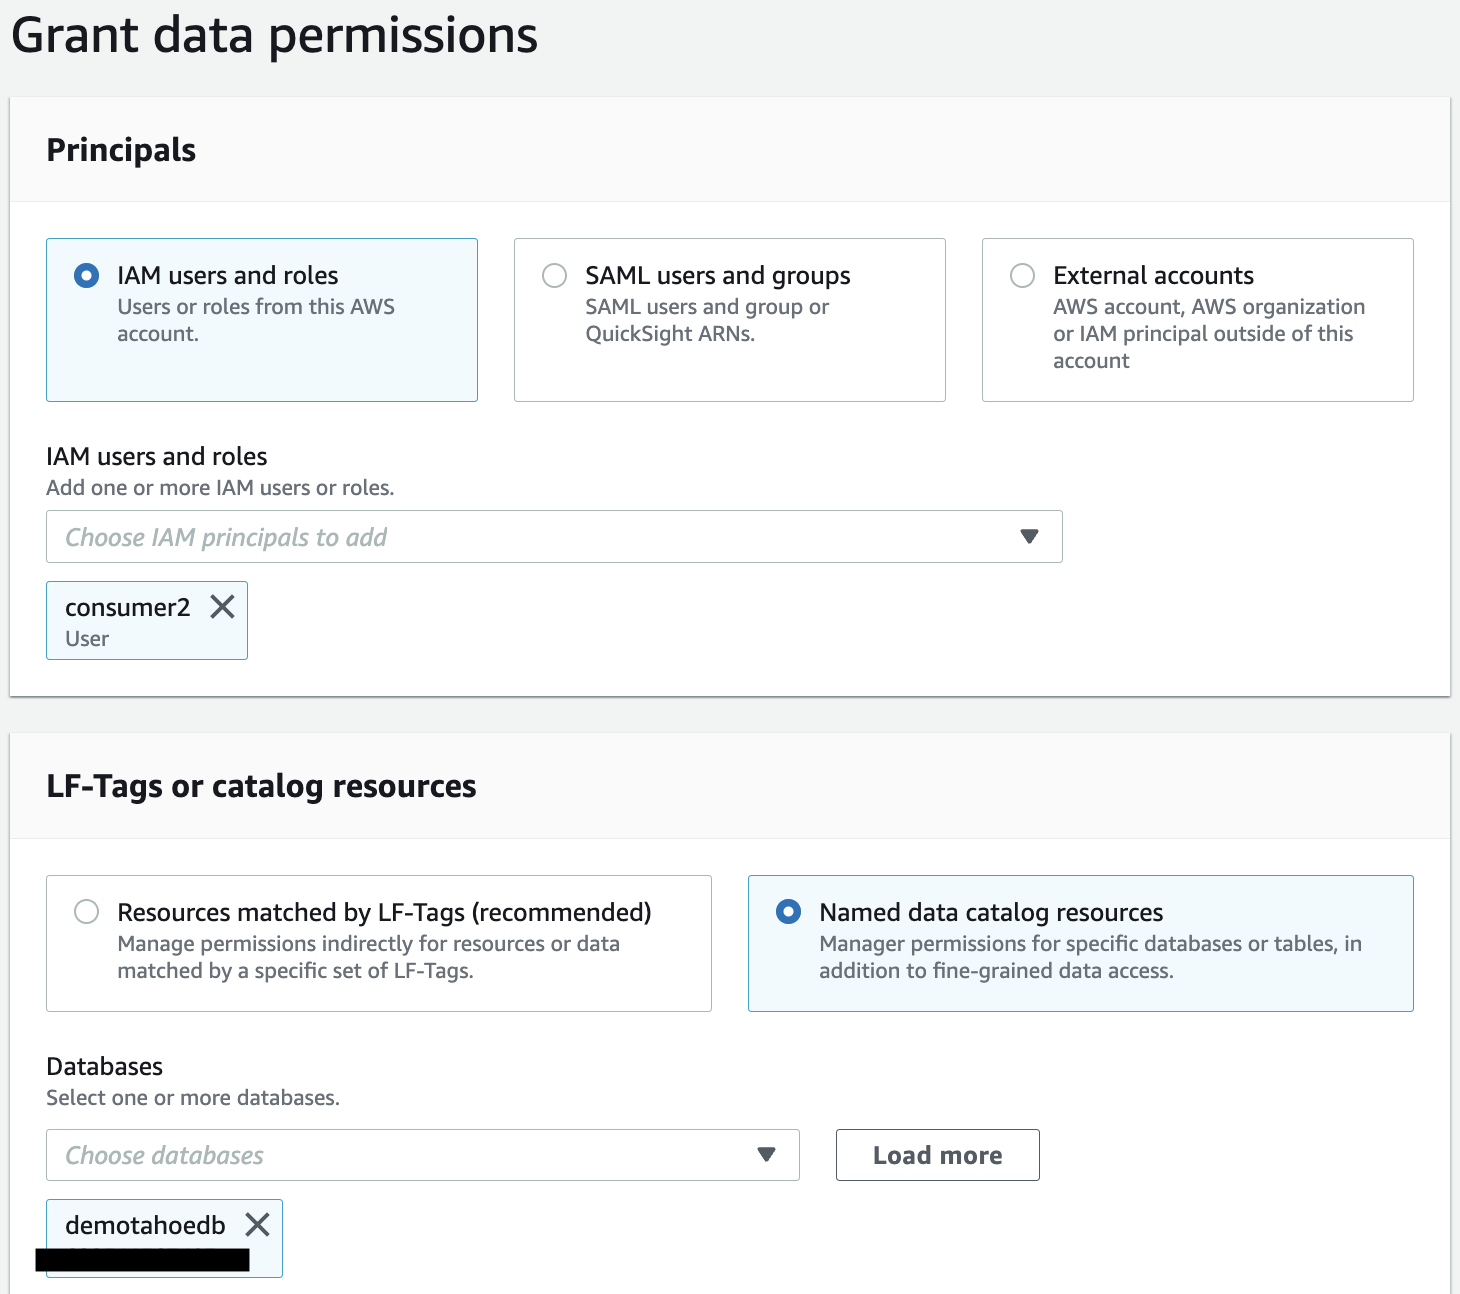
- Under Principals, select IAM users and roles.
- Choose the IAM users consumer1 and consumer2.
- Under LF-Tags or catalog resources, demotahoedb is already selected for Databases.
- Select Describe for Database permissions.
- Choose Grant to apply the permissions.
|

|
|
Grant table permissions to consumer1
|
To grant the IAM user consumer1 permissions on table public.customer, follow these steps:
- Under Data catalog in the navigation pane, choose Databases.
- Select the database demotahoedb and on the Actions menu, choose Grant.
- Under Principals, select IAM users and roles.
- Choose IAM user consumer1.
- Under LF-Tags or catalog resources, demotahoedb is already selected for Databases.
- For Tables, choose public.customer.
- Select Describe and Select for Table permissions.
- Choose Grant to apply the permissions.
|

|
|
Grant column permissions to consumer2
|
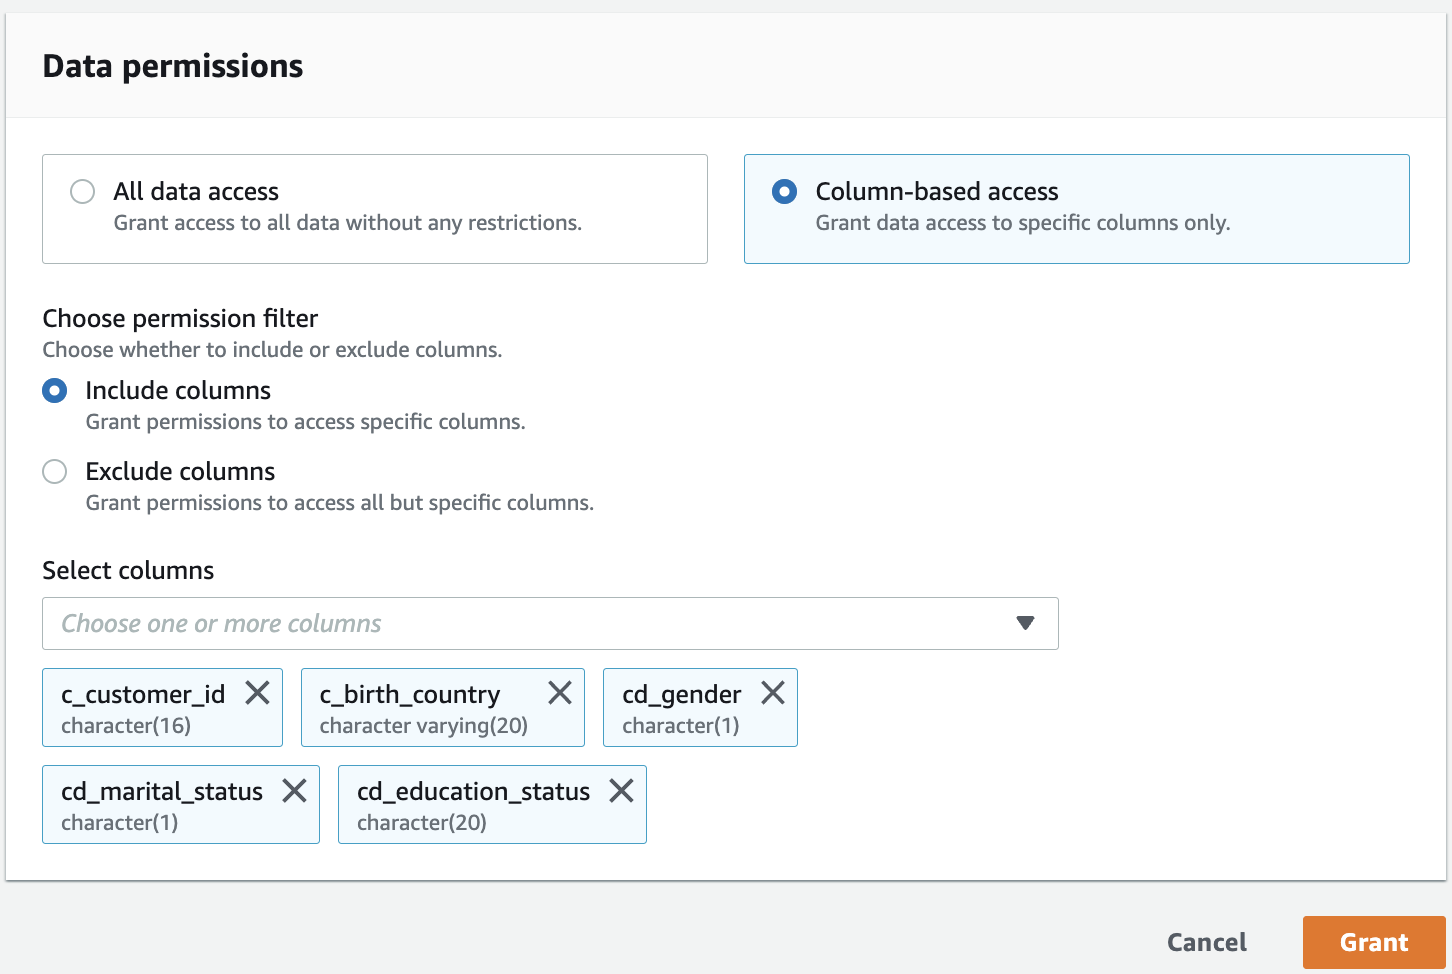
To grant the IAM user consumer2 permissions on non-sensitive columns inpublic.customer_view, follow these steps:
- Under Data catalog in the navigation pane, choose Databases.
- Select the database demotahoedb and on the Actions menu, choose Grant.
- Under Principals, select IAM users and roles.
- Choose the IAM user consumer2.
- Under LF-Tags or catalog resources, demotahoedb is already selected for Databases.
- For Tables, choose public.customer_view.
- Select Select for Table permissions.
- Under Data Permissions, select Column-based access.
- Select Include columns and choose the non-sensitive columns (c_customer_id, c_birth_country, cd_gender, cd_marital_status, and cd_education_status).
- Choose Grant to apply the permissions.
|
|
|
Consume the datashare from the data consumer account in the Amazon Redshift cluster
|
In the Amazon Redshift consumer data warehouse, log in as the admin user using Query Editor V2 and complete the following steps:
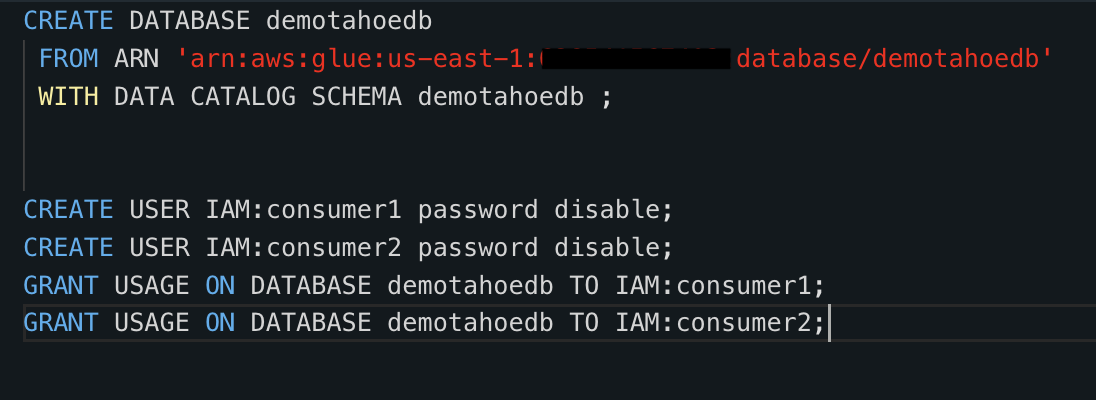
- Create the Amazon Redshift database from the shared catalog database using the following SQL command:
CREATE DATABASE demotahoedb FROM ARN 'arn:aws:glue:<central-region>:<central-aws-account-id>:database/demotahoedb' WITH DATA CATALOG SCHEMA demotahoedb ;
- Run the following SQL commands to create and grant usage on the Amazon Redshift database to the IAM users consumer1 and consumer2:
CREATE USER IAM:consumer1 password disable;
CREATE USER IAM:consumer2 password disable;
GRANT USAGE ON DATABASE demotahoedb TO IAM:consumer1;
GRANT USAGE ON DATABASE demotahoedb TO IAM:consumer2;
|
|
|
Use a federated identity to enforce Lake Formation permissions
|
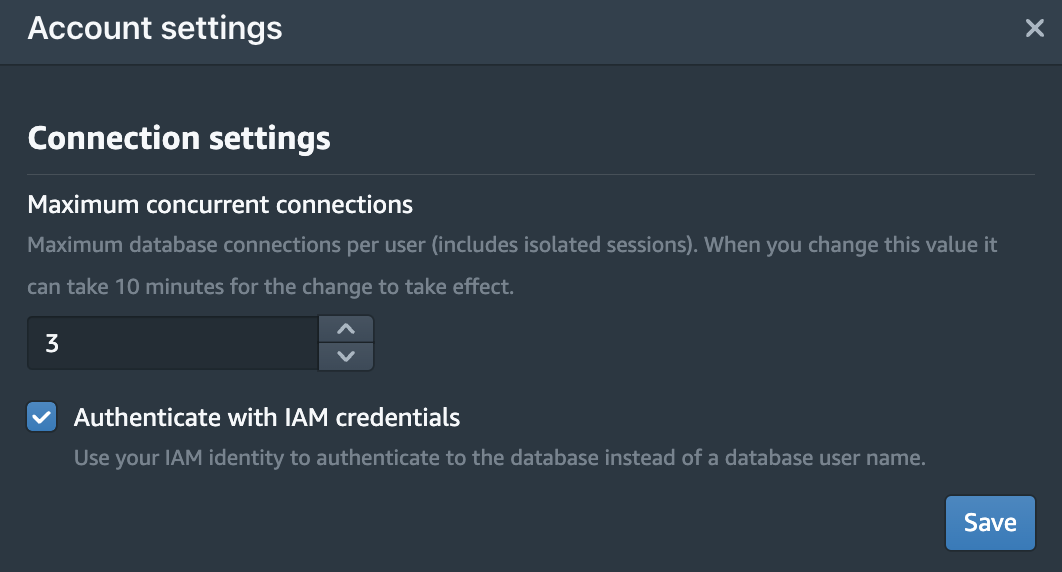
Follow below steps to configure Query Editor v2.
- Choose the settings icon in the bottom left corner of the Query Editor v2, then choose Account settings.
- Under Connection settings, select Authenticate with IAM credentials.
- Choose Save.
|
|
|
Query the shared datasets as a consumer user-
validate that the IAM user consumer1 has datashare access from Amazon Redshift
|
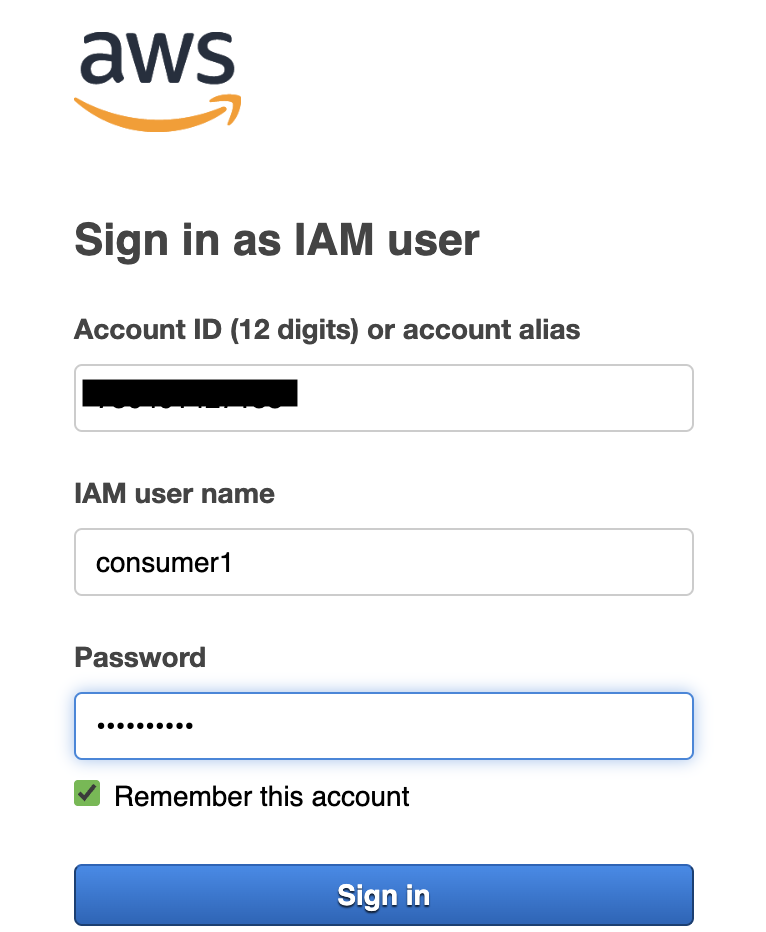
- Sign in to the console as IAM user consumer1 using the ConsoleIAMLoginURL and LFUsersCredentials values saved when consumer1 user was created using cloudformation.
|
|
|
|
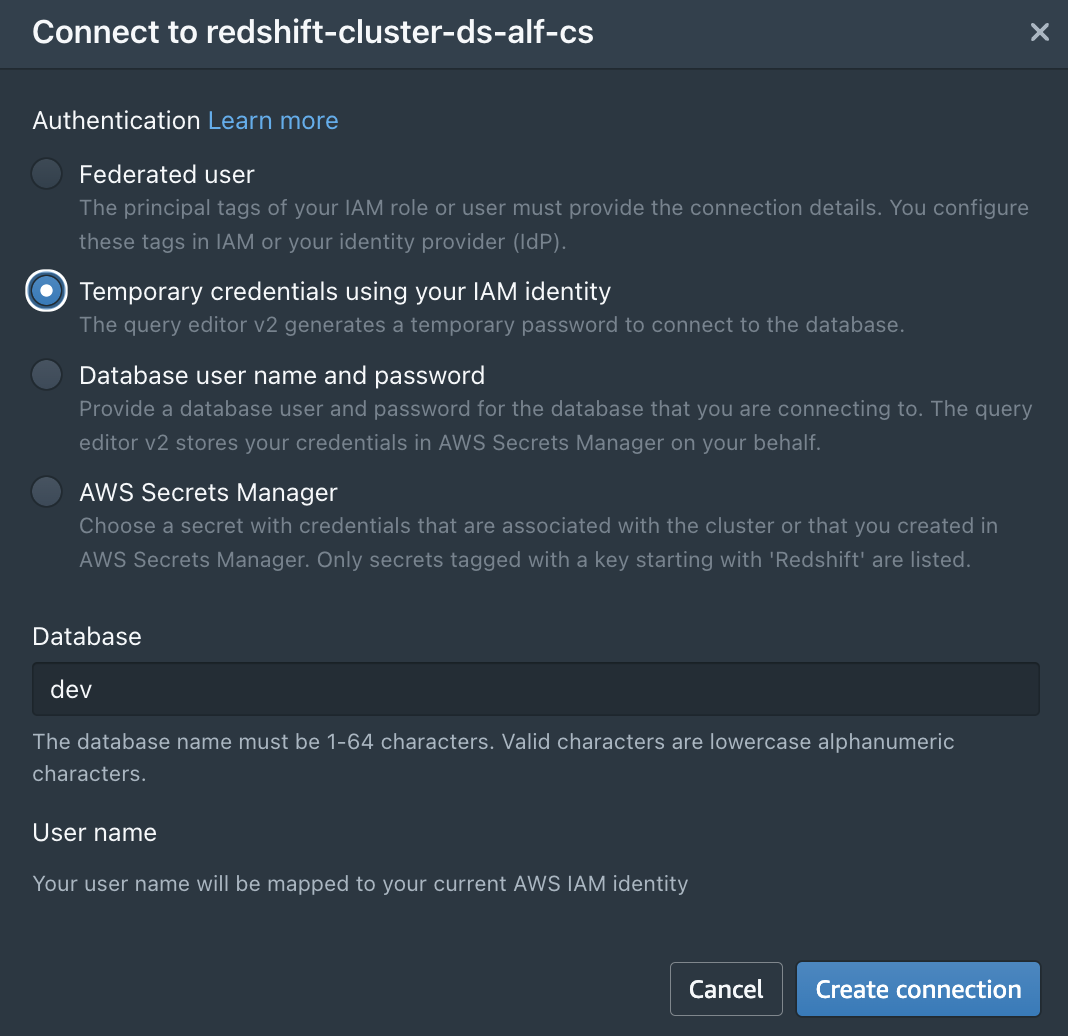
- On the Amazon Redshift console, choose Query Editor V2 in the navigation pane.
- To connect to the consumer cluster, choose the consumer cluster in the tree-view pane.
- When prompted, for Authentication, select Temporary credentials using your IAM identity.
- For Database, enter the database name (for this post, dev).
- The user name will be mapped to your current IAM identity (for this post, consumer1).
- Choose Save.
|
|
|
|
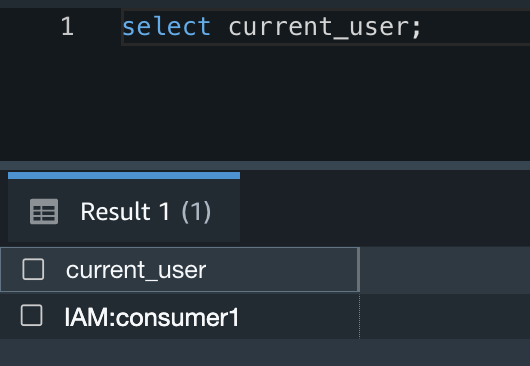
- Once you’re connected to the database, you can validate the current logged-in user with the following SQL command:
|
|
|
|
- To find the federated databases created on the consumer account, run the following SQL command:
SHOW DATABASES FROM DATA CATALOG ACCOUNT 'Central Governance account'
|

|
|
|
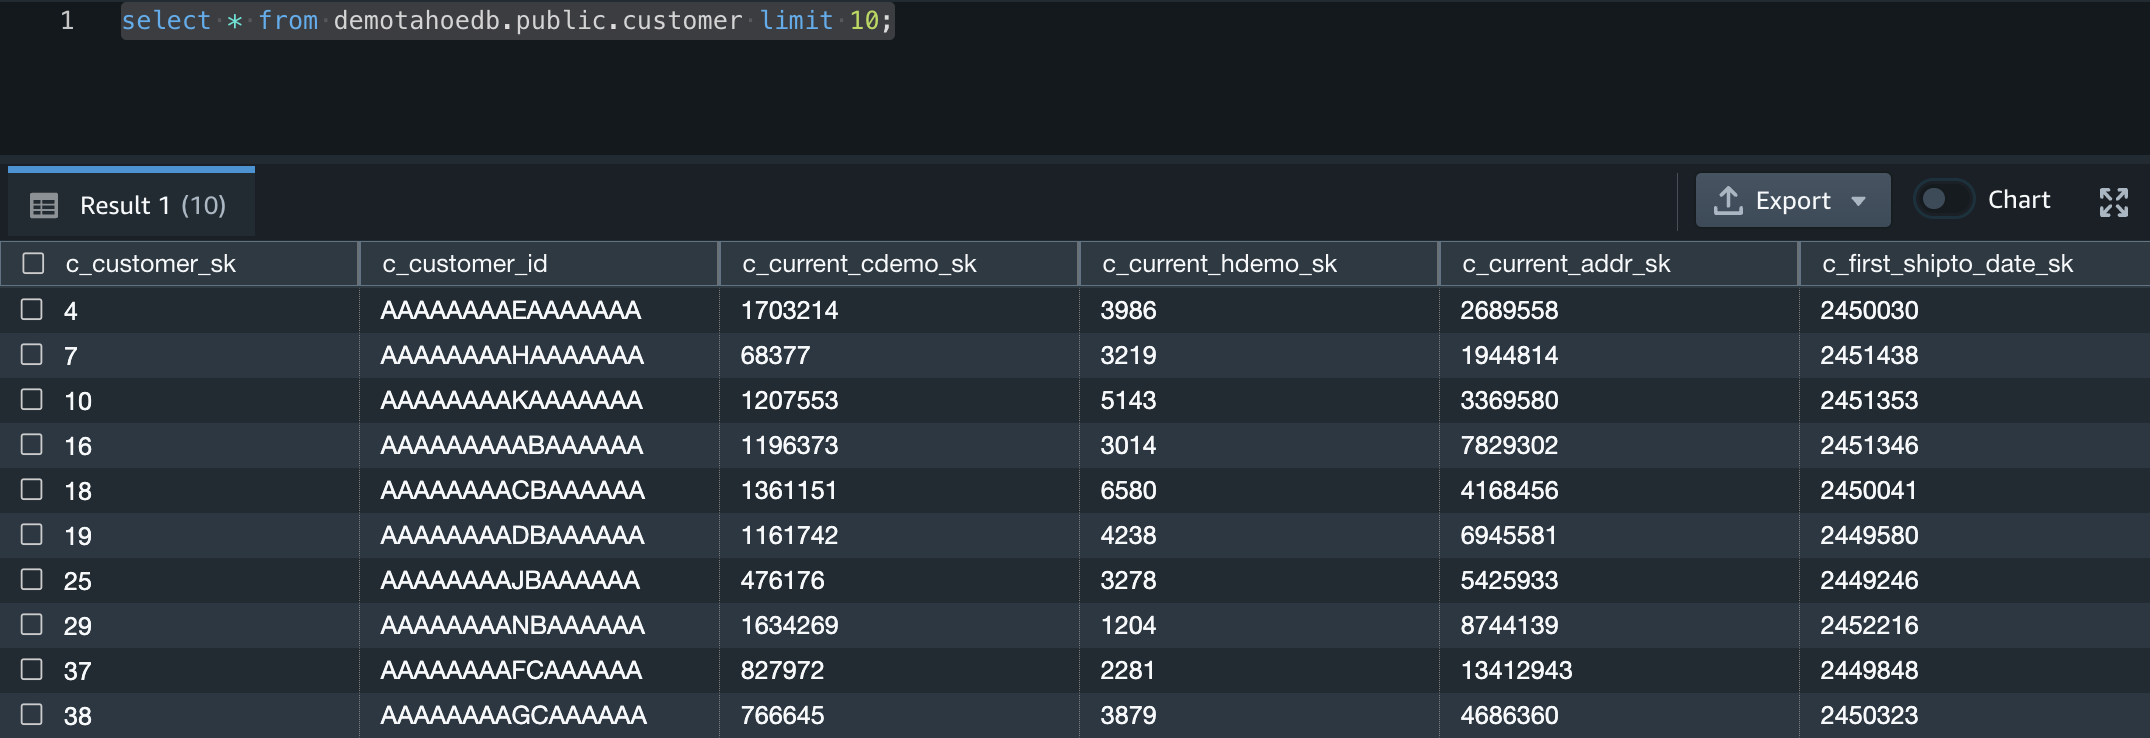
- To validate permissions for consumer1, run the following SQL command:
select * from demotahoedb.public.customer limit 10;
|
|
|
Validate that the IAM user consumer2 doesn’t have access to the datashare tables public.customer on the same consumer cluster.
|
- Log out of the console and sign in as IAM user consumer2.
- Follow the same steps to connect to the database using the query editor.
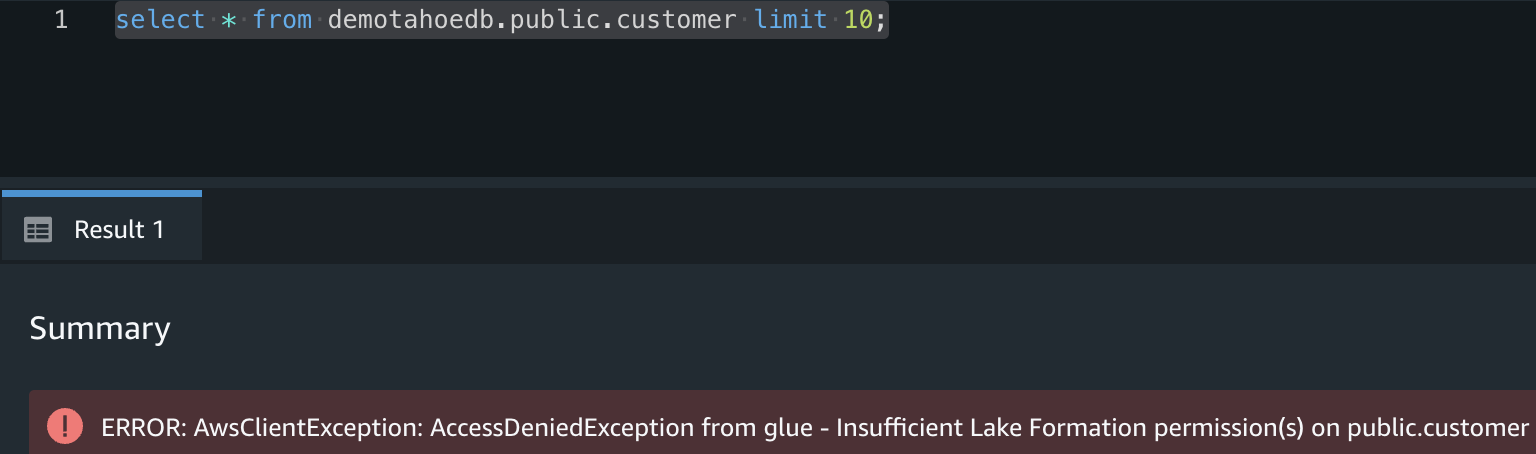
- Once connected, run the same query:
select * from demotahoedb.public.customer limit 10;
The user consumer2 should get a permission denied error
|
|
|
Validate the column-level access permissions of consumer2 on public.customer_view view
|
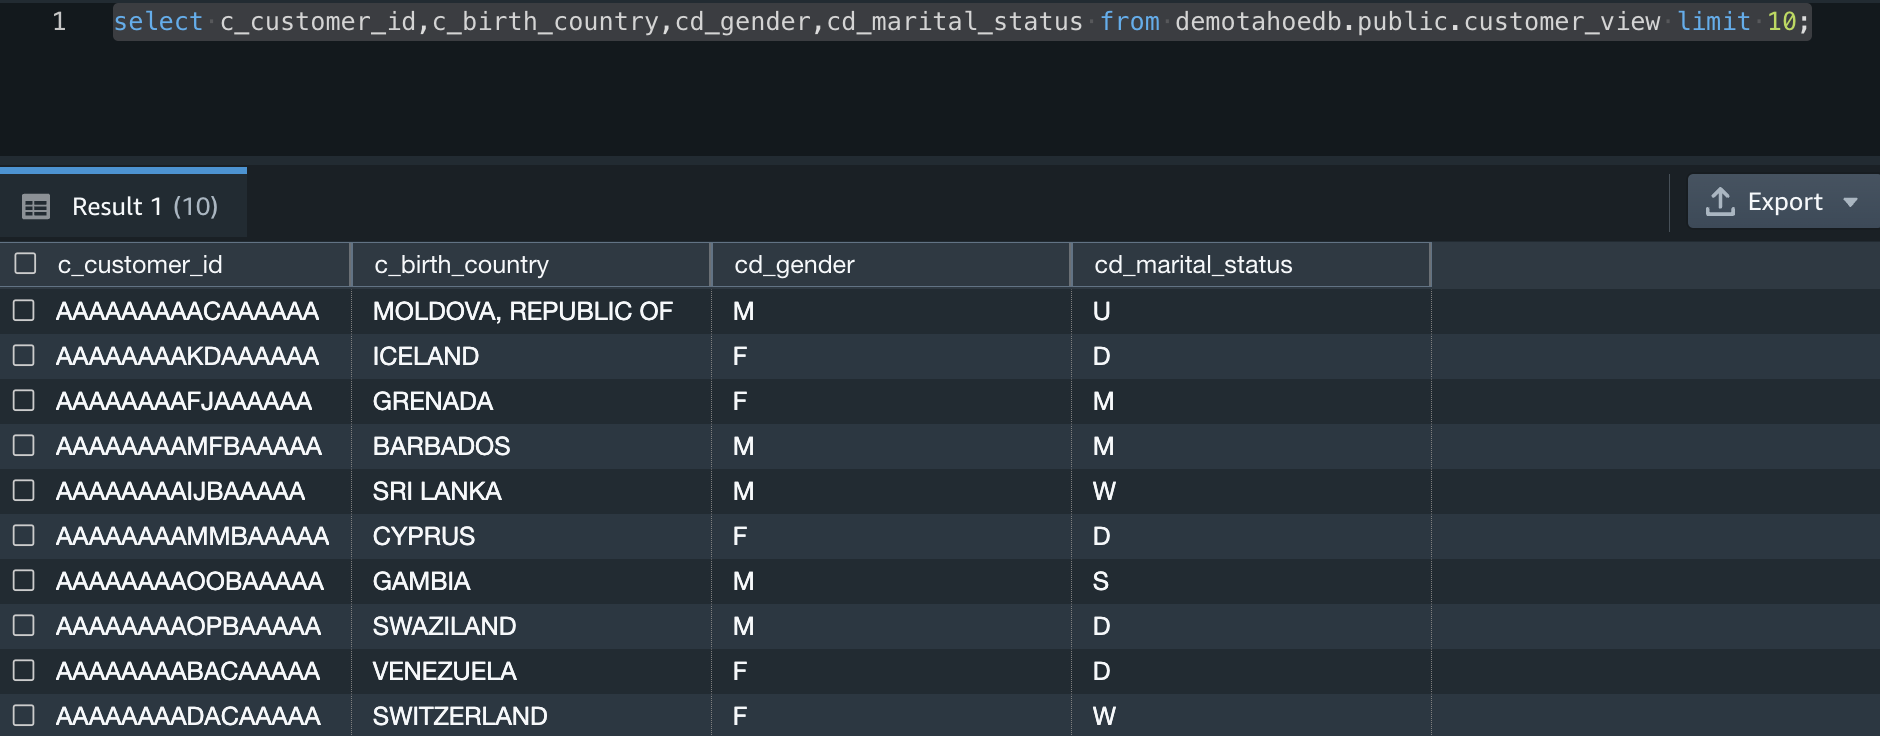
Connect to Query Editor v2 as consumer2 and run the following SQL command:
select c_customer_id,c_birth_country,cd_gender,cd_marital_status from demotahoedb.public.customer_view limit 10;
You can see that consumer2 is only able to access columns that were granted access by Lake Formation.
|
|
