Elastic Views
Demo Video
Coming soon!
Before you Begin
Ensure that you launch the main Cloud Formation template from here.
Capture the following parameters from the launched main CloudFormation template as you will use them in the demo.
https://console.aws.amazon.com/cloudformation/home?region=us-east-1#/stacks?filteringText=&filteringStatus=active&viewNested=true&hideStacks=false
- EC2DeveloperPassword
- EC2HostName
- RedshiftClusterDatabase
- RedshiftClusterEndpoint
- RedshiftClusterPort
- RedshiftClusterUser
- RedshiftClusterPassword
- RedshiftClusterIAMRole
- TaskDataBucketName
- DynamoDBTableName
Load data into DynamoDB Table:
- Create DynamoDB Table:
- Navigate to https://console.aws.amazon.com/dynamodbv2/home?region=us-east-1#tables
- Click on
Create Table - Enter
TransactionDetailsas Table name - Enter
TransactionNumberas Partition Key withStringdatatype andTransactionDateas Sort Key withStringdatatype - Click on
Create Table
- Load data into DynamoDB Table
- Navigate to https://console.aws.amazon.com/dynamodbv2/home?region=us-east-1#edit-item?table=TransactionDetails&ref=%23item-explorer%3Ftable%3DTransactionDetails&route=ROUTE_ITEM_EXPLORER&itemMode=1
- Click on JSON Format
- Copy and paste the below item representing a transaction record with TransactionNumber 1 and Click on
Create Item{ "TransactionNumber": {"S": "1"}, "TransactionDate": {"S": "01/01/2021"}, "TransactionAmount": {"N": "10000"}, "TransactionFee": {"N": "10"}, "Currency": {"S": "USD"}, "State": {"S": "CA"} }
This feature is in preview when this demo is created. If the feature is still in preview by the time you are accessing this demo, please whitelist your account by raising a TT
Client Tool
If you do not have a Remote Desktop client installed, you can use the instructions at this link to do so.
Challenge
Red Imports has transactional data in a DynamoDB table. Marie, a data engineer wants to build a scalable and robust data pipeline to access the transactional data from DynamoDB table using Redshift.
Solution
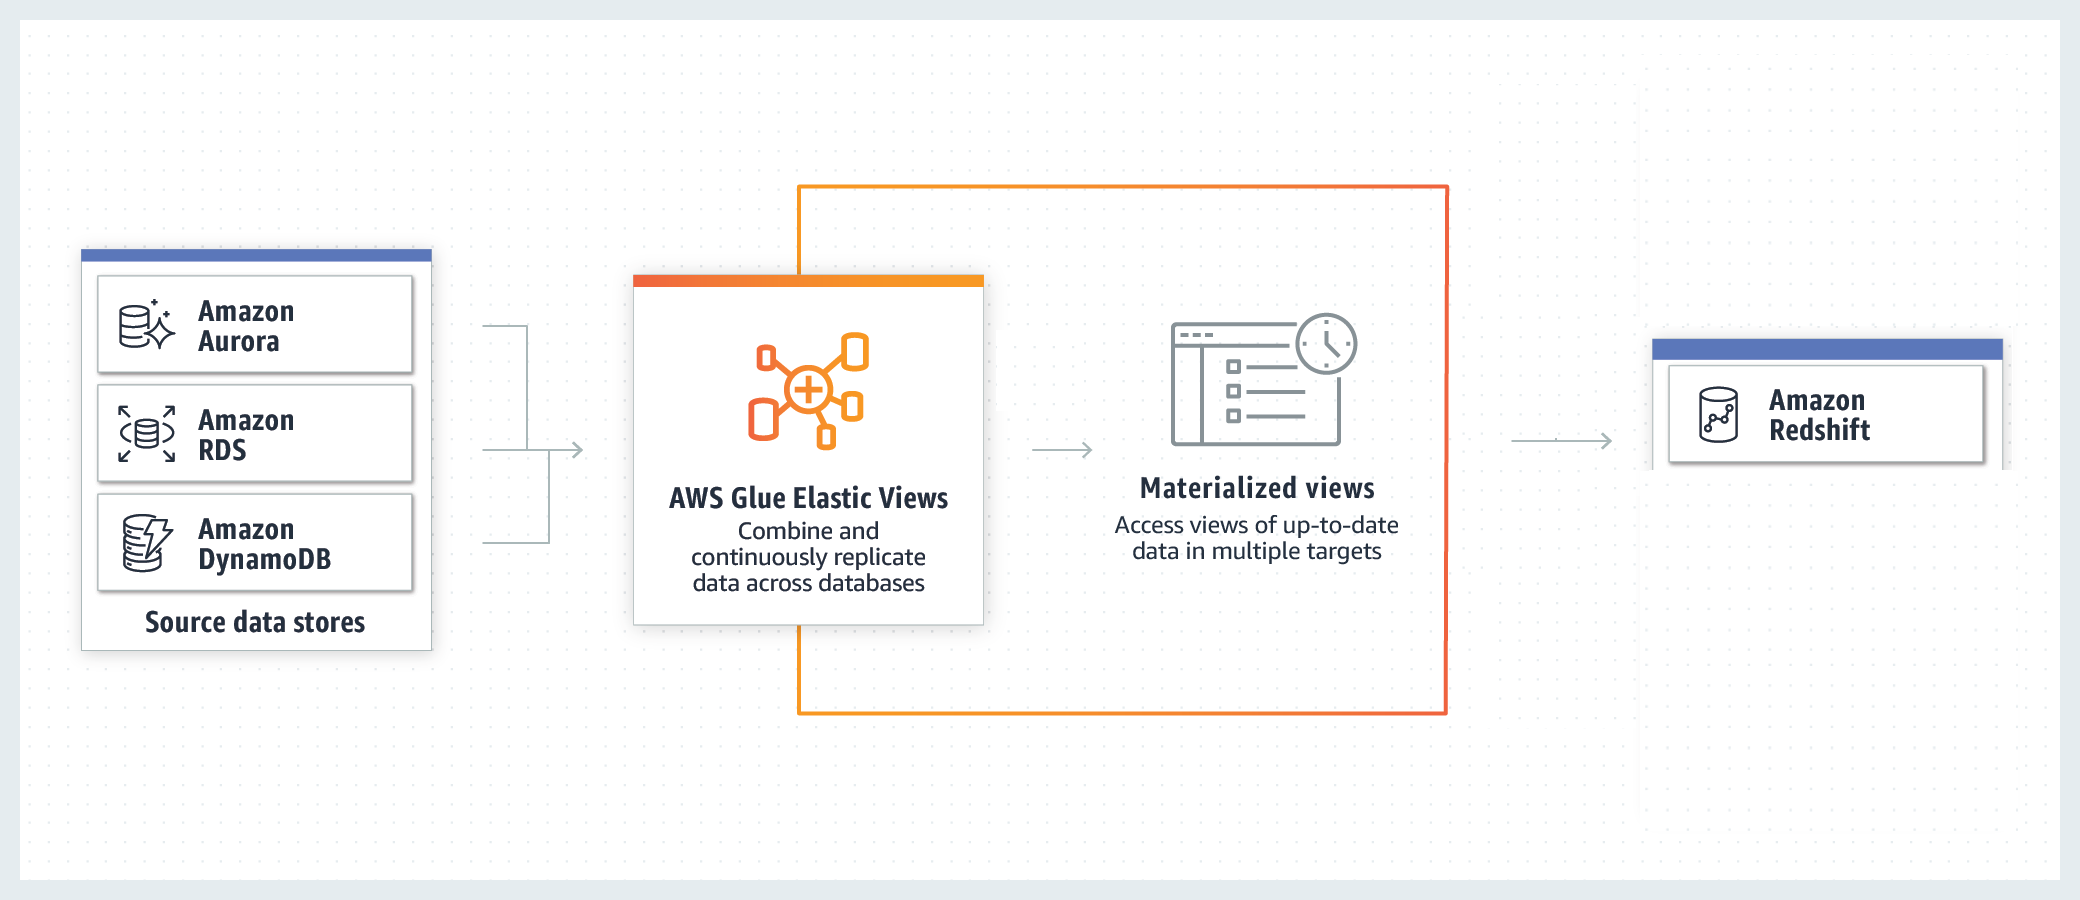
Marie can accomplish this using AWS Glue Elastic Views. AWS Glue Elastic View copies data from DynamoDB and creates a replica in a target data store such as S3, ElasticSearch Cluster or Redshift. For this usecase, Marie we will be replicating data to S3. AWS Glue Elastic Views then continuously monitors for changes to data in your source data stores(DynamoDB table for this usecase) and provides updates to the materialized views in your target data stores(S3 for this usecase) automatically, ensuring data accessed through the materialized view is always up-to-date.
- Create a Table
- Activate the Table
- Create and Activate Elastic View
- Materialize the Elastic View
- Query Materialized View in Redshift
- Refresh Materialized View in Redshift
Create Table
| Say | Do | Show |
|---|---|---|
|
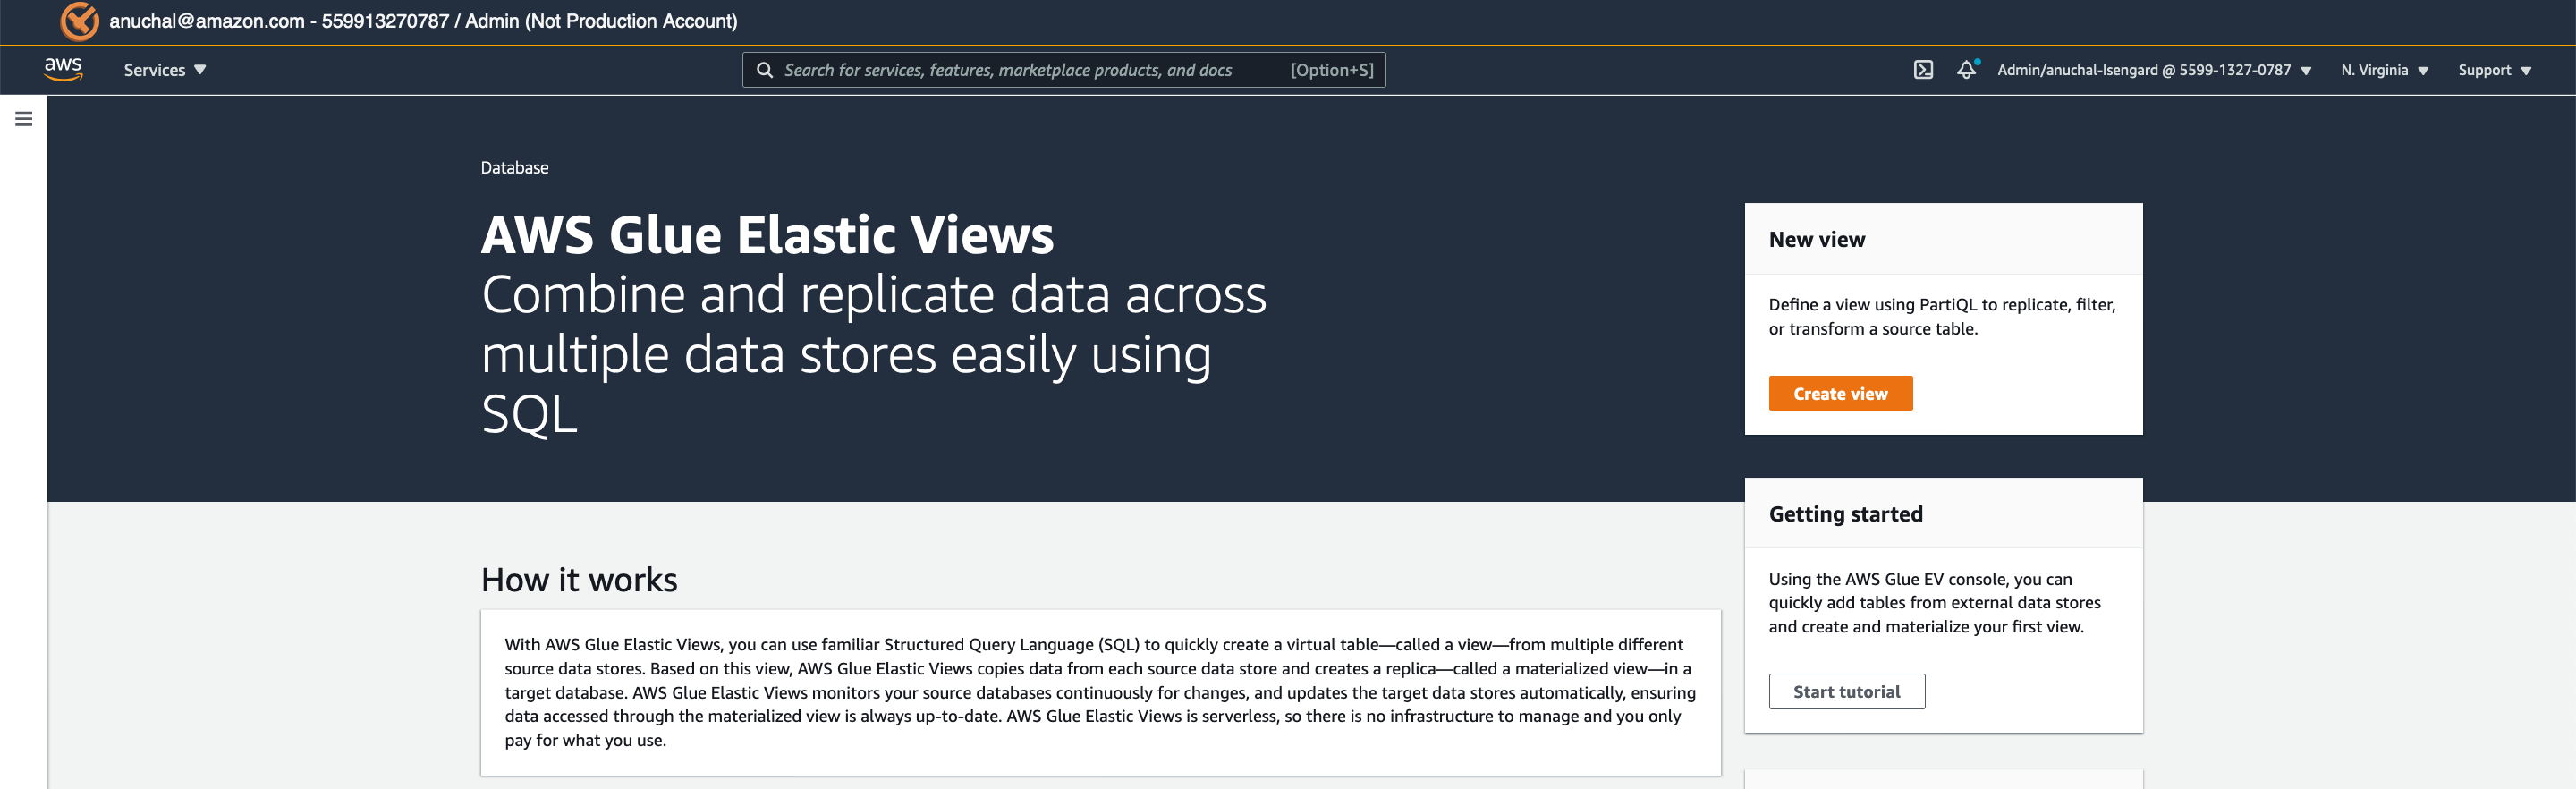
Marie navigates to AWS Glue Elastic Views Console |
Navigate to AWS Glue Elastic Views using the link here: https://console.aws.amazon.com/elasticviews/home?region=us-east-1#/ |
|
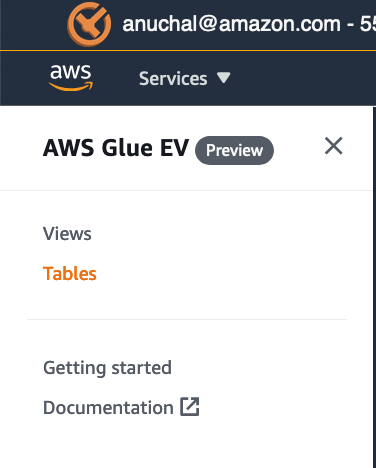
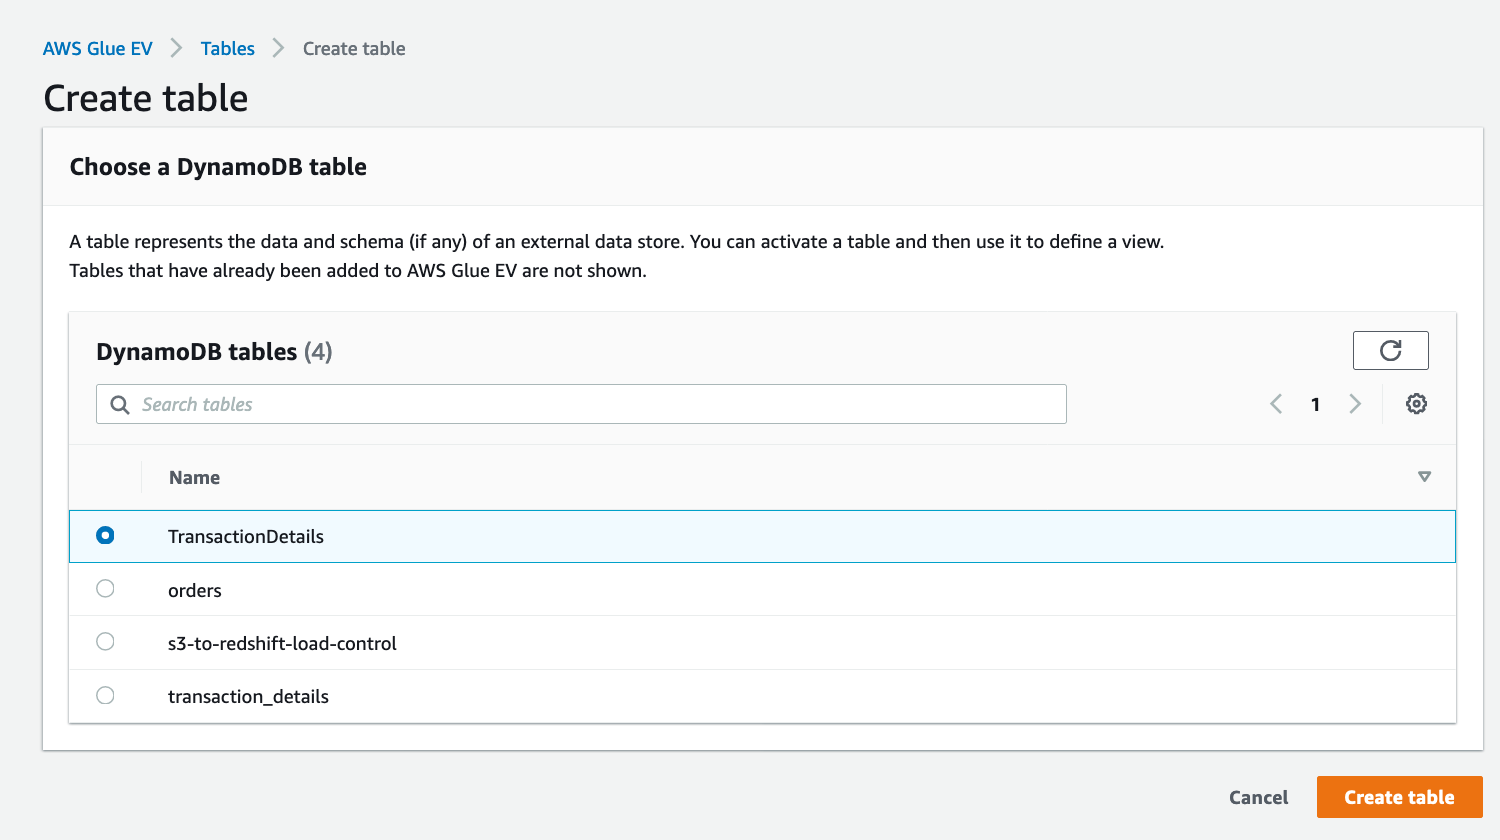
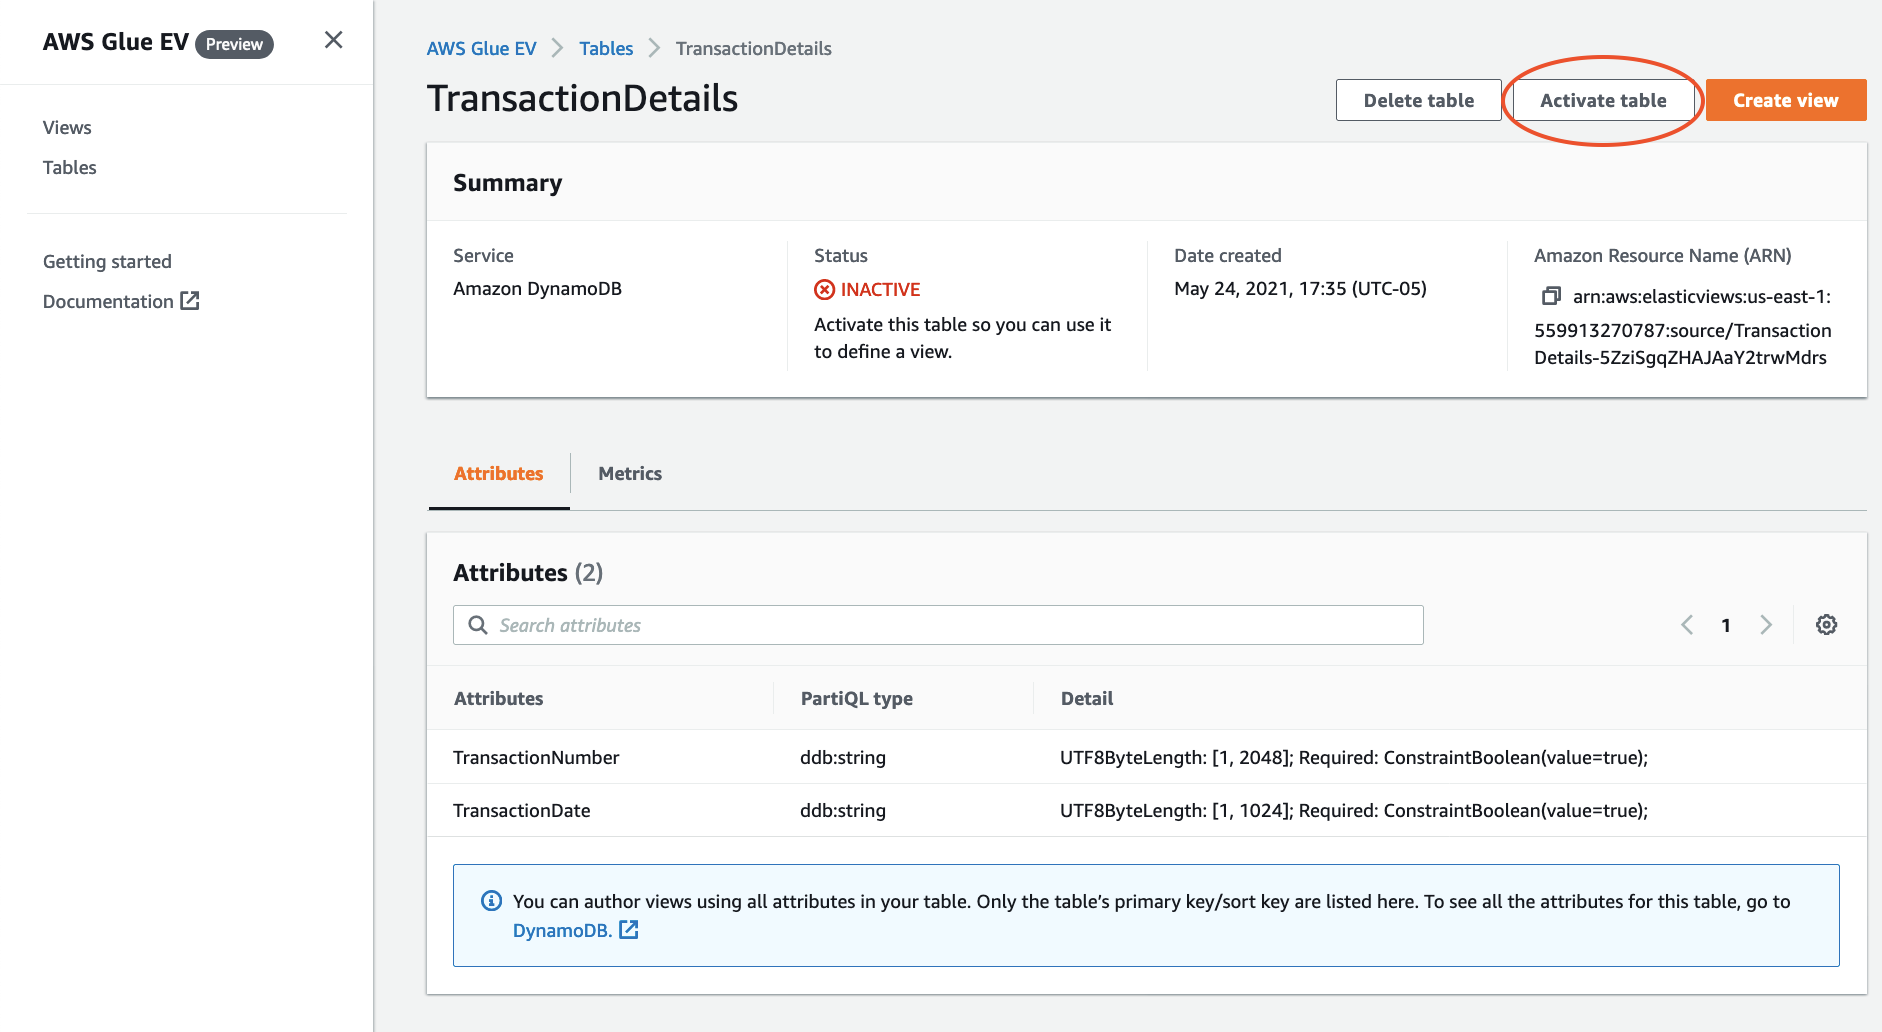
| In AWS Glue Elastic Views console, Marie navigates to Tables and creates a Table pointing to the DynamoDB Table |
|


|
Activate Table
| Say | Do | Show |
|---|---|---|
|
Marie then activates the table. Activating the table enables the data to flow from the source data store to Elastic Views |
|


|
Create Elastic View
| Say | Do | Show |
|---|---|---|
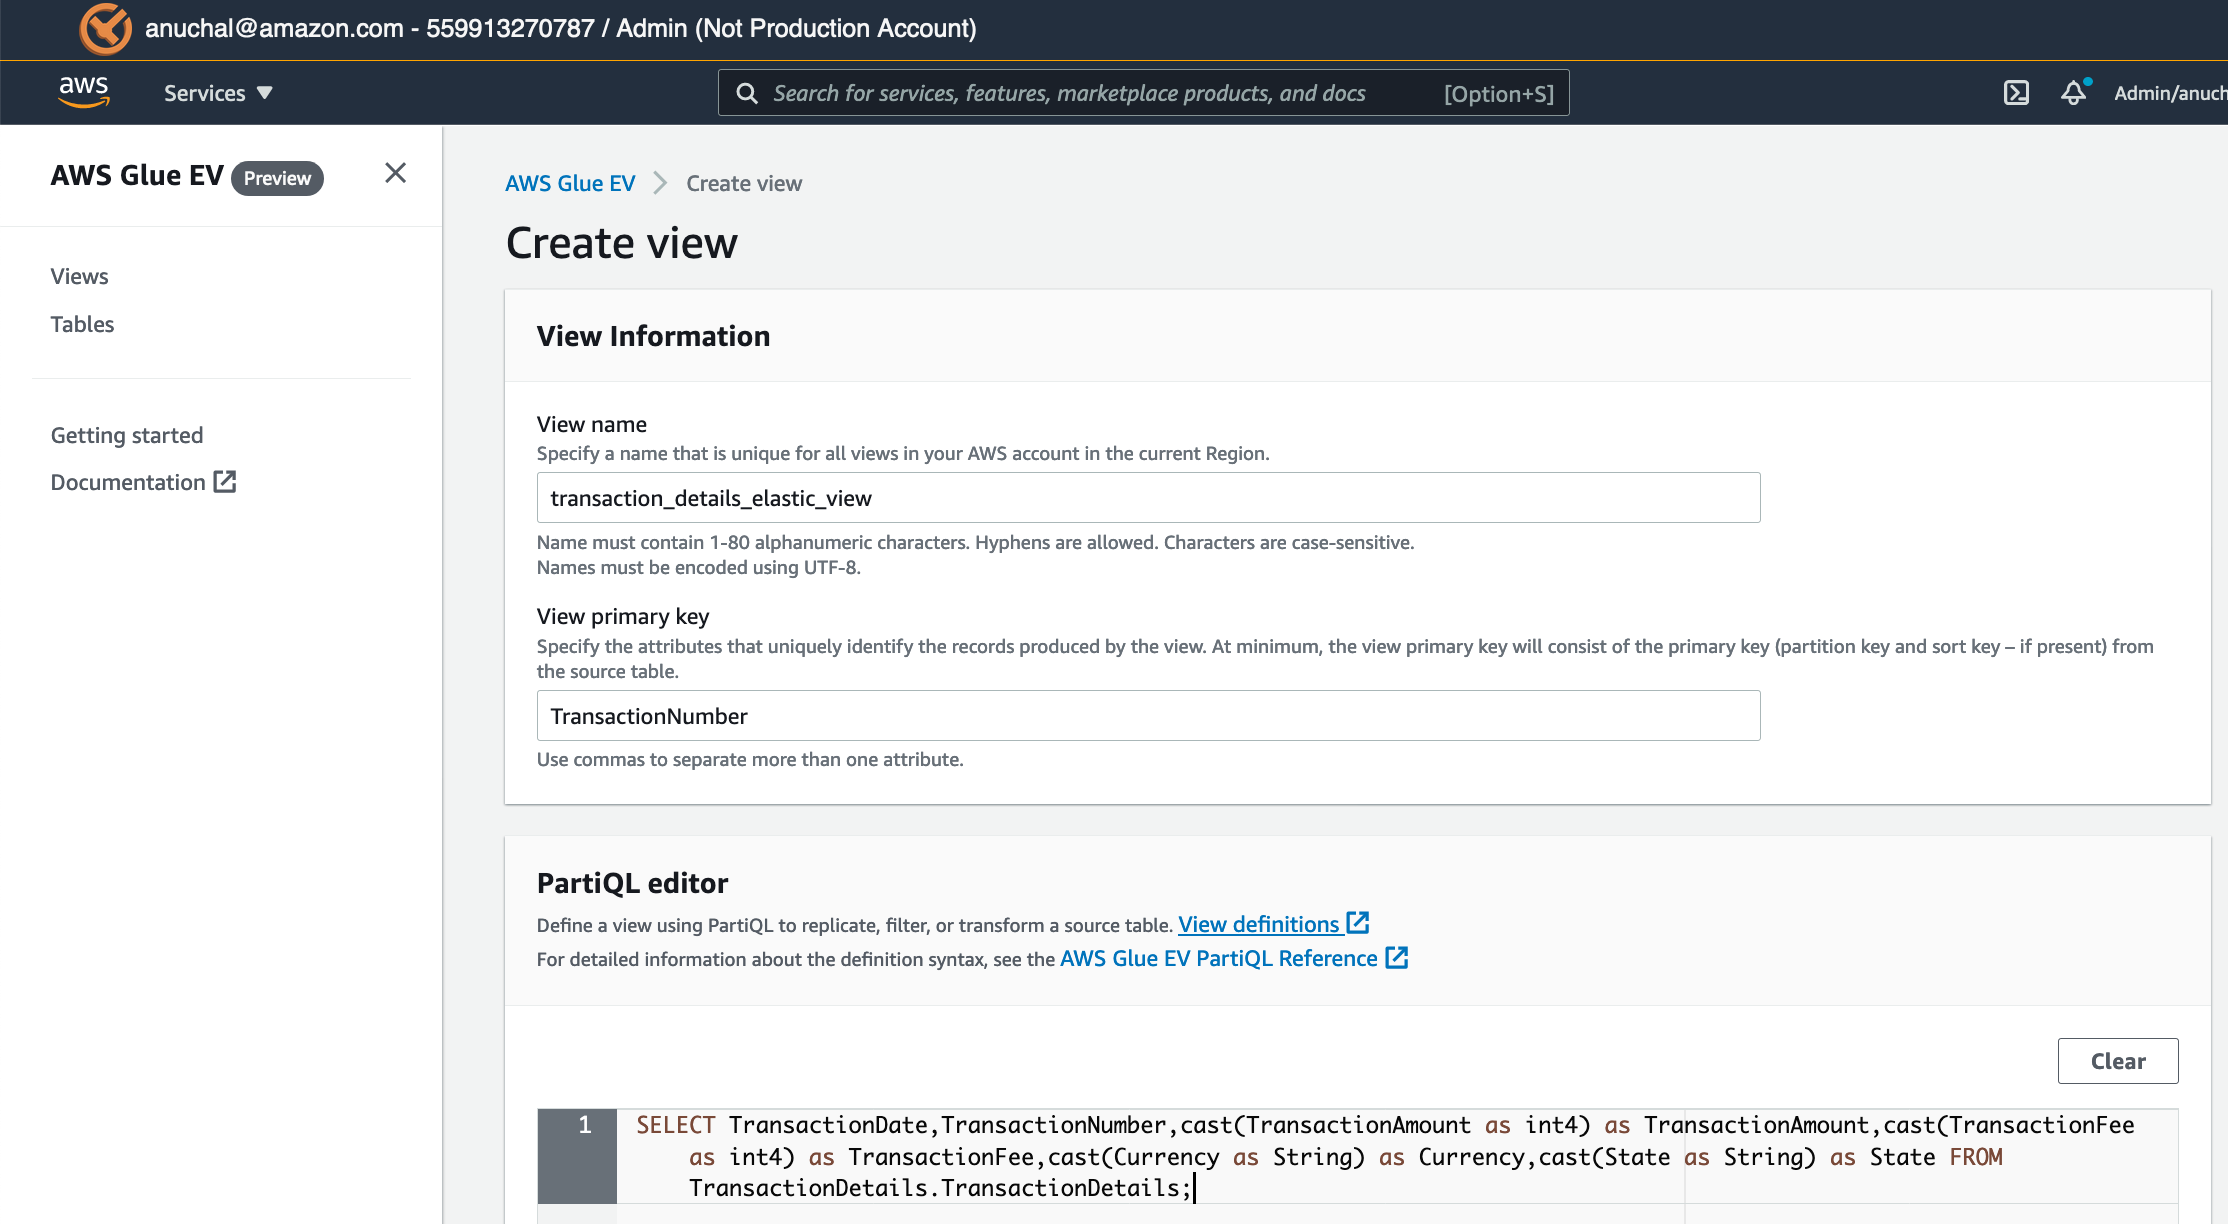
| Marie will create and start a view in AWS Glue Elastic Views using the DynamoDB TransactionDetails table as a source. When Marie creates the view, she must provide the source table or view name it will query, the primary keys that uniquely define records in the view output, and the PartiQL query that defines how the view will process input records. |
|
|
| Marie then starts the Elastic View by activating the Elastic View. A view must be activated to produce output. This operation starts the process of executing the view’s PartiQL query against the input data. |
|


|


MaterializeElastic View
| Say | Do | Show |
|---|---|---|
|
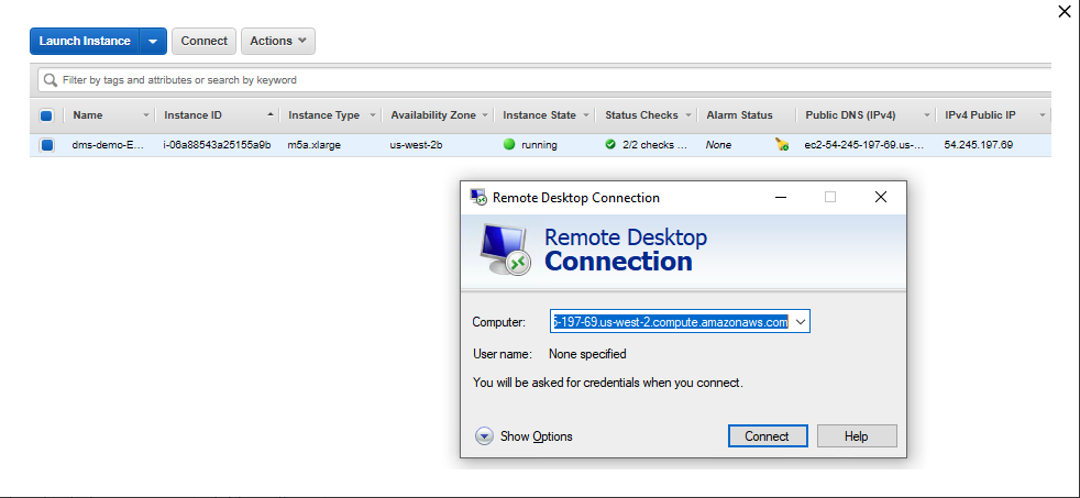
Marie logs into her workstation, in which she has already installed the required tools like schema conversion tool for the migration, SQL Workbench to connect to Redshift, SQL Workbench to connect to Greenplum |
The cloud formation template deploys a Windows EC2 instance, with required drivers and softwares for AWS SCT, SQL Workbench. Connect to that EC2 instance using Remote Desktop client. |
|
| Now, Marie will need to verify that the objects have been created in Redshift using an IDE like SQL workbench, which is an open source JDBC IDE. She will need to provide the driver path for Redshift. |
Open SQL workbench from the taskbar shortcut, which opens the new connection window. In that, click Manage Drivers in bottom left hand corner and select Redshift. Correct the driver path as |

|
| Then provide the connectivity settings |
On the connectivity screen, select inputs: Click |

|
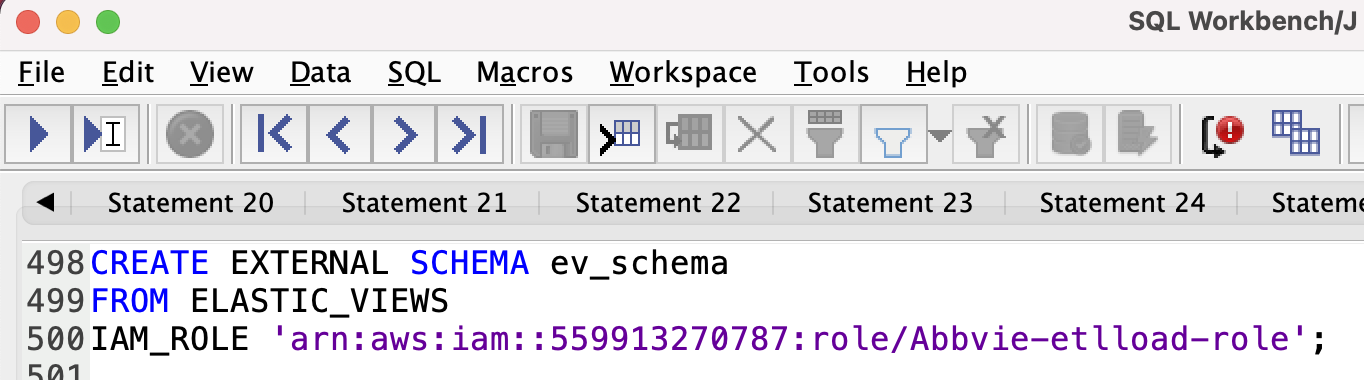
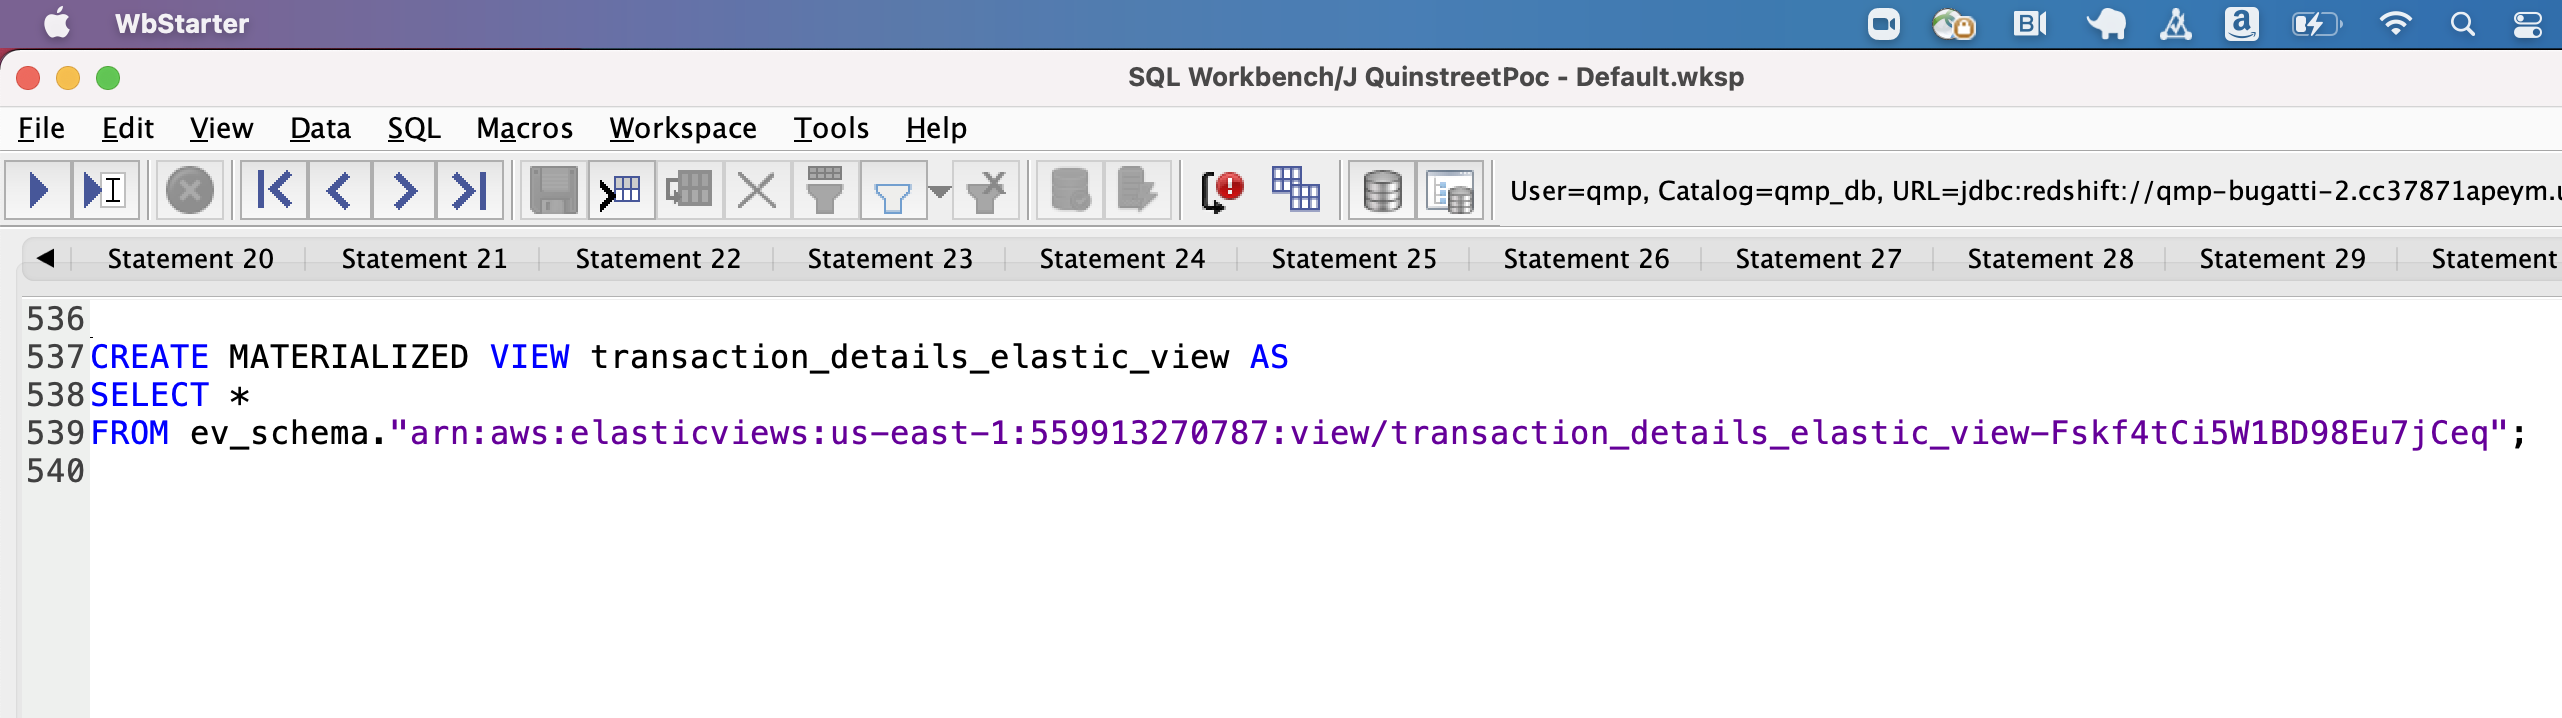
| Marie then executes a SQL statement that creates an External Schema Pointing to elastic views |
|
|
Query Materialized View Redshift
| Say | Do | Show |
|---|---|---|
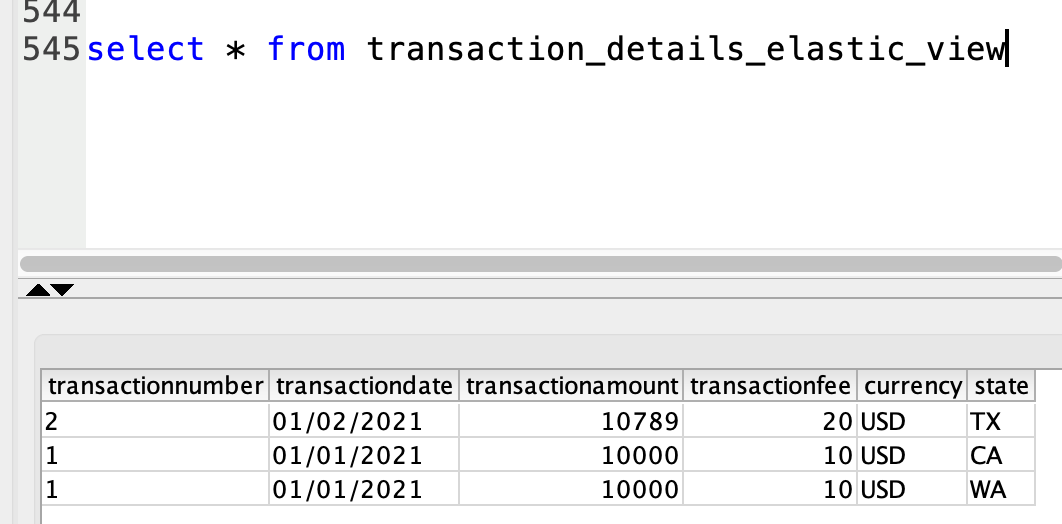
| Marie can now query the Dynamo DB table that is materialized in Redshift |
1.In SQL Workbench, run the below query |
|
Refresh Materialized View Redshift
| Say | Do | Show |
|---|---|---|
| To keep the data upto date Marie can refresh the materialized view |
1.In SQL Workbench, run the below query |
|

Before you Leave
If you no longer need the resources that you created for the tutorial, you can delete them. Ensure that you perform these clean-up tasks in the following order:
- Drop the materialized view and external schema in Amazon Redshift
  DROP MATERIALIZED VIEW transaction_details_elastic_view;
  DROP SCHEMA ev_schema;
- Delete the Elastic View
- Open the Elastic Views console at https://console.aws.amazon.com/elasticviews
- In the navigation pane, choose Views.
- In the views list, choose the transaction_details_elastic_view link.
- Choose Delete view.
- Deactivate and Delete the table
- In the navigation pane, choose Tables.
- In the tables list, choose the TransactionDetails.TransactionDetails link.
- Choose Deactivate
- Choose Delete Table
If you are done using your cluster, please think about deleting the CFN stack or to avoid having to pay for unused resources do these tasks:
- pause your Redshift Cluster
- stop the elasticviews ubuntu EC2 Instance