Redshift: How to build a successful demo for your customers > Preparing your Demo > BI Tool Considerations
BI Tool Considerations
Before you Begin
Capture the following parameters from the launched CloudFormation template as you will use them in the demo.
https://console.aws.amazon.com/cloudformation/home?region=us-east-1#/stacks?filteringText=&filteringStatus=active&viewNested=true&hideStacks=false
- RedshiftClusterIdentifier
- RedshiftClusterUser
- RedshiftClusterPassword
Tools
There are many 3rd party BI Tools available (e.g. MicroStrategy, Tableau, Looker, Etc.). These tools will come packaged with a native client or leverage the Redshift Provided JDBC/ODBC driver. However, for these demos, we will use the AWS Business Intelligence Platform QuickSight because of it’s ease of setup and use.
Setup QuickSight Environent
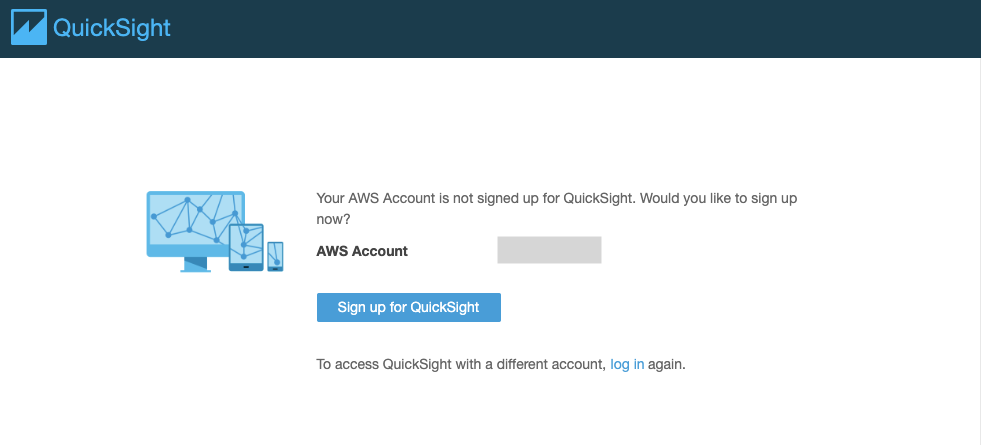
- Navigate to the QuickSight Landing page. If you see something like the following, that means this is the first time you are using QuickSight. Click on Sign Up For QuickSight. Otherwise, skip to step 5.

- You will be re-directed to choose between the Standard and Enterprise versions. Choose Enterprise and click Continue.
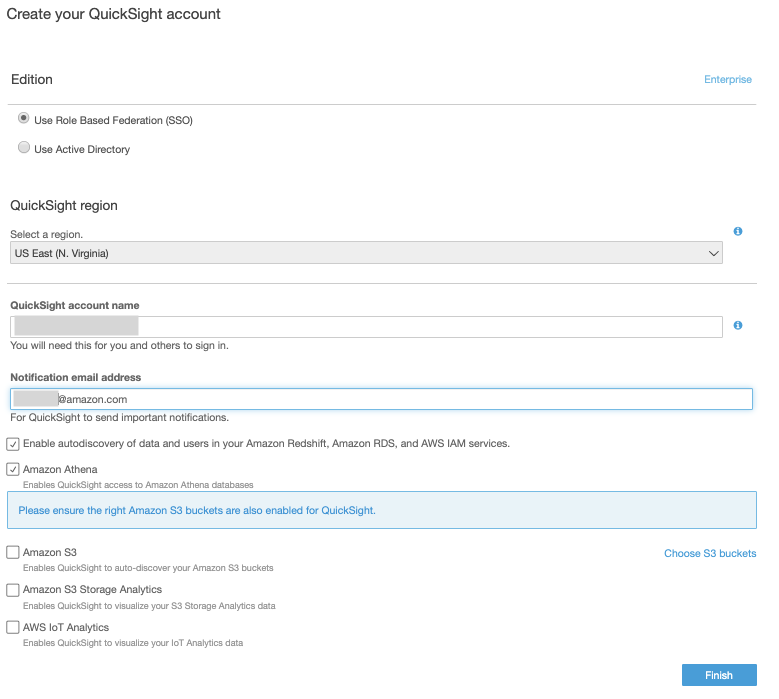
- Enter an Account Name & Notification Email Address and click Finish. Note: Use an email address which you have access to, so you can demonstrate the email functionality.

- Once complete click Go to Amazon Quicksight.
Building a Redshift Data Source
- Click on Manage data –> New data set –> Redshift Auto-discovered.
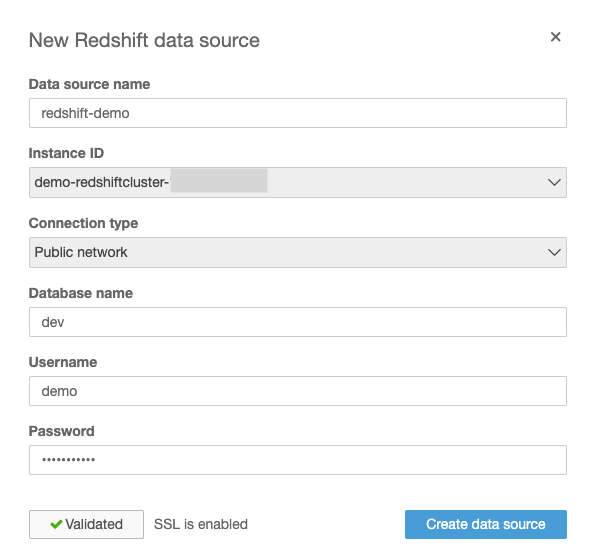
- Name your data source Redshift-Demo. Choose the Cluster based on the <RedshiftClusterIdentifier> acquired earlier. Set the username to <RedshiftClusterUser> and the password to <RedshiftClusterPassword>.
- Click on Validate connection. If the connection is valid, you should get the following message.

- Click Create data source.
- In the Choose your table just click X. We will create our data sets in the demos.
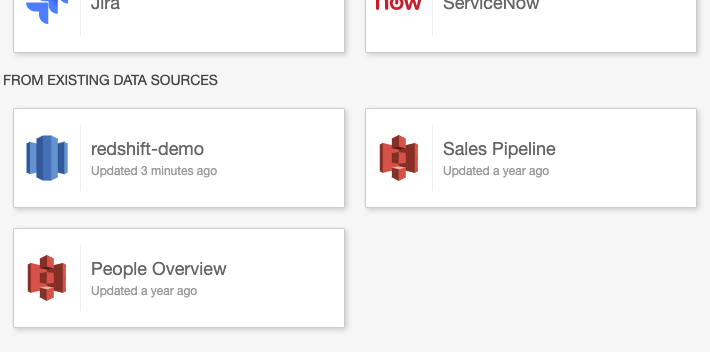
- If it works successfully, you should see your data source towards the bottom of the screen.
