Teradata Migration
Demo Video
Coming soon!
Before you Begin
- Capture the following parameters from the previously launched CloudFormation template as you will use them in the demo.
https://console.aws.amazon.com/cloudformation/home?region=us-east-1#/stacks?filteringText=&filteringStatus=active&viewNested=true&hideStacks=false
- EC2DeveloperPassword
- EC2HostName
- RedshiftClusterDatabase
- RedshiftClusterEndpoint
- RedshiftClusterPassword
- RedshiftClusterPort
- RedshiftClusterUser
- TaskDataBucketName
- VpcId
- SubnetAPublic
- SecurityGroup
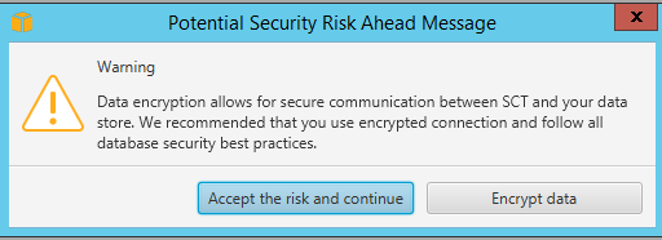
Please ensure that you have accepted the license agreement for a Teradata subscription here, or the CFN will fail to complete.
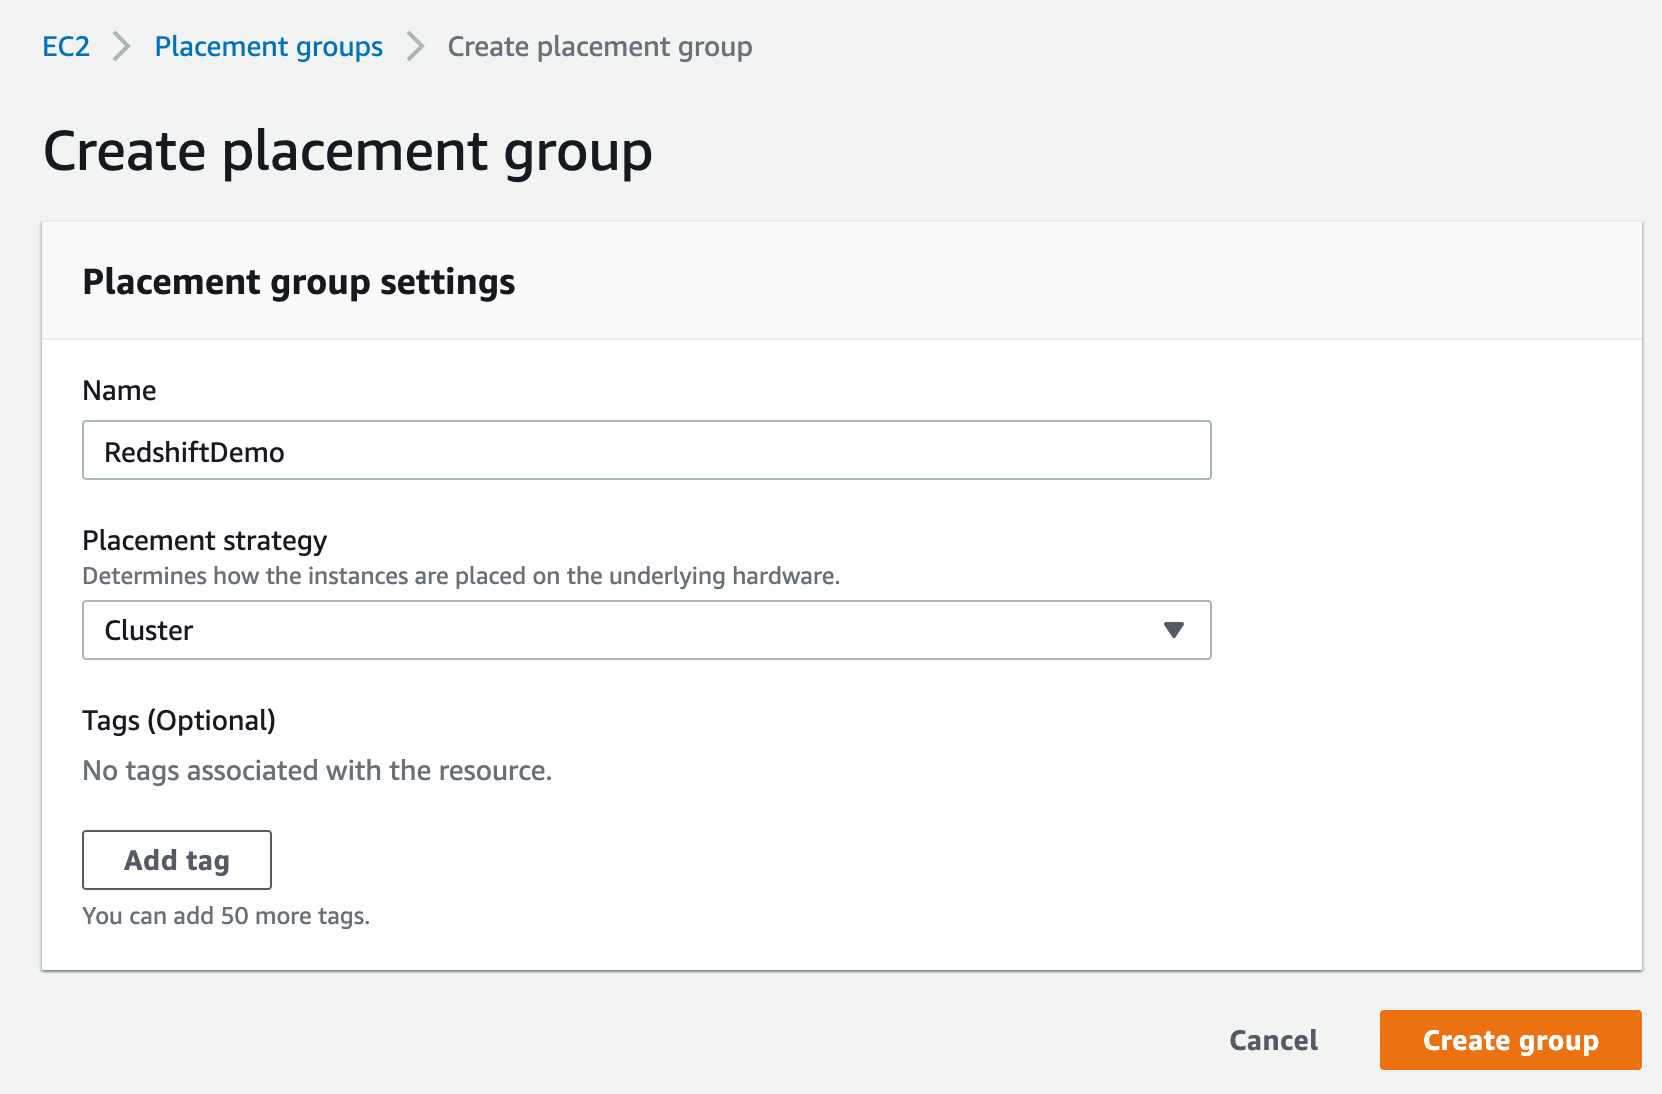
- Create a placement group in EC2 console. Use the name
RedshiftDemoand the placement strategyCluster.
- Click the launch icon below to begin the installation of Teradata. Please note that this is only needed if you are performing the Teradata Migration demo for a customer. You still need to run the main Cloud Formation template from here. Enter the following values for parameters:
| Parameter Name | Value to enter |
|---|---|
| DBC Password | dbc (you must select this password) |
| VPC | VpcId that you noted earlier from running the main Cloud Formation template |
| System Timezone | America/New_York |
| Number of Nodes | 2 |
| Capacity Reservation | Leave this blank |
| Database Subnet | SubnetAPublic that you noted earlier from running the main Cloud Formation template |
| Database Placement Group | RedshiftDemo |
| Remote Access From | 10.0.0.0/16 |
| AWS Key Pair | Create or choose any key pair (make sure you have the associated pem file) |

Capture the following parameters from the launched Teradata CloudFormation template as you will use them in the demo.
| Reference Name | Value or where to find it |
|---|---|
| TeradataDatabaseServer | From the EC2 Console note the Public DNS (IPv4) of the Teradata instance that ends in SMP001-01 |
| TeradataServerPort | 1025 |
| TeradataDatabaseUser | dbc |
| TeradataDatabaseUserPassword | dbc |
| TeradataDatabaseName | adventureworksdw |
Load Data into Teradata
Next step is to load data into the Teradata. SSH into the TeradataDatabaseServer noted above and execute the following commands. They should not take more than a few minutes to execute. Verify that it ran without errors in the log file.
curl https://redshift-demos.s3.amazonaws.com/adventureworksdw.zip -o /home/ec2-user/adventureworksdw.zip
sudo chmod 777 /home/ec2-user/adventureworksdw.zip
unzip -u /home/ec2-user/adventureworksdw.zip -d /home/ec2-user/
cd /home/ec2-user/samples
chmod 777 _install.btq
chmod 777 _install.log
bteq < _install.btq > _install.log
At this point your Teradata source database is up and running and has been loaded with data. Proceed to your demo.
Client Tool
If you do not have a Remote Desktop client installed, you can use the instructions at this link to do so.
Challenge
Marie has been asked to migrate Red Imports on-premises Teradata data warehouse (Adventureworksdw) to Amazon Redshift in their AWS account. The Teradata data warehouse hosts business critical applications in PL/SQL. She also needs to ensure that Redshift data warehouses are in sync until all legacy applications are migrated to Redshift. Marie will need to convert the DDL structures and PL/SQL code into Redshift and perform full load from Teradata to Redshift. Marie will also need to setup updates from Teradata to Redshift to keep the data in sync. Marie will accomplish these tasks by doing the following:
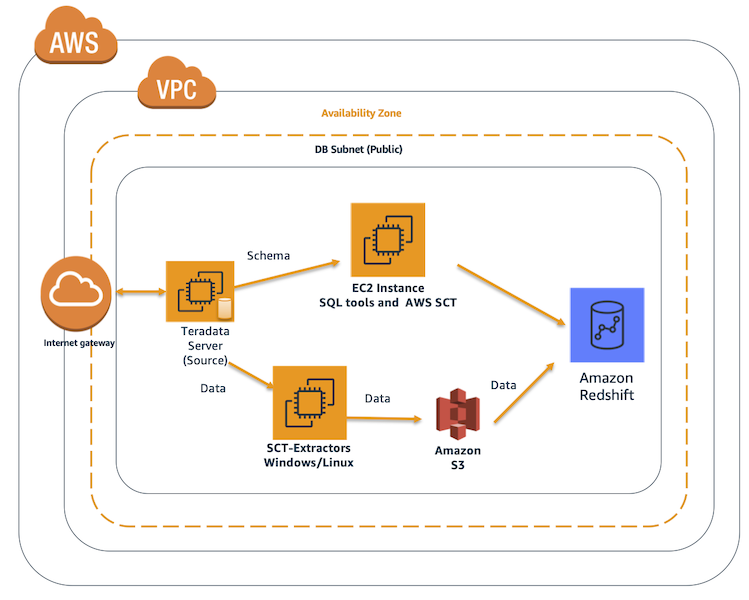
Convert the Schema
| Say | Do | Show |
|---|---|---|
|
Marie logs into her workstation, in which she has already installed the required tools like schema conversion tool for the migration, SQL Workbench to connect to Redshift, SQL Workbench to connect to Teradata |
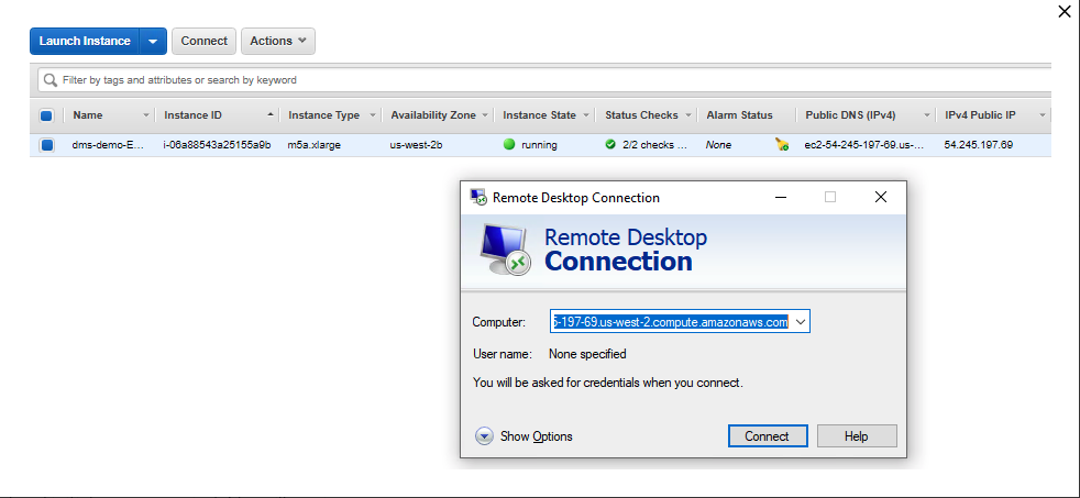
The cloud formation template deploys a Windows EC2 instance, with required drivers and softwares for AWS SCT, SQL Workbench. Before the demo, please note down all relevant parameters from the CloudFormation output that you’ll need to use in the subsequent steps. Connect to that EC2 instance using Remote Desktop client. |
|
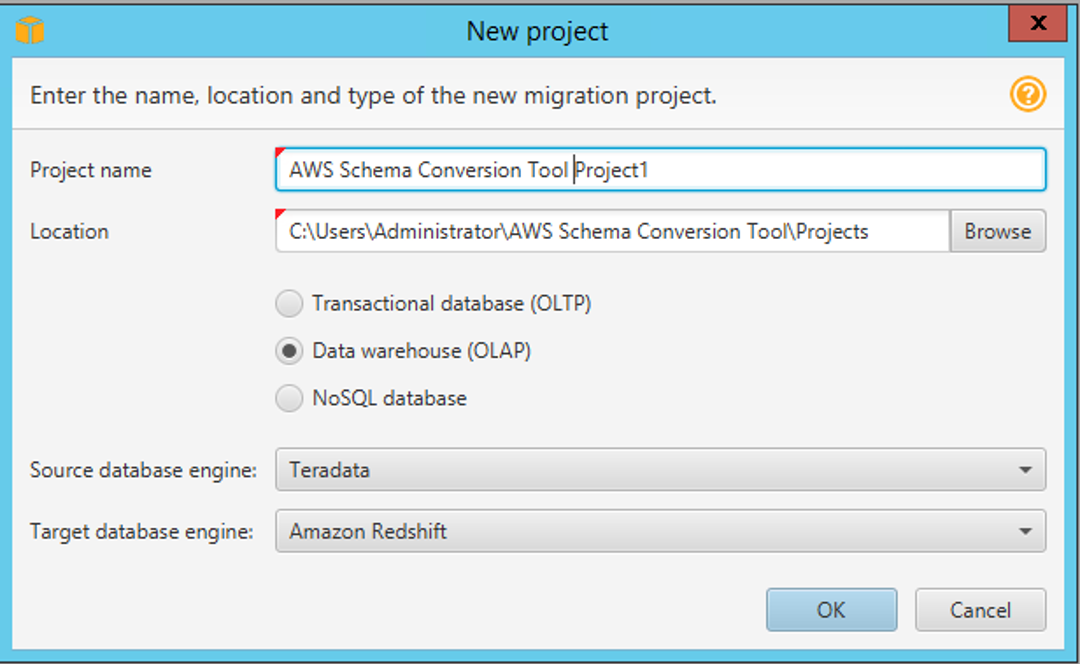
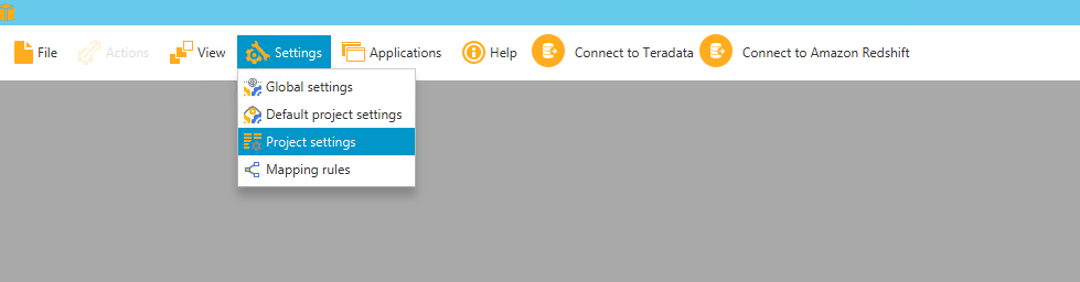
| Once logged in, she opens AWS Schema Conversion Tool(SCT) and initiates a new project. She will select OLAP as it’s a data warehousing from Teradata to Redshift |
From the Start Menu, search for and launch Then click |
|
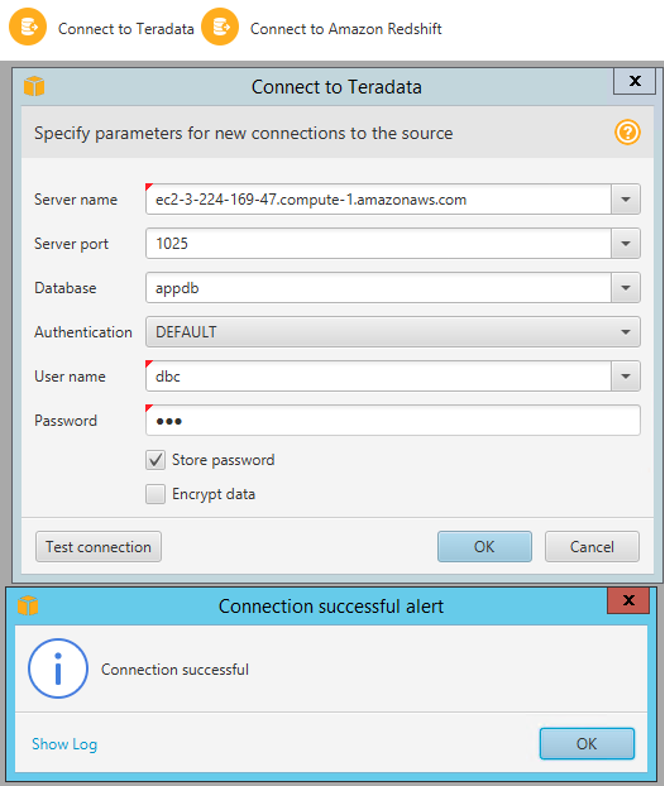
| Now she needs to configure the connectivity for Teradata OLAP database |
Click Click |
|
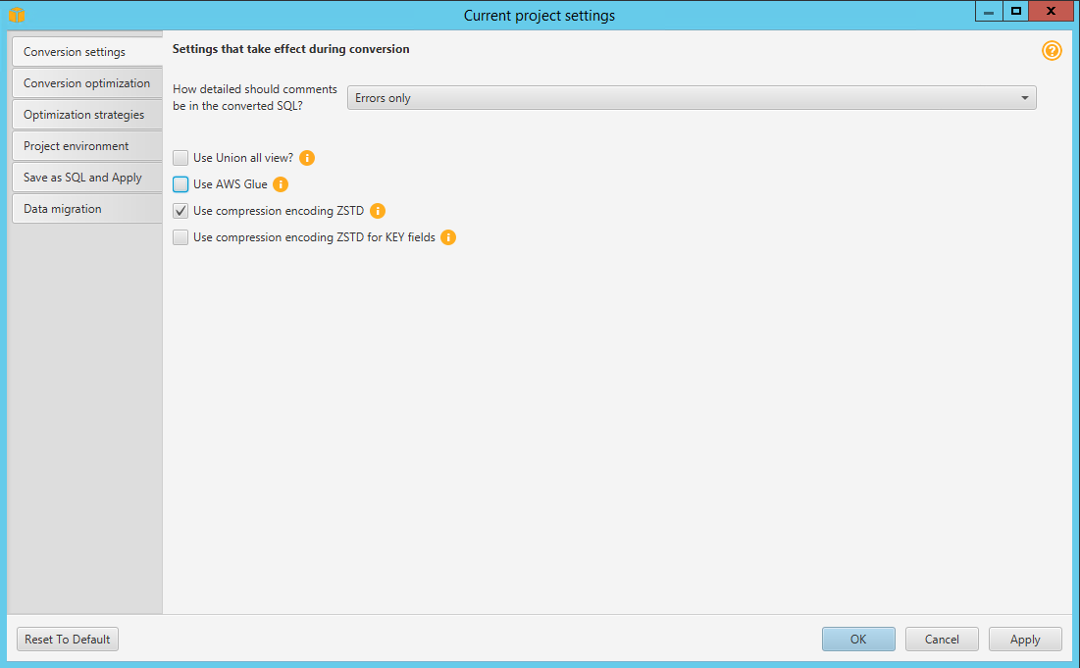
| By default, AWS SCT uses AWS Glue for ET/migration. Marie may not be using it for now. So, let’s disable it. |
Click |
|
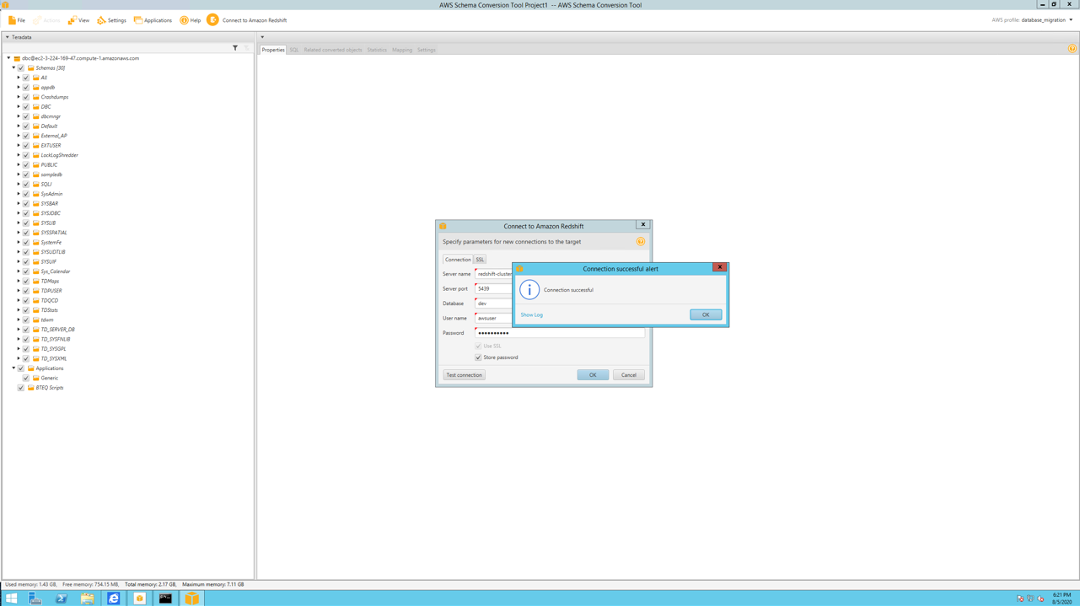
| Now, Marie needs to configure the connectivity for the Redshift target system. |
On the main project page, click Connect to Amazon Redshift. Enter the following parameters in the ensuing dialog box.
Click |

|
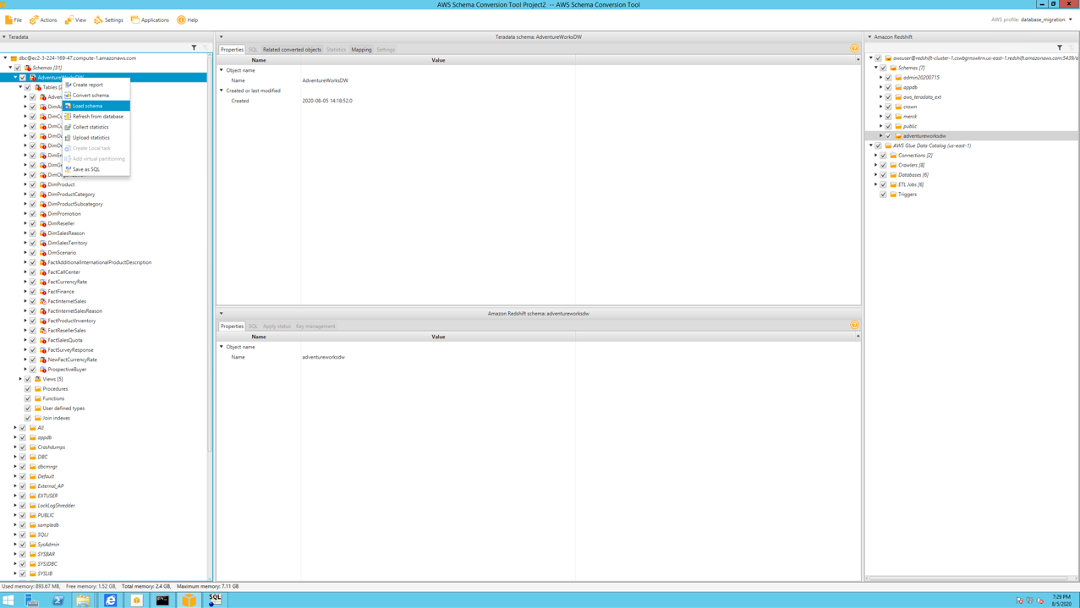
On the left hand side, she can see all the objects in Teradata and all Redshift objects on the right hand side. She may now convert the Teradata schema AdventureworksDW
|
Right click on |
|
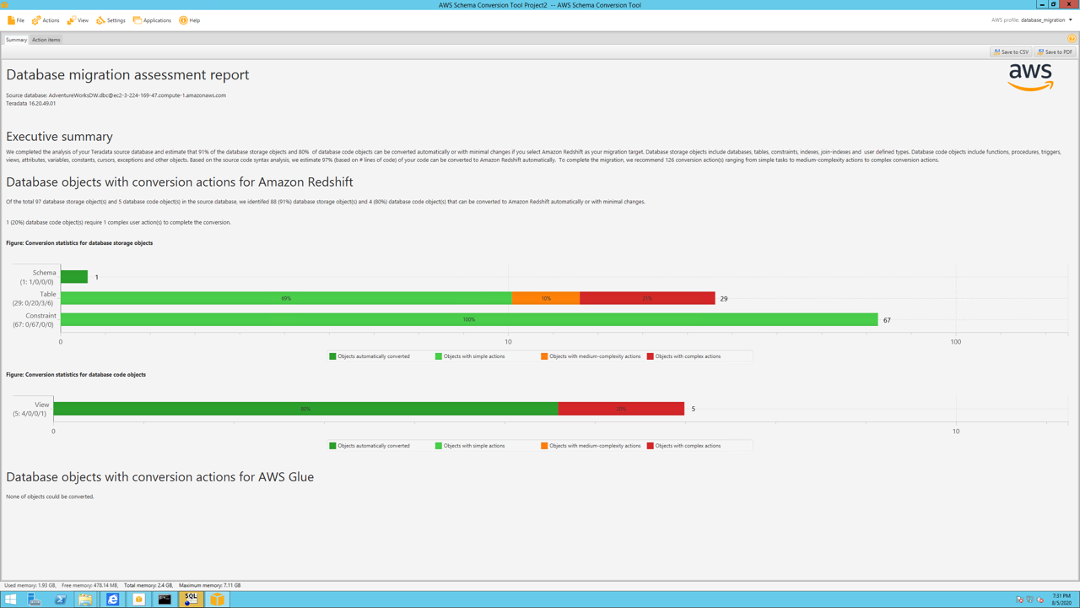
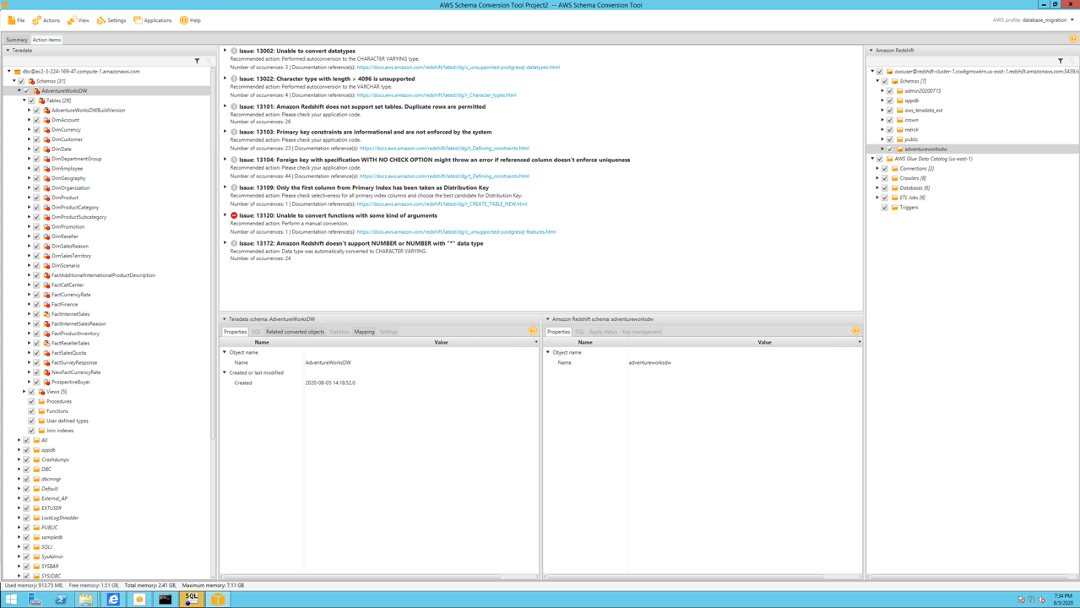
| All Teradata objects got converted to Redshift syntax now. But there are some objects showing in Red, which essentially means that SCT couldn’t fully convert these objects. Marie can view an assessment summary for the migration to dive deeper into the incompatibilities and issues. |
Click |
|
| She can now look at specific actions she would need to take for the tables / constraints / views that could not be converted to Redshift |
On the Migration assessment report screen, she can select the |
|
|
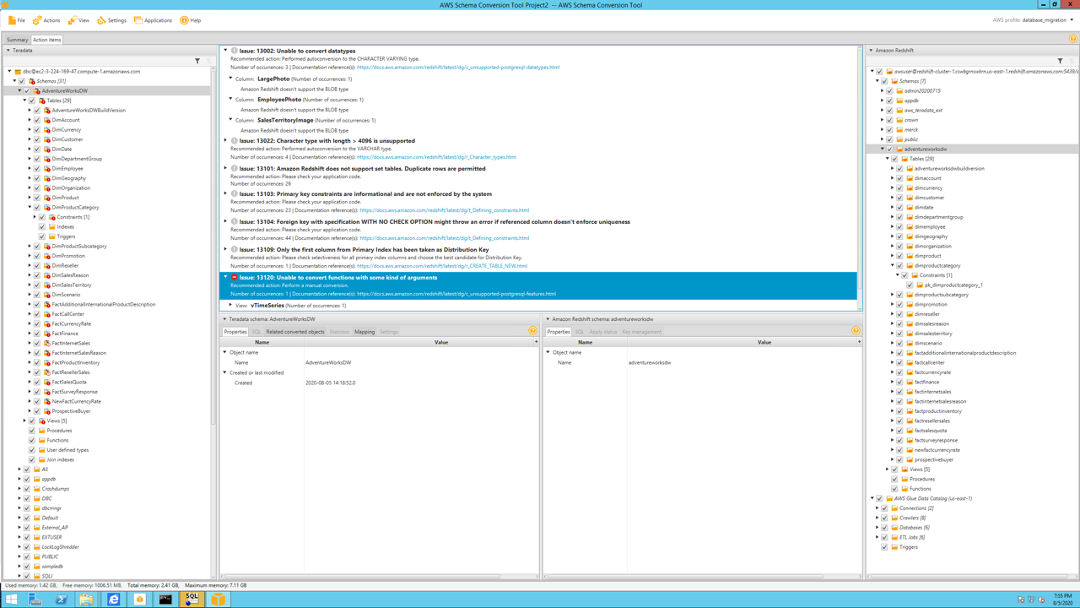
Marie goes through the issues and identifies any issues that would be of concern.
Some examples are binary data in BLOB format is not supported by Redshift. SCT automatically converted the data type of varying but raised an issue. There are vendor supplied stored procedures and functions that could not be converted, SCT cannot perform a conversion and errors out. Marie will need to investigate these issues and fix these errors manually. |
Clicking the issues with a red icon in front of them shows the details to analyze manual conversion |
|
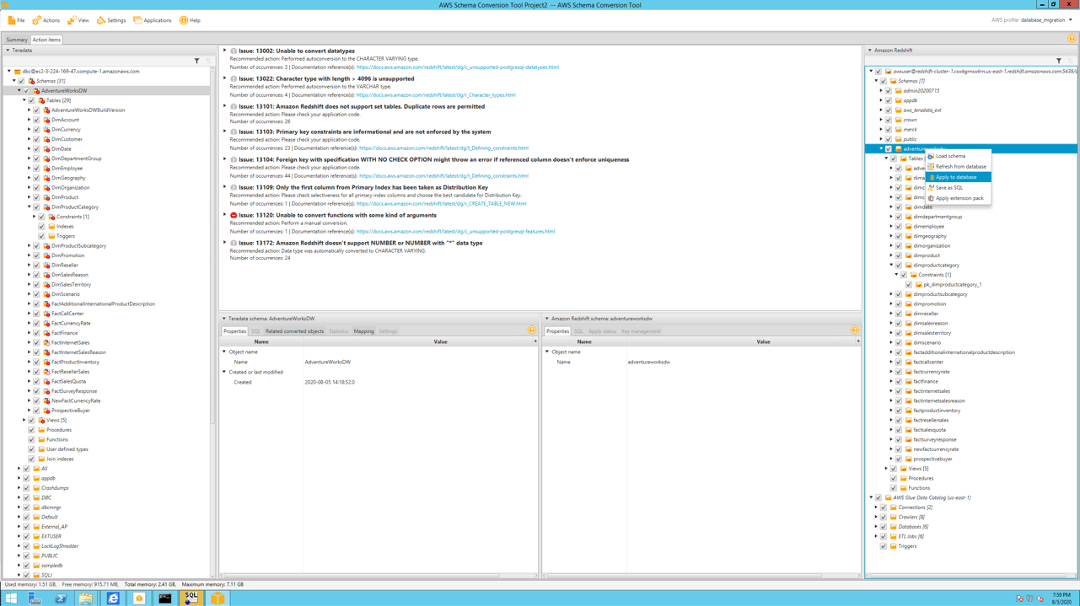
| Lets assume Marie addressed the key issues and we are not ready to move forward with the migration to Redshift. She will commit the Schema to Redshift. |
Click the adventureworksdw schema on the right side and select Apply to database. Then select Yes on the Are you sure? prompt.
|
|
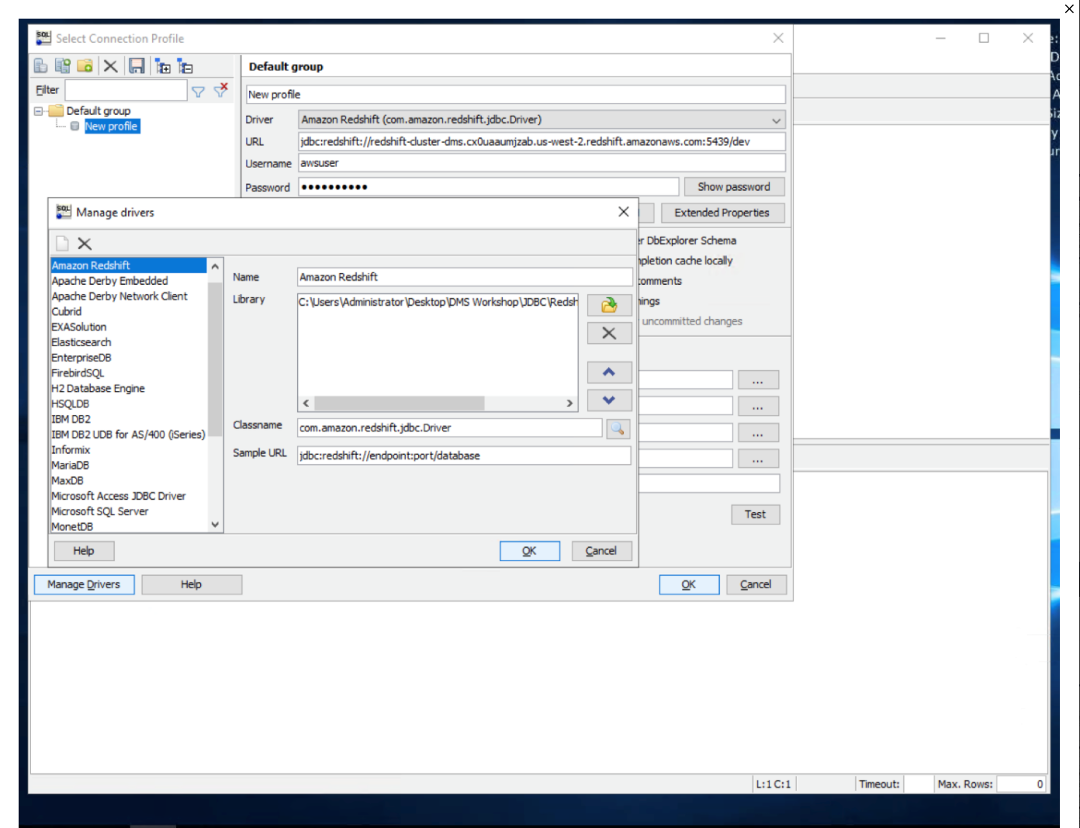
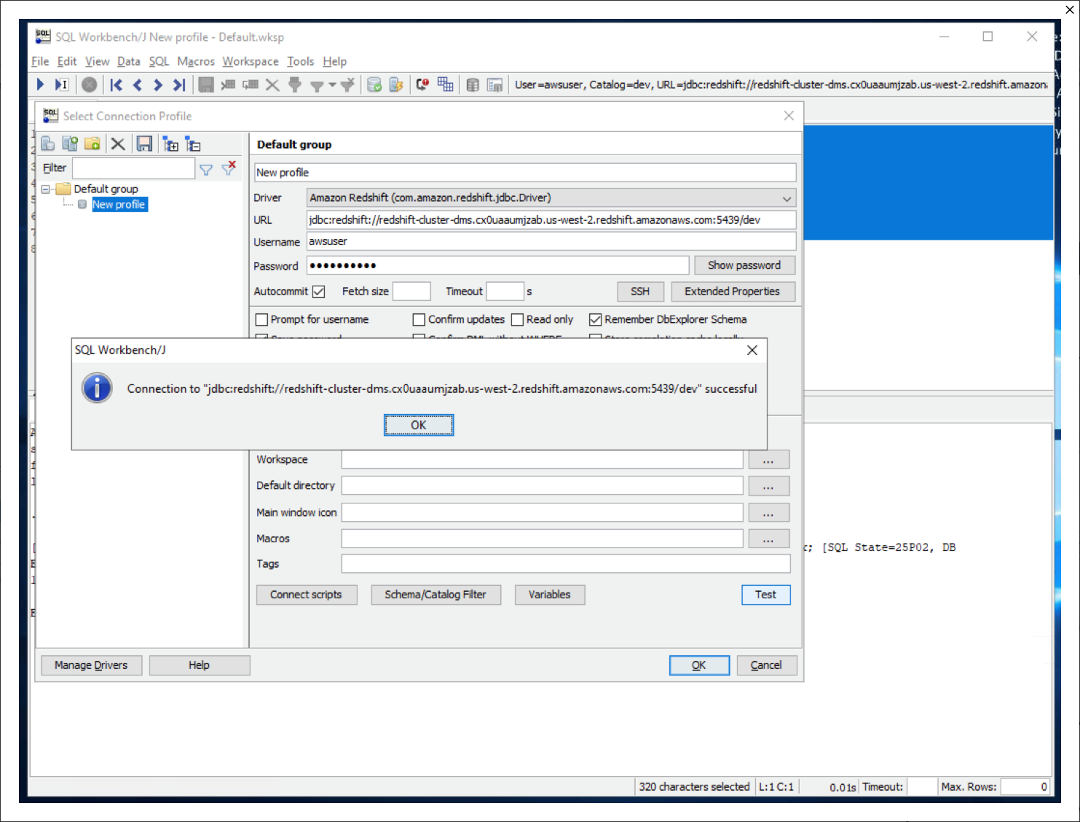
| Marie will need to verify that the objects have been created in Redshift using an IDE like SQL Workbench/J, which is an open source JDBC IDE. She will need to provide the driver path for Redshift. |
Open SQL Workbench/J from the taskbar shortcut, which opens the new connection window. In that, click |
|
| Marie will provide the connectivity settings |
On the connectivity screen, enter these inputs: Click |
|
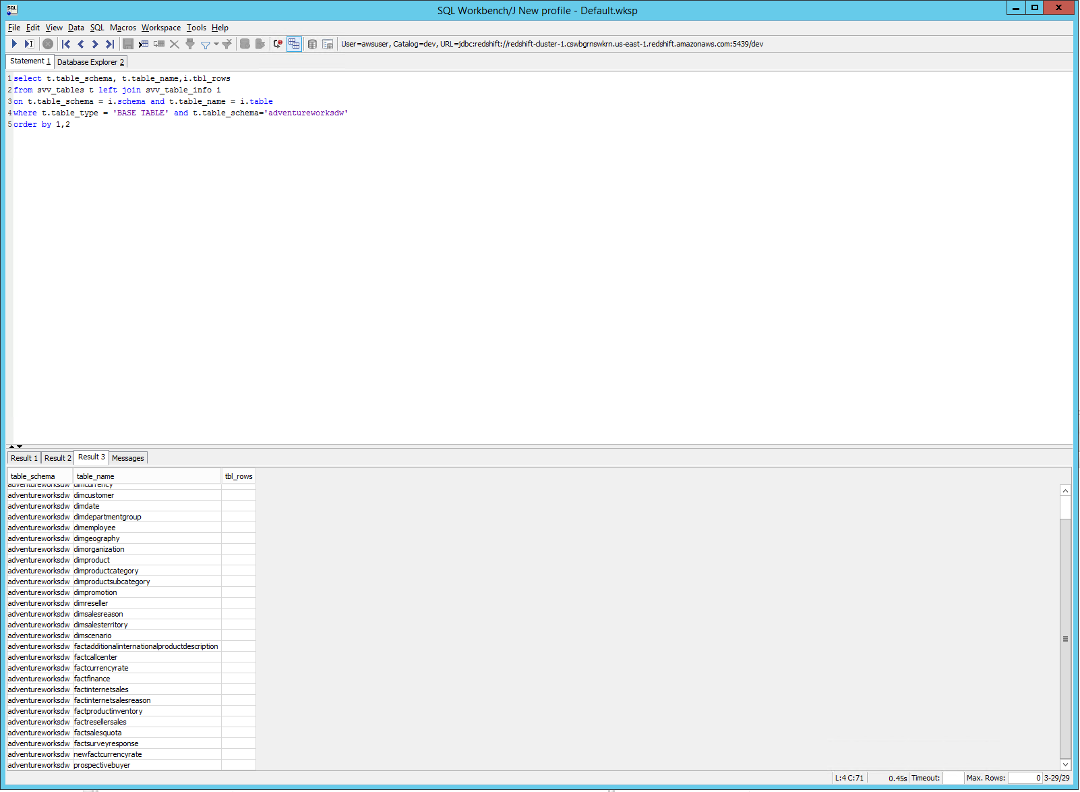
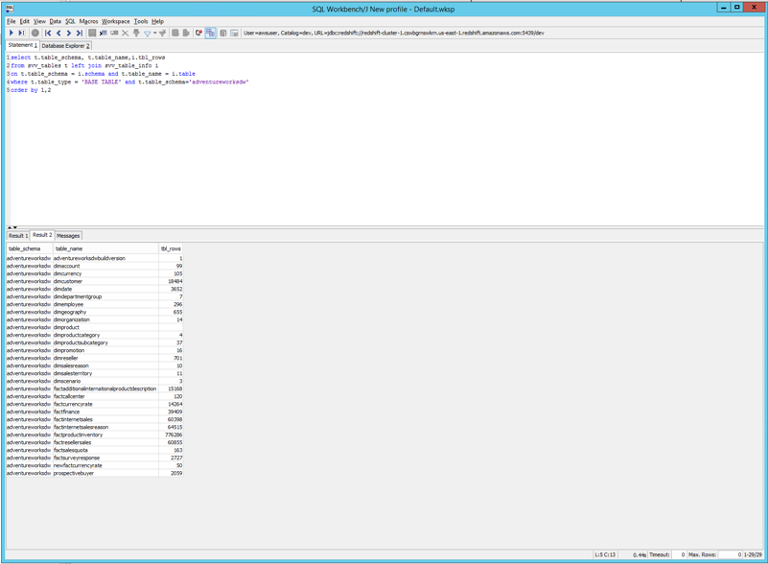
Marie can now check what adventureworksdw schema contains. The Schema for all the Teradata tables have been successfully migrated to the redshift schema, but there are no records in it yet. AWS SCT schema conversion tool took care of the schema conversion and application.
|
Execute this SQL in SQL Workbench/J. The result should show all the table schemas converted from Teradata. |
|
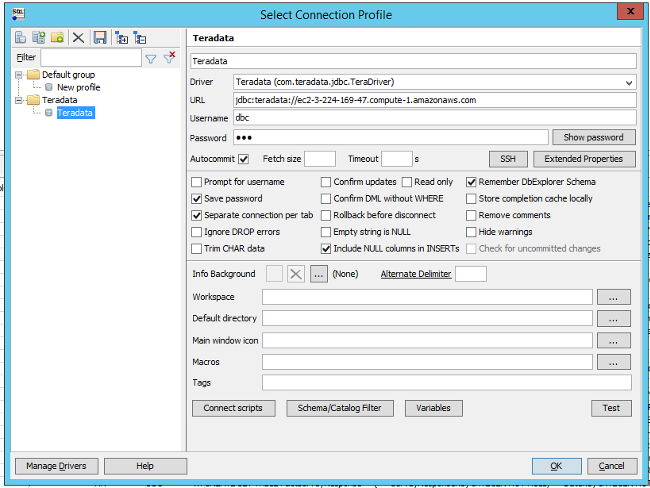
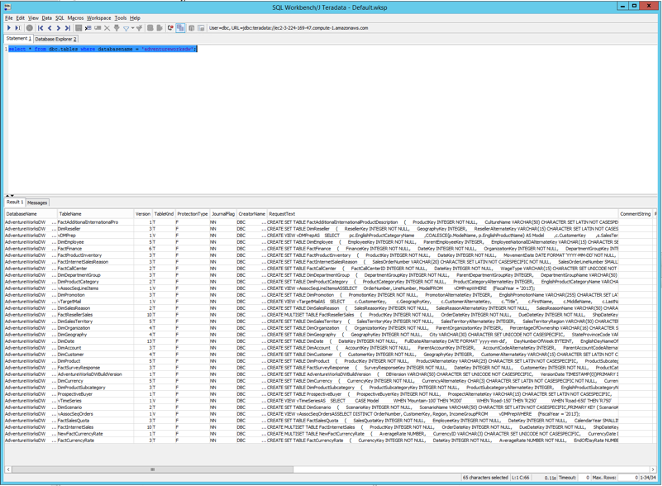
| Marie can now connect to Teradata (source) and run a query to check if all the tables have been converted to Redshift. |
On the connectivity screen with a new connection, select inputs like before but using these values:
Click |
|
Migrate the data
| Say | Do | Show |
|---|---|---|
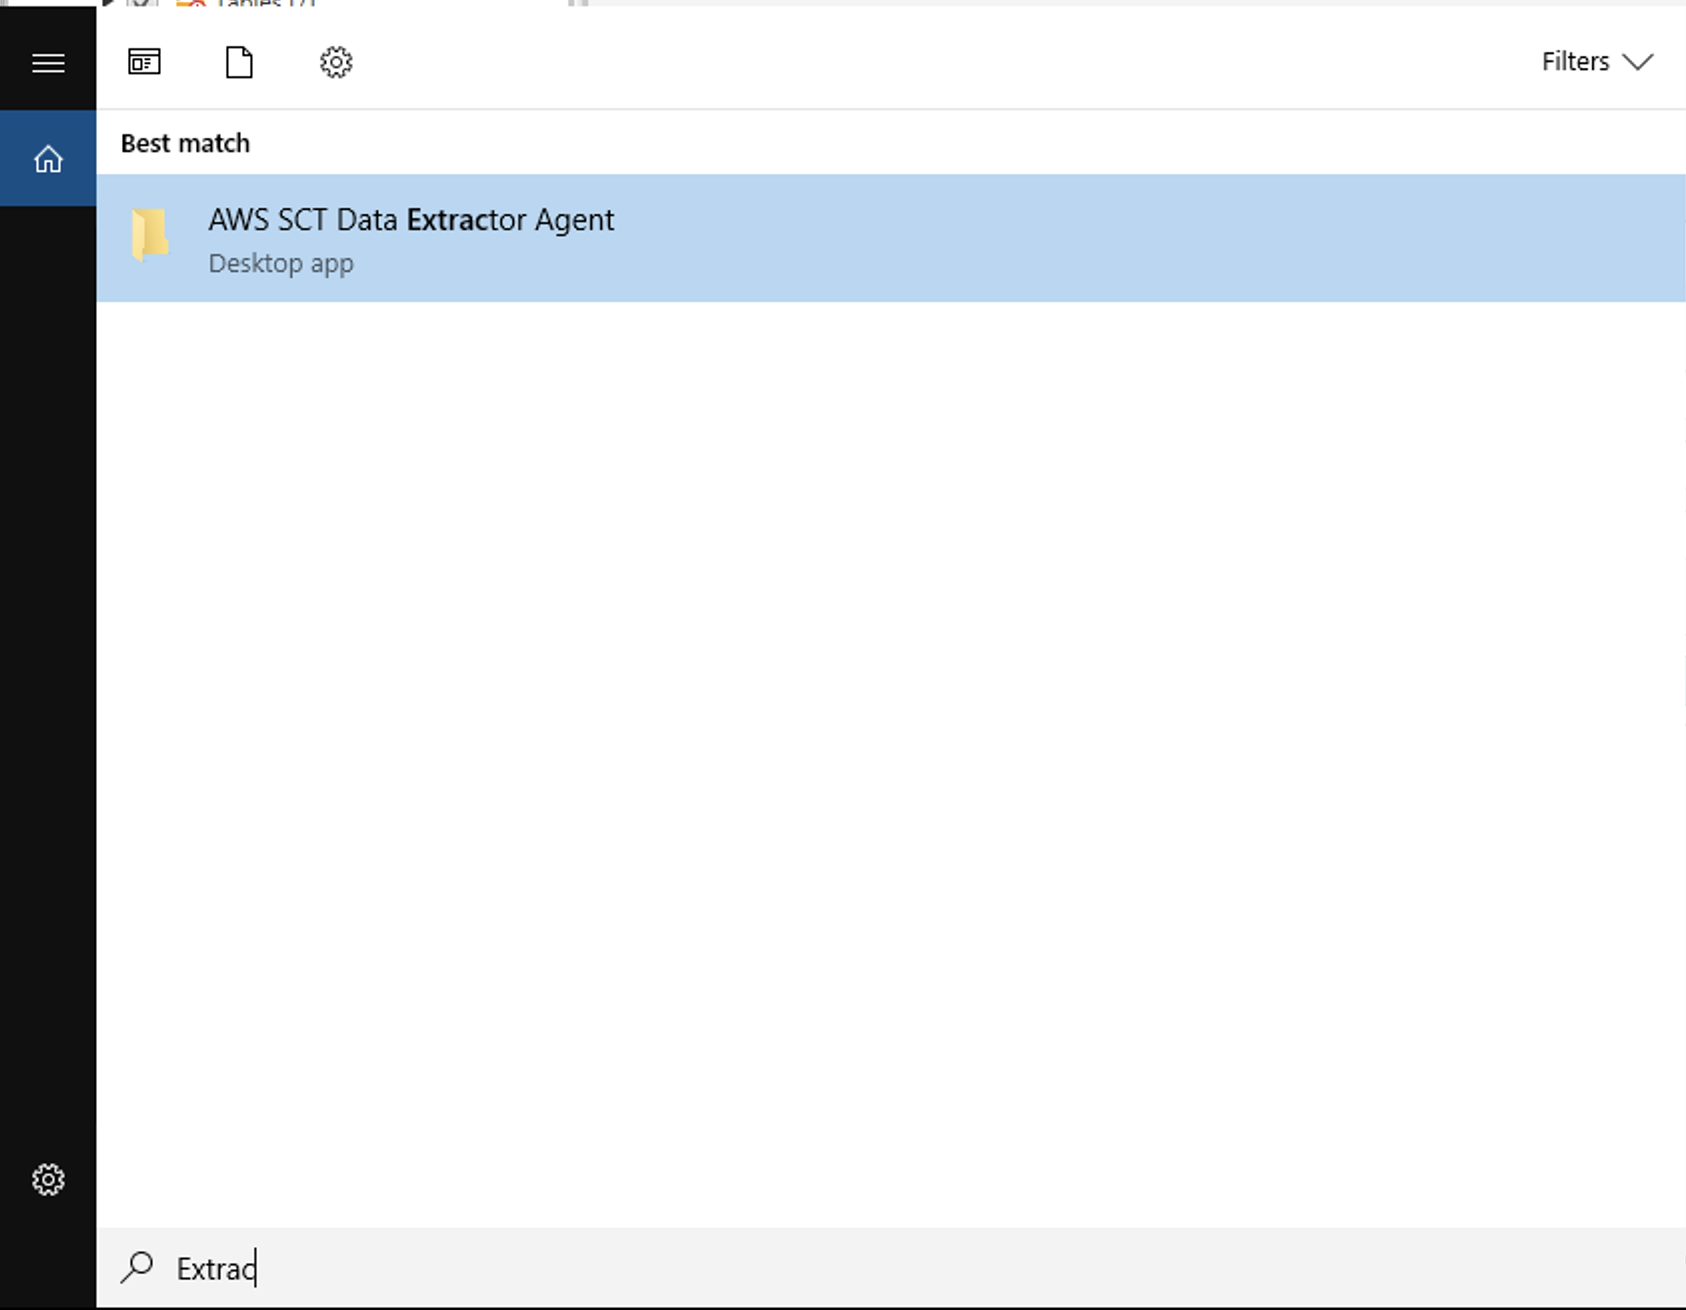
| At this point, the Teradata schema has been successfully converted and applied in Redshift but there is no data in those tables. Marie will configure SCT Extractor properties file with Teradata properties to begin the task of migrating the data next. |
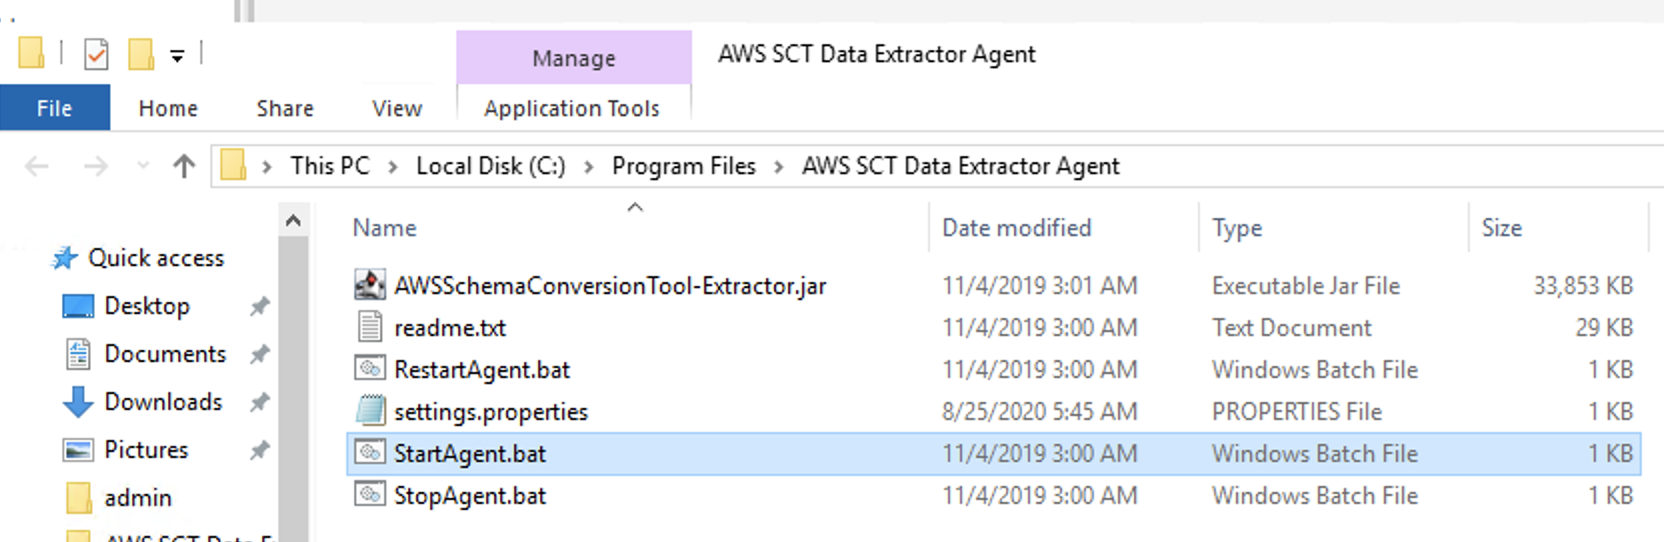
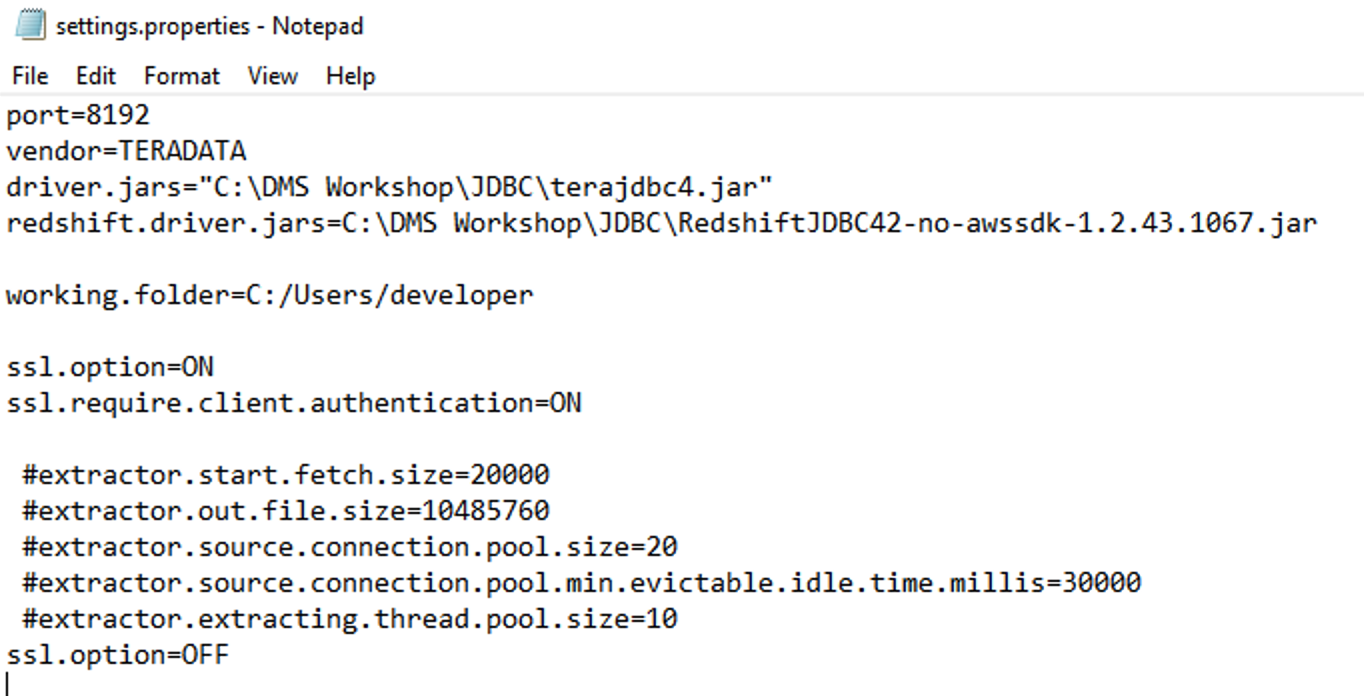
Search for AWS SCT Data Extractor Agent in Windows Start and launch the program. When the AWS SCT Data Extractor Agent folder opens, click on settings.properties file.
Replace the contents of the file with the text given below Save and close the file. Right click on |
|
| Now that the SCT Extractor Agent is running on this EC2 instance, Marie will use it to begin the data migration. Marie will now configure the SCT Extractor to perform a one time data move. When dealing with large volume of data multiple extractors can be used for migrating data. She will register the SCT Extractor to the SCT tool. |
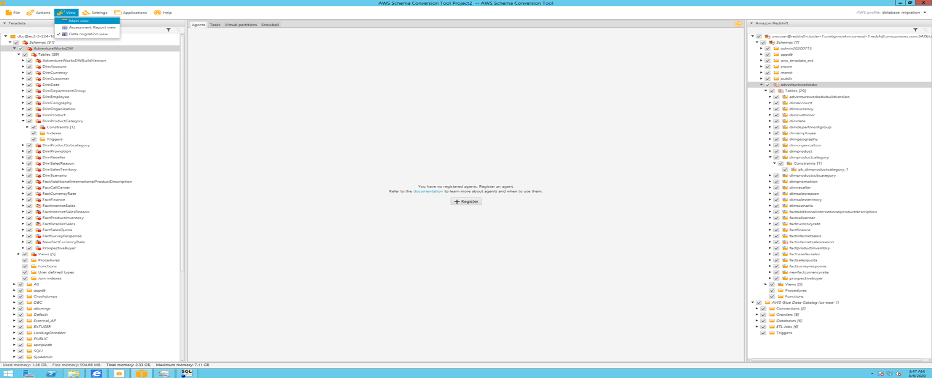
On the AWS Schema Conversion Tool View > Data migration view then click the + sign to register an agent.
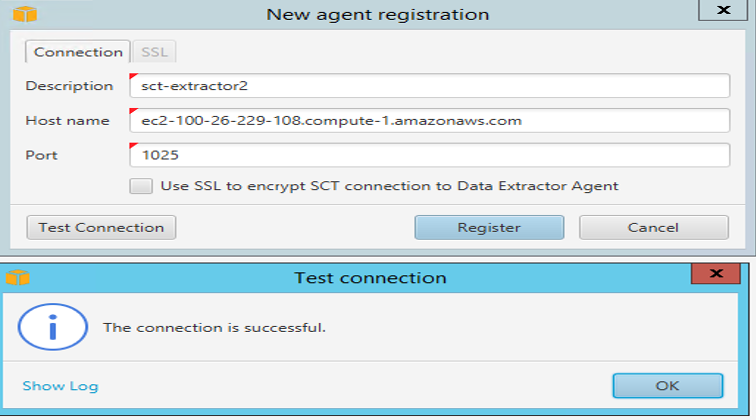
New agent registration screen would pop-up. Fill in the details Click One agent can be registered to one project at a time. To re-use same agent you will need to un-register from existing project and then register again. |
|
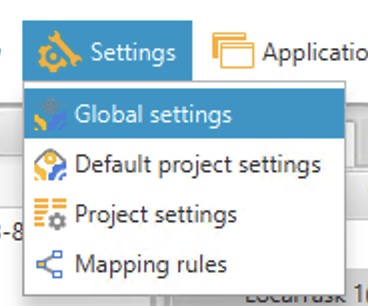
| Marie will then configure connection profile for SCT to access S3 |
Go to Settings on top and Global Settings > AWS Service Profiles then enter the following parameters:
Click the
The user associated with the Access Key MUST have read/write access to the S3 bucket provided AND the Redshift Cluster or the migration will fail. |
|
|
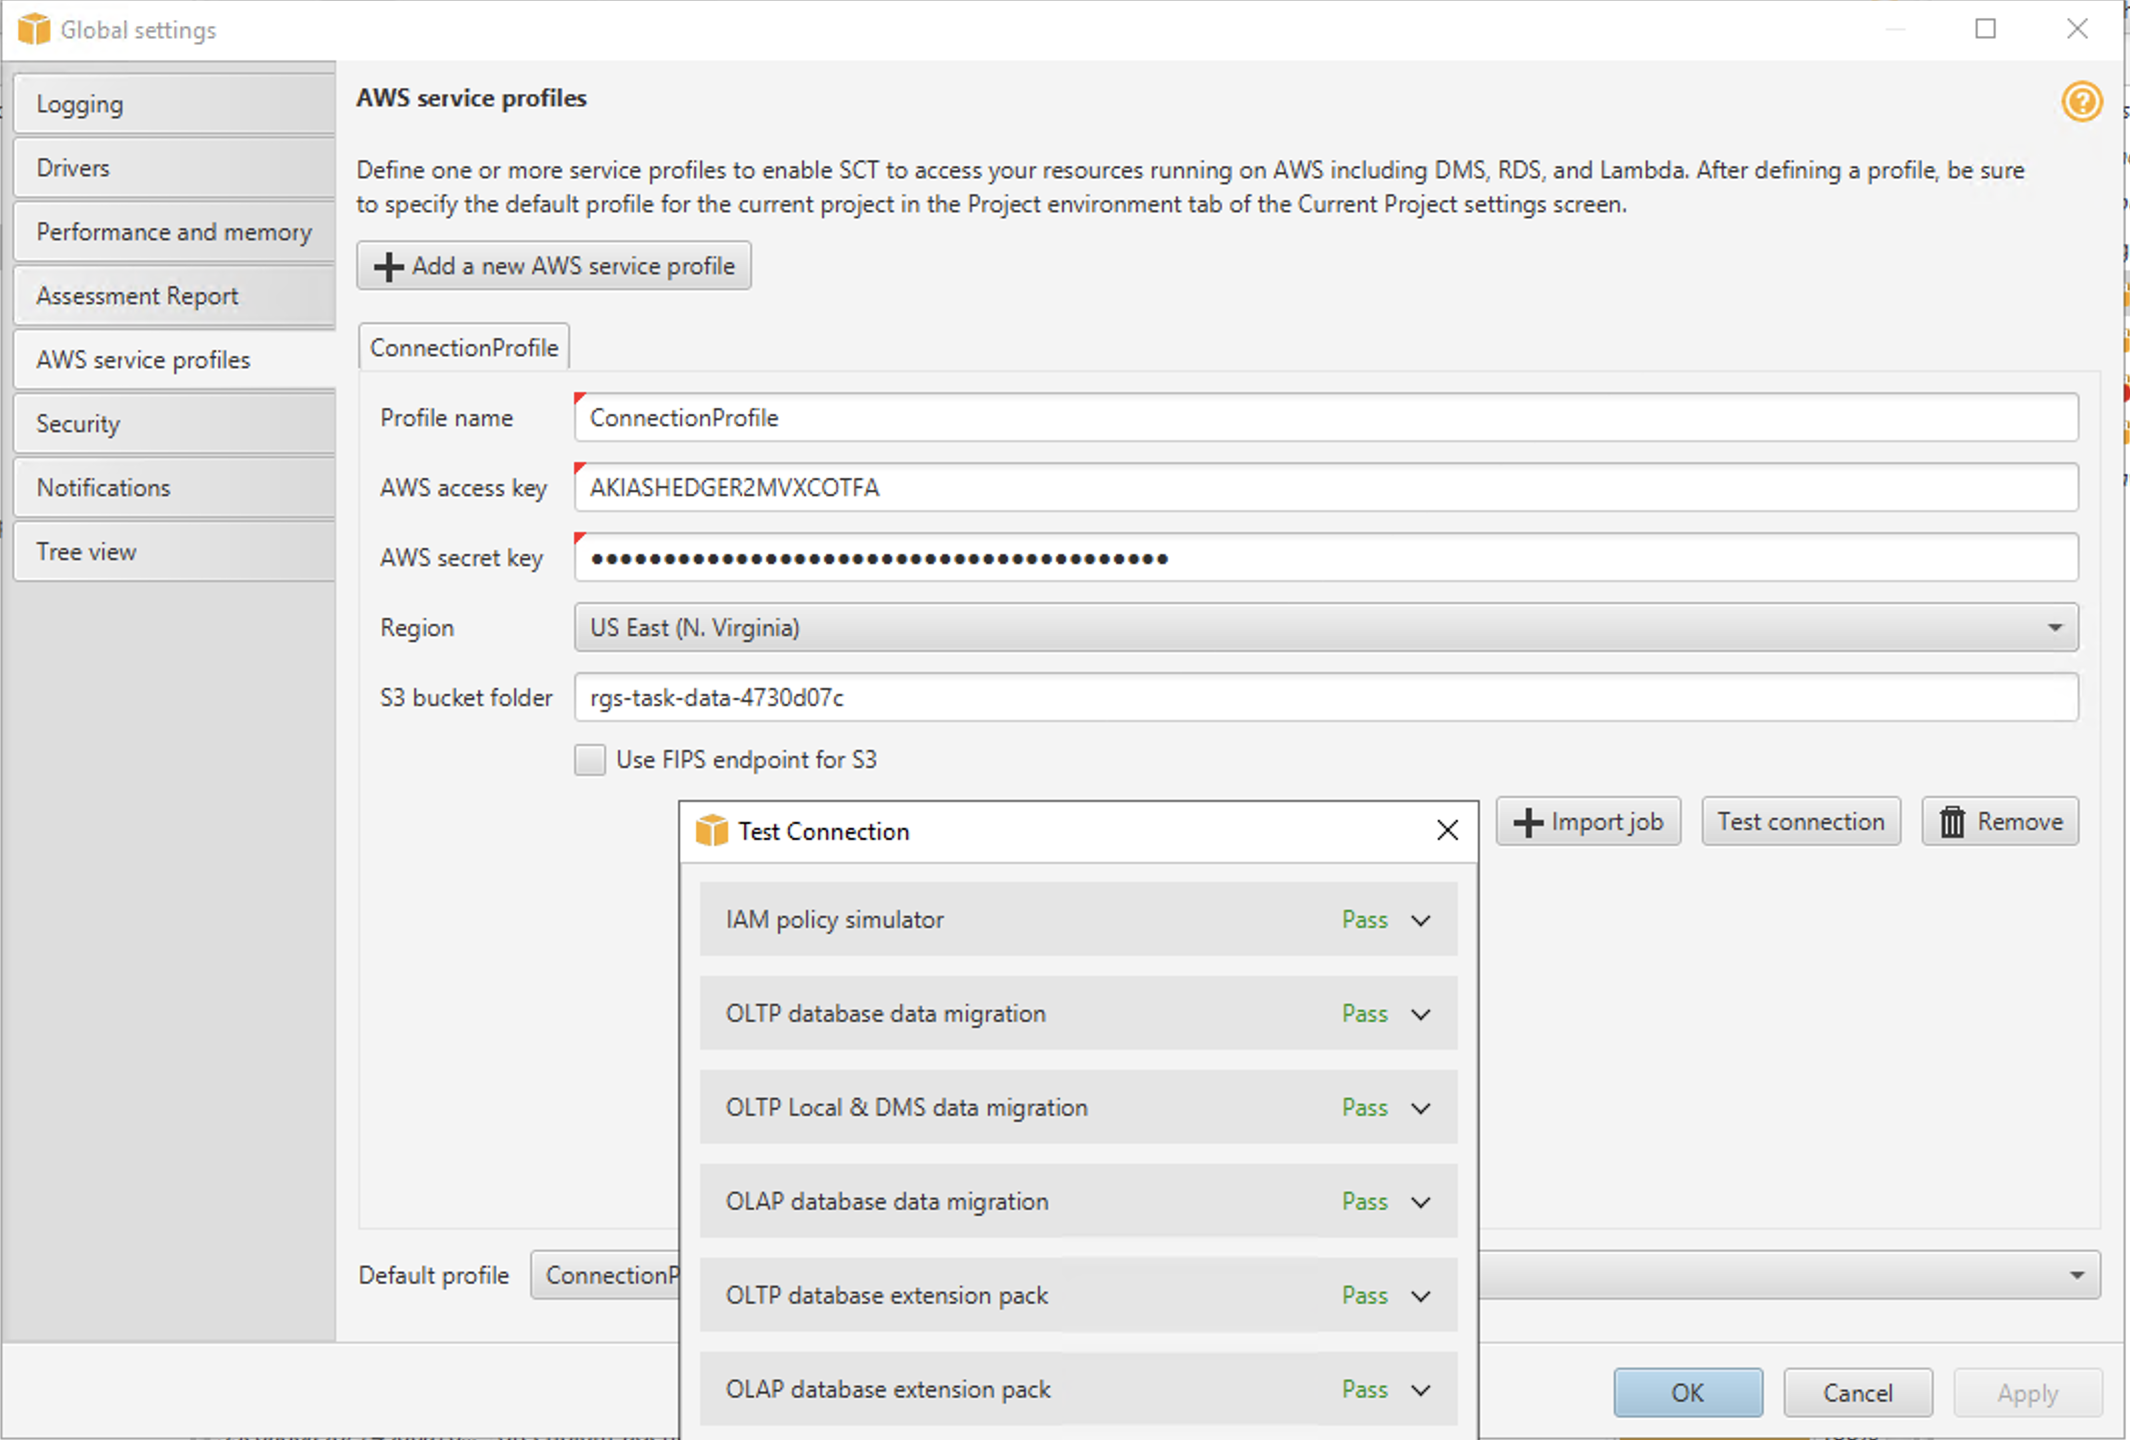
Marie will create a task for extractor to extract data, upload to S3 bucket and copy the data into tables created on Redshift. |
Right click tables under adventureworksdw on left pane (Teradata) > Create local task
A window with create local task details should pop up:
Click the |

|
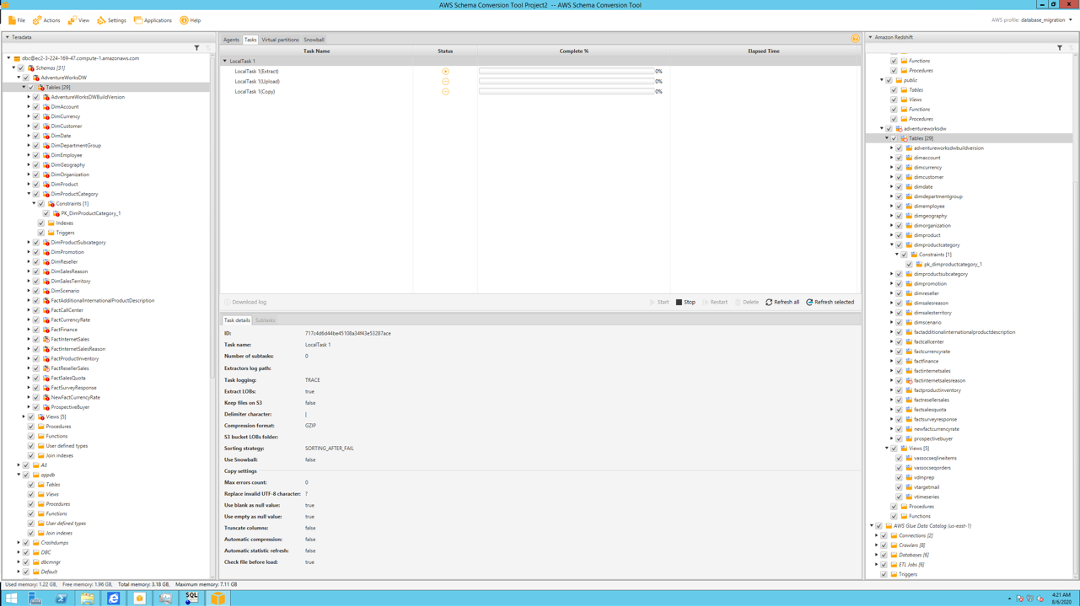
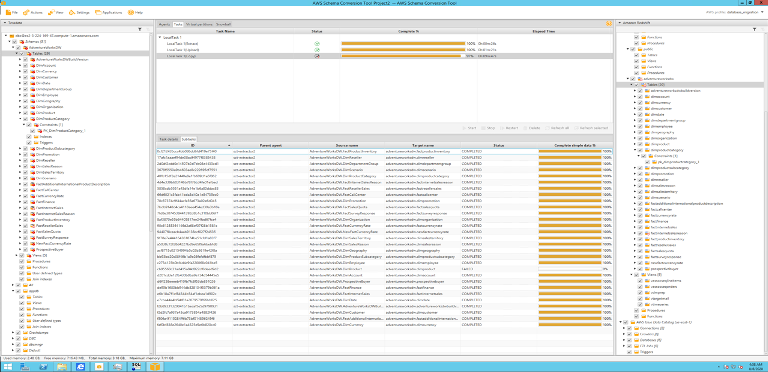
| Marie will execute the created task and monitor the data migration. |
Click the Start button on the Task monitor pane
|
|
|
Mary can monitor monitor status of tasks and % complete and tables which were loaded successfully. She will also need to verify the count of records loaded in the Redshift database using SQL. There might be errors of fails during Extract/Upload/Copy and Marie will need to investigate. In this Teradata demo the |
Click each Task to get a detailed breakdown of activity completed.
Connect to SQL Workbench/J and execute the following query: |
|
Keep the data in sync
Teradata does not support log monitoring for CDC. We are preparing, testing and will publish a Teradata migration script and steps here when it’s ready. Check back again soon!
Before you Leave
To reset your demo, drop the tables created by executing the following SQL statement in Redshift.
drop schema adventureworksdw cascade;
If you are done using your cluster, please think about deleting the CFN stack or to avoid having to pay for unused resources do these tasks:
- pause your Redshift Cluster
- stop the Oracle database
- stop the DMS task