Salesforce Data Ingestion using Appflow
Demo Video

Before you Begin
Capture the following parameters from the launched CloudFormation template as you will use them in the demo.
https://console.aws.amazon.com/cloudformation/home?region=us-east-1#/stacks?filteringText=&filteringStatus=active&viewNested=true&hideStacks=false
- RedshiftClusterEndpoint
- RedshiftClusterPort
- RedshiftClusterDatabase
- RedshiftClusterUser
- RedshiftClusterPassword
- RedshiftClusterRoleName
- TaskDataBucketName
- EC2HostName
- EC2DeveloperPassword
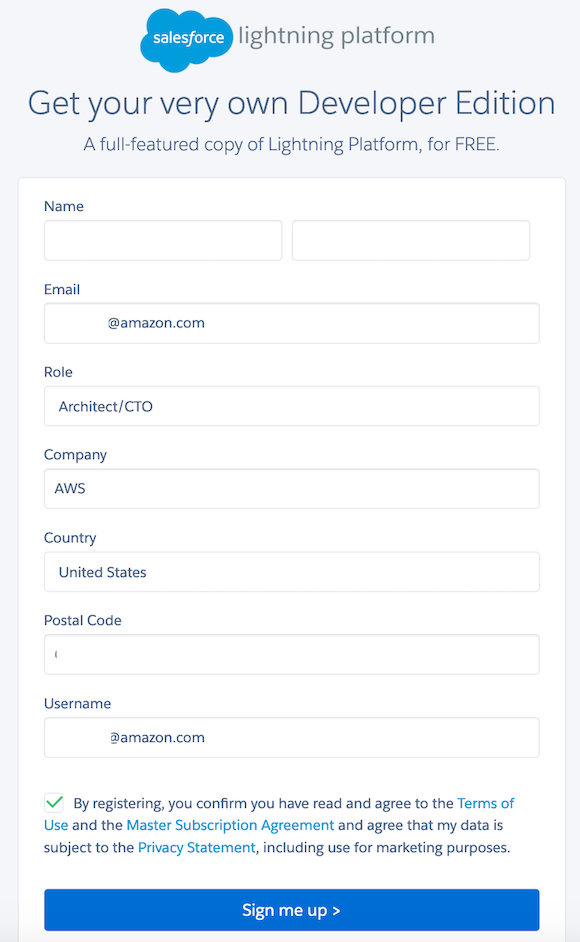
If you don’t have a free Salesforce developer account, please create one by following the below steps. Please note that you will need a “Developer” Account for this demo. Developer account supports API calls, whereas a basic salesforce account doesn’t.
Create a free Salesforce developer account by following the below steps
|
|
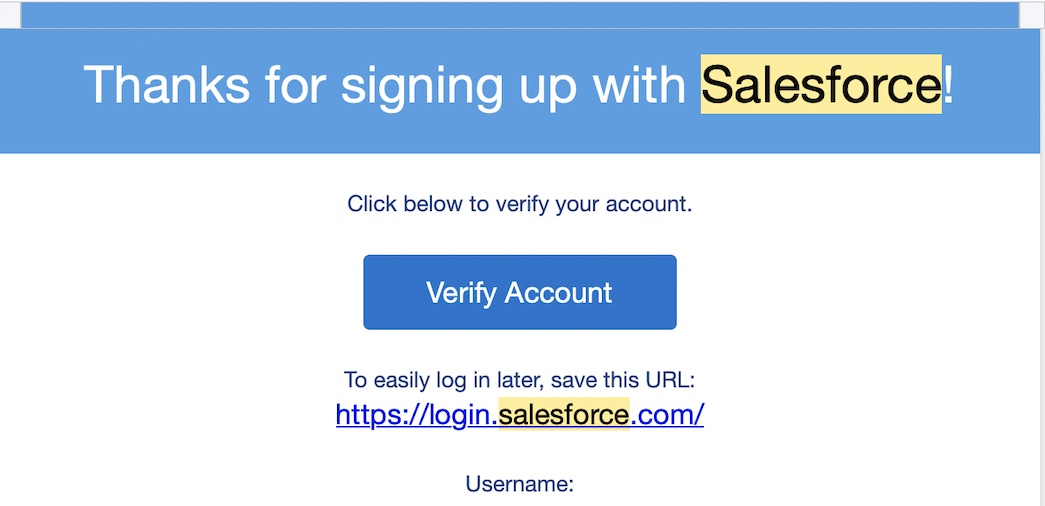
You will receive an email to verify your account.
Verify account |
|
Capture the below details related to your Salesforce developer account:
- Salesforce Developer Account Username
- Salesforce Developer Account Password
Client Tool
The screenshots for this demo will leverage the SQL Client Tool of SQLWorkbench/J. Be sure to complete the SQL Client Tool setup before proceeding.
Challenge
Marie is Red Import’s data engineer. She has been assigned a task to ingest Salesforce data into Amazon Redshift Data Warehouse inorder to run analytics on top of it. While ingesting data into Amazon Redshift, Marie has to perform basic validations to ensure data quality. In addition to performing validations, Marie needs to mask PII data. Also, Marie needs to apply filters on salesforce data inorder to ingest current year data only.
The architecture that Marie would follow is given below:
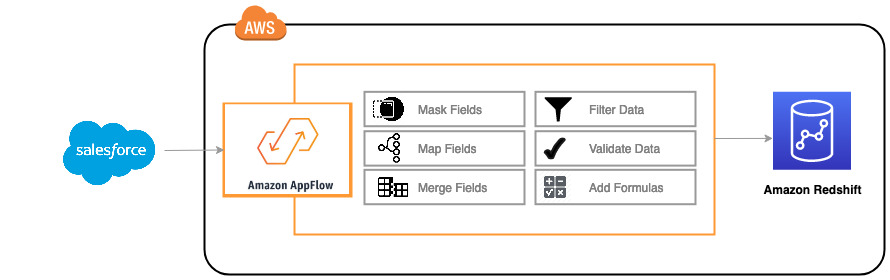
To solve this challenge, Marie will primary use Amazon AppFlow service to ingest data into Redshift. She follow the below steps:
- Create AppFlow connectors to Salesforce and Redshift
- Create tables in Redshift
- Create Appflow DataFlows from Salesforce to Redshift
- Execute AppFlow DataFlows
- Validate data in Redshift
Create Connectors
| Say | Do | Show |
|---|---|---|
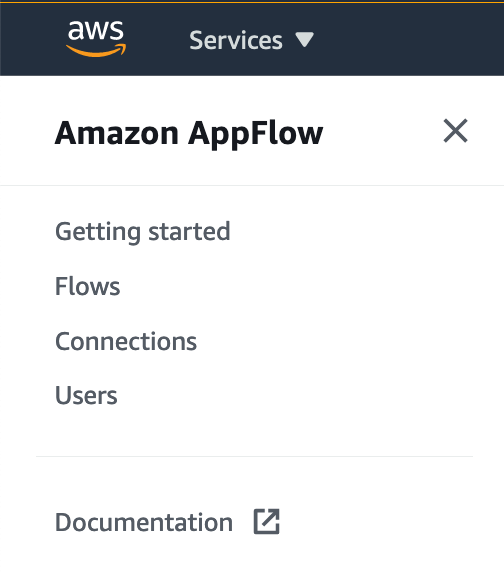
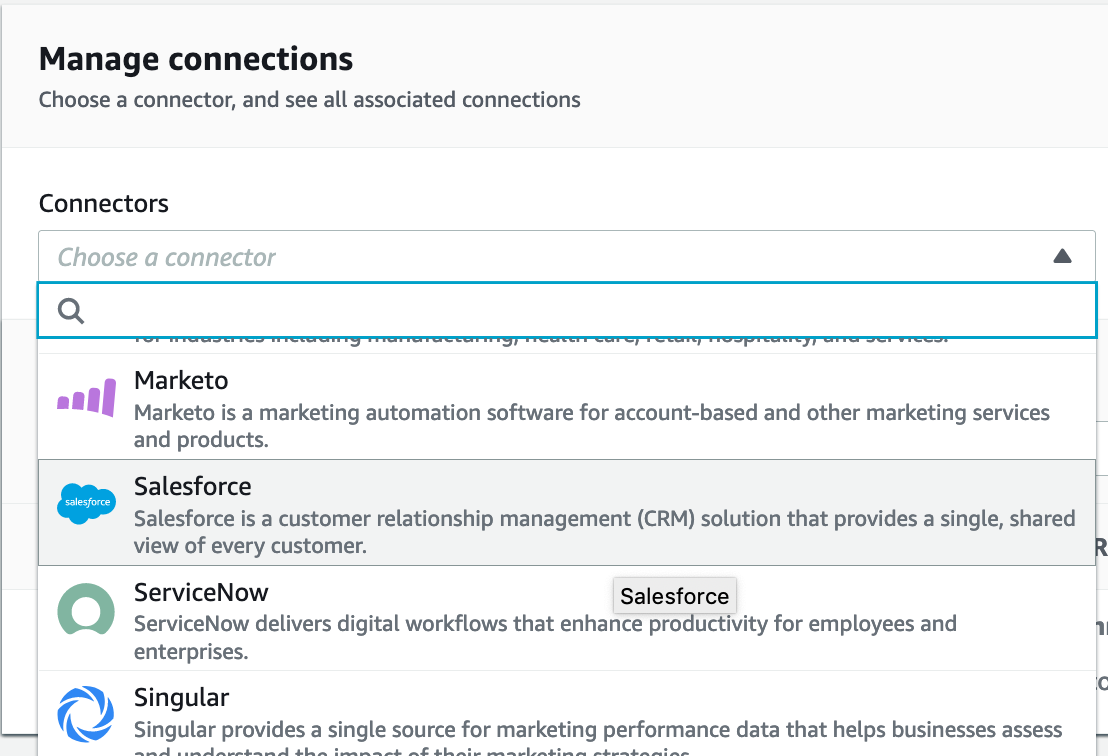
| Marie will go to AppFlow to create a connector to Salesforce |
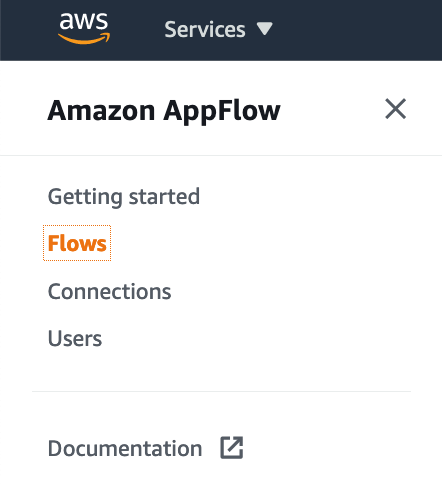
Select Appflow from the All Services menu
Click on the expand menu icon on the left From the Menu, click on From the Connectors drop down, choose Click on |


|
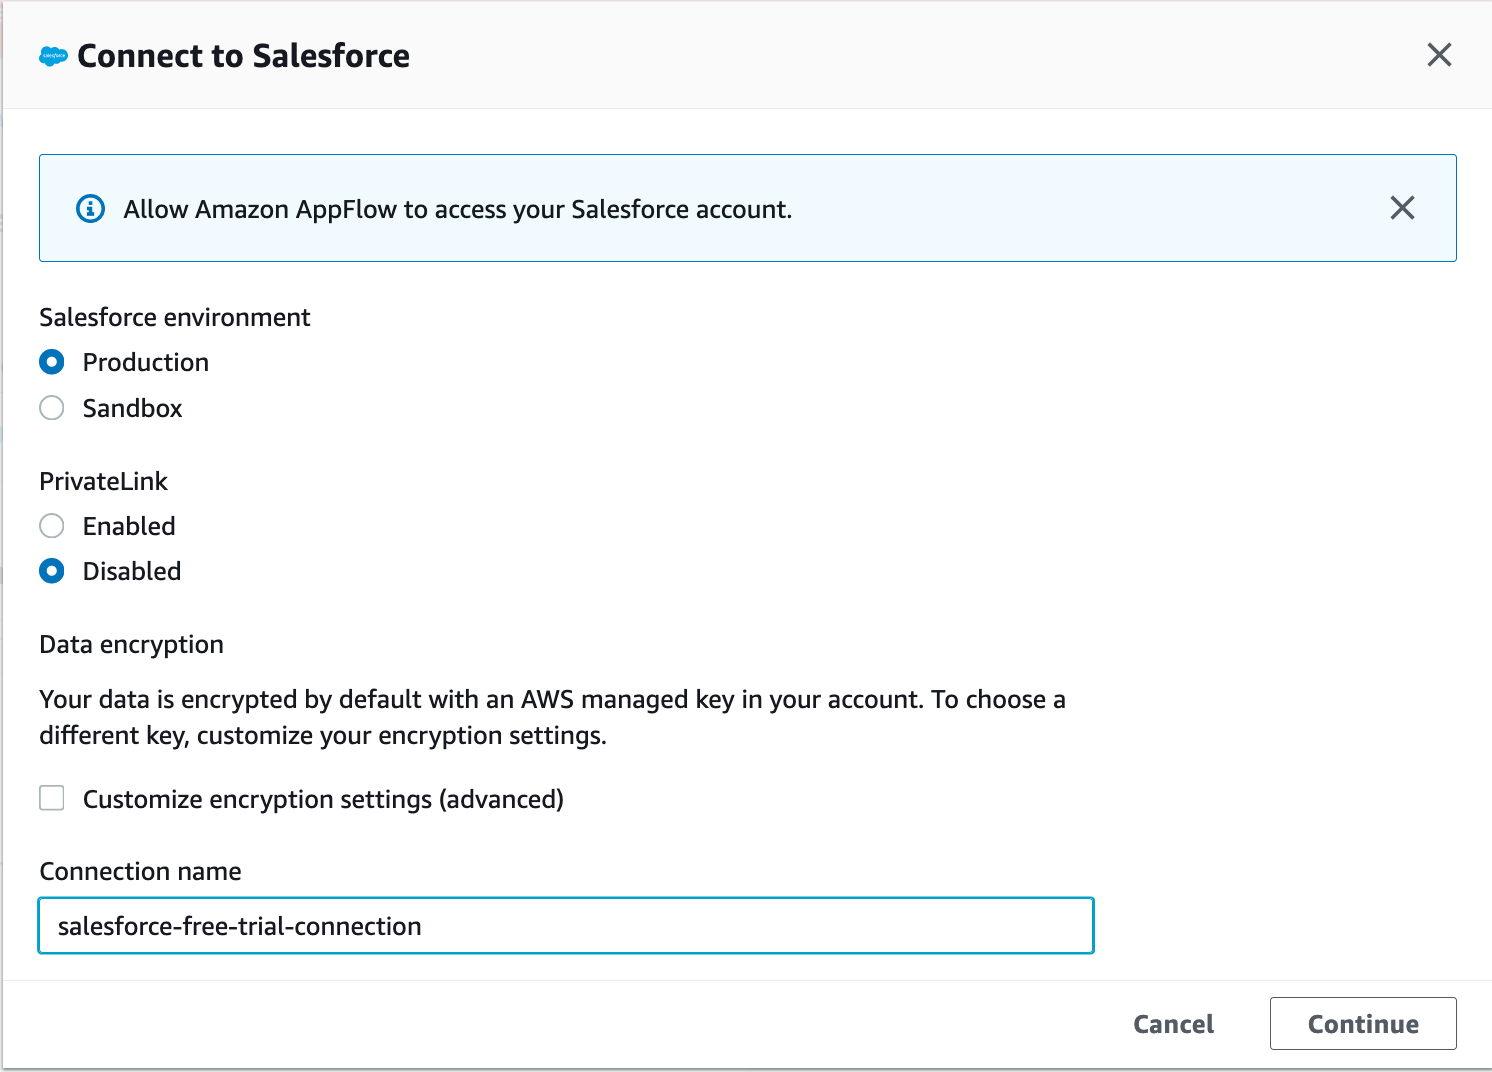
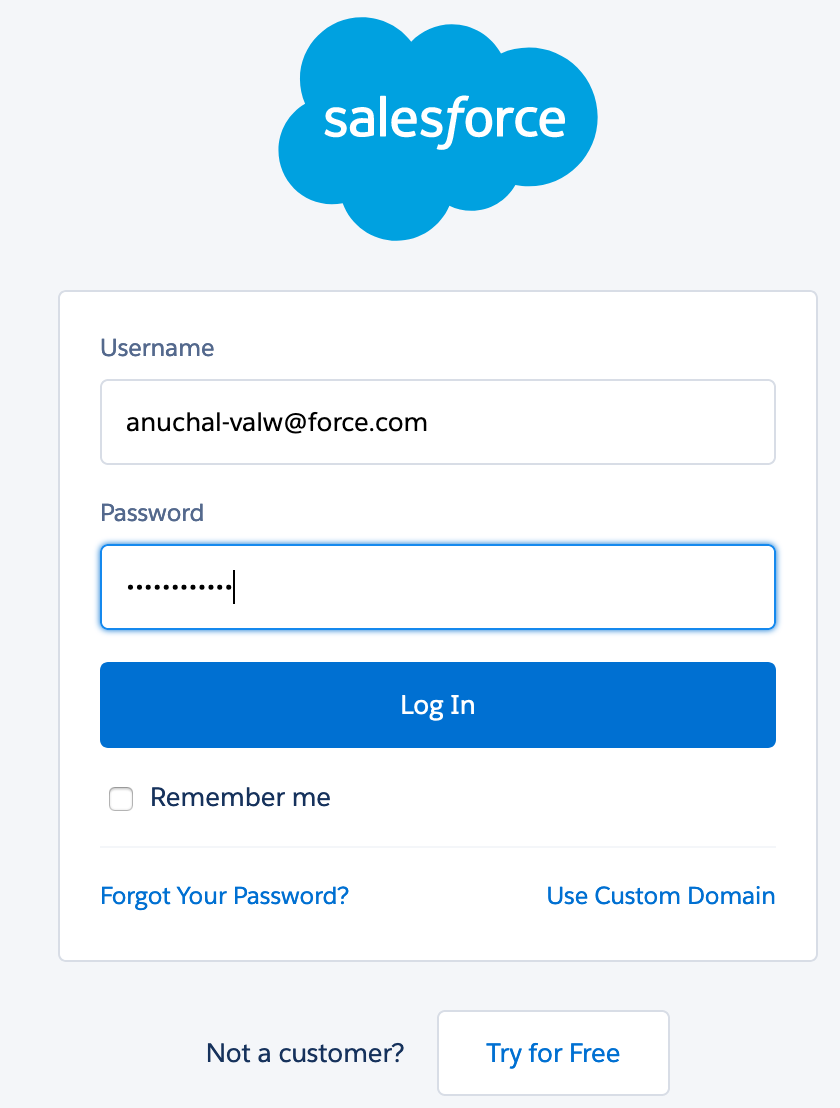
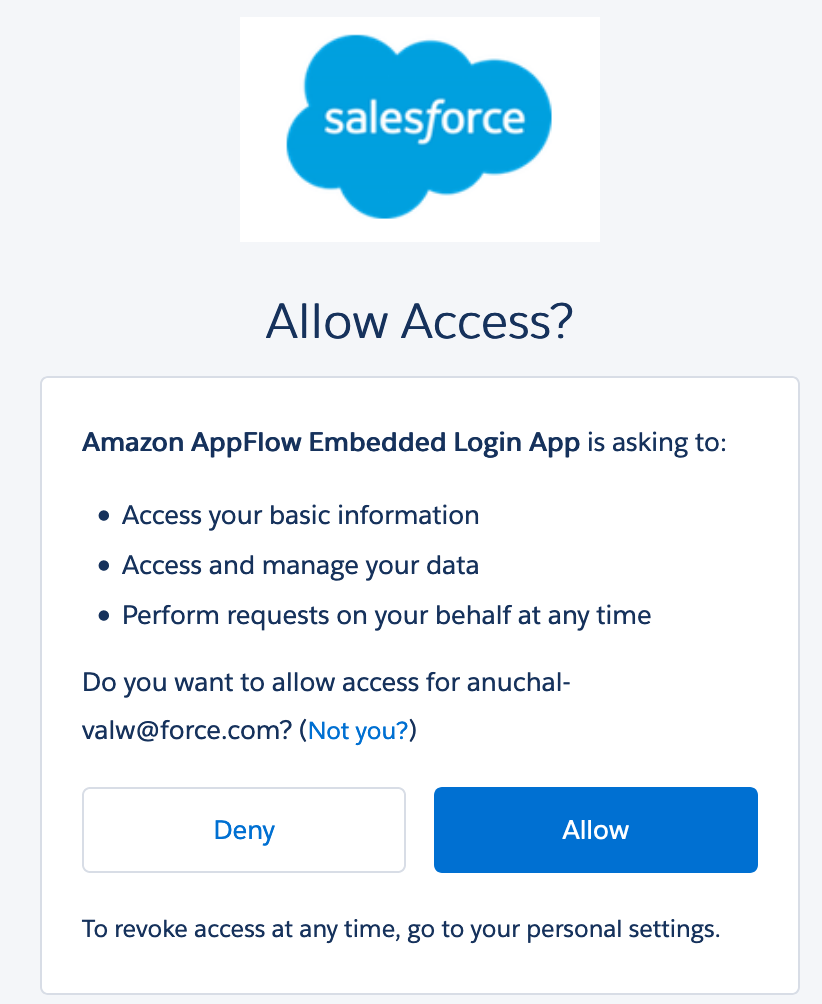
| While creating Salesforce connector, Marie will be redirected to Salesforce’s login page, where she will enter her Salesforce developer account credentials. She then allows salesforce to access AppFlow and creates the connection. |
Make the below selections/entries and click Continue
You will be re-directed to salesforce login URL. Enter the below details when prompted In the next page, choose You will then see a message “The connection salesforce-free-trial-connection was successfully created” |
|
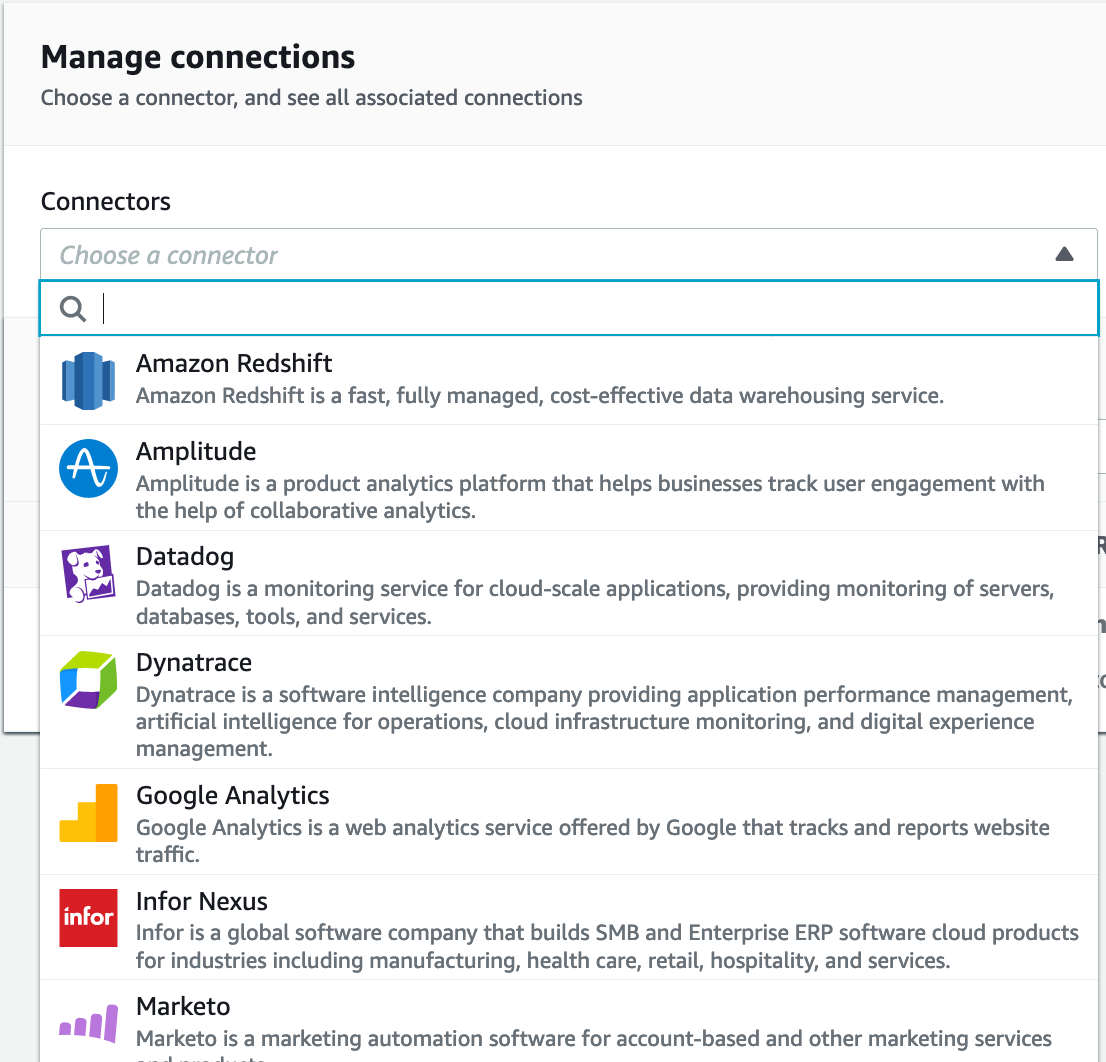
| Next Marie will proceed to create a Connector to Redshift |
From the Connectors drop down, choose Redshift and
Click on |

|
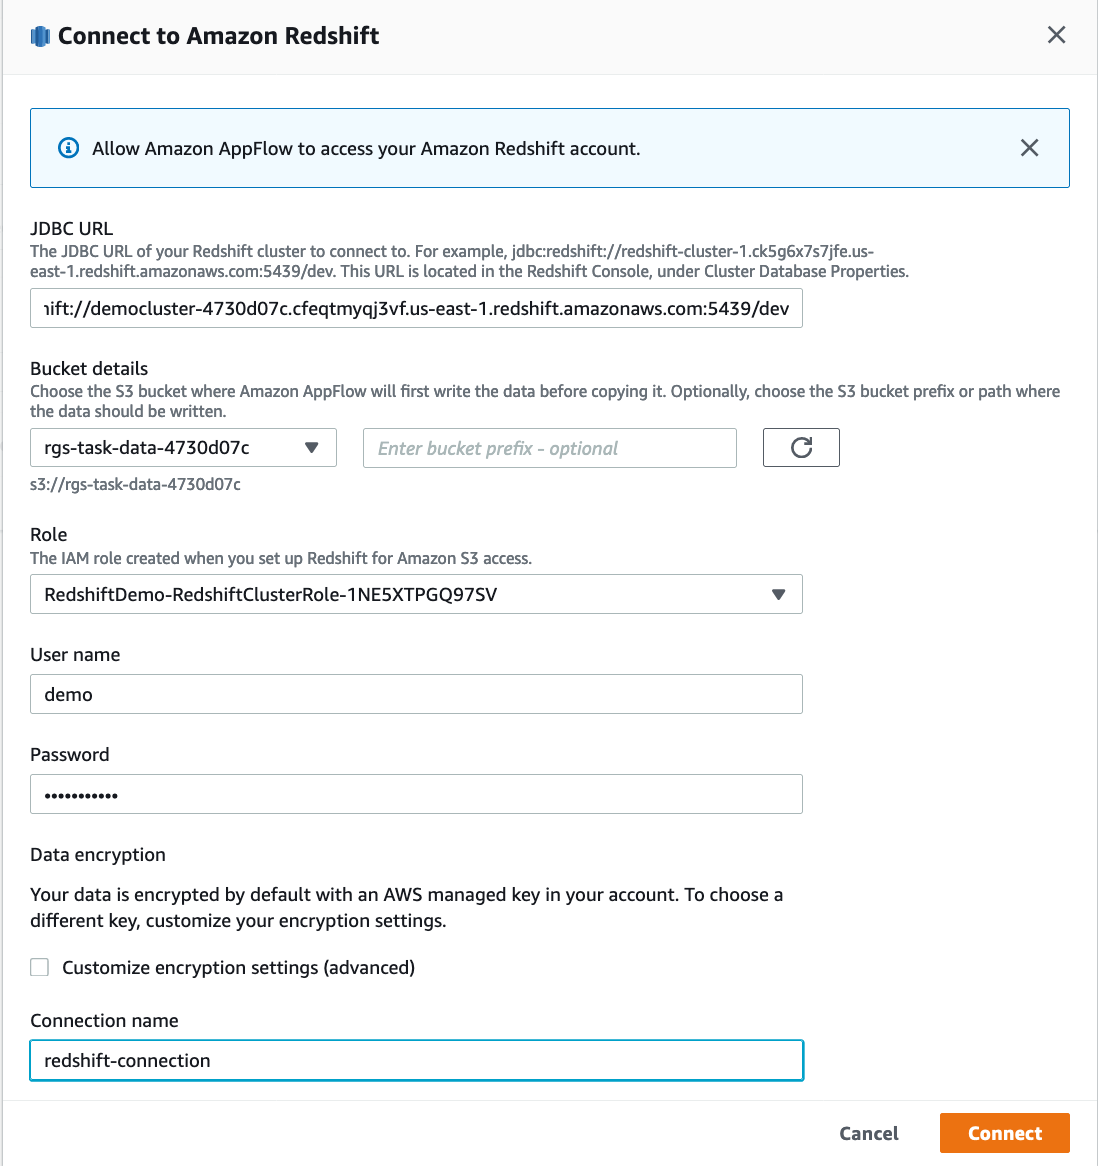
| Marie enters her Redshift cluster details when prompted and creates a connection |
Enter the below details and click Connect
|
|
Create Tables
| Say | Do | Show |
|---|---|---|
| Marie now will create target tables in Redshift. In order to create tables, she needs SQLWorkbenchJ. Marie logs into her workstation, in which she has already installed SQLWorkbenchJ to connect to Redshift |
The main cloud formation template deploys a Windows EC2 instance, with required drivers and softwares for AWS SCT, SQL Workbench. Before the demo, please capture all relevant parameters from the CloudFormation output that you’ll need to use in the subsequent steps. Connect to that EC2 instance using Remote Desktop client.
|

|
| Marie opens SQL Workbench IDE and connects to the database |
Open SQL workbench from the taskbar shortcut, which opens the new connection window. In that, click Manage Drivers in bottom left hand corner and select Redshift. Correct the driver path as
|
|
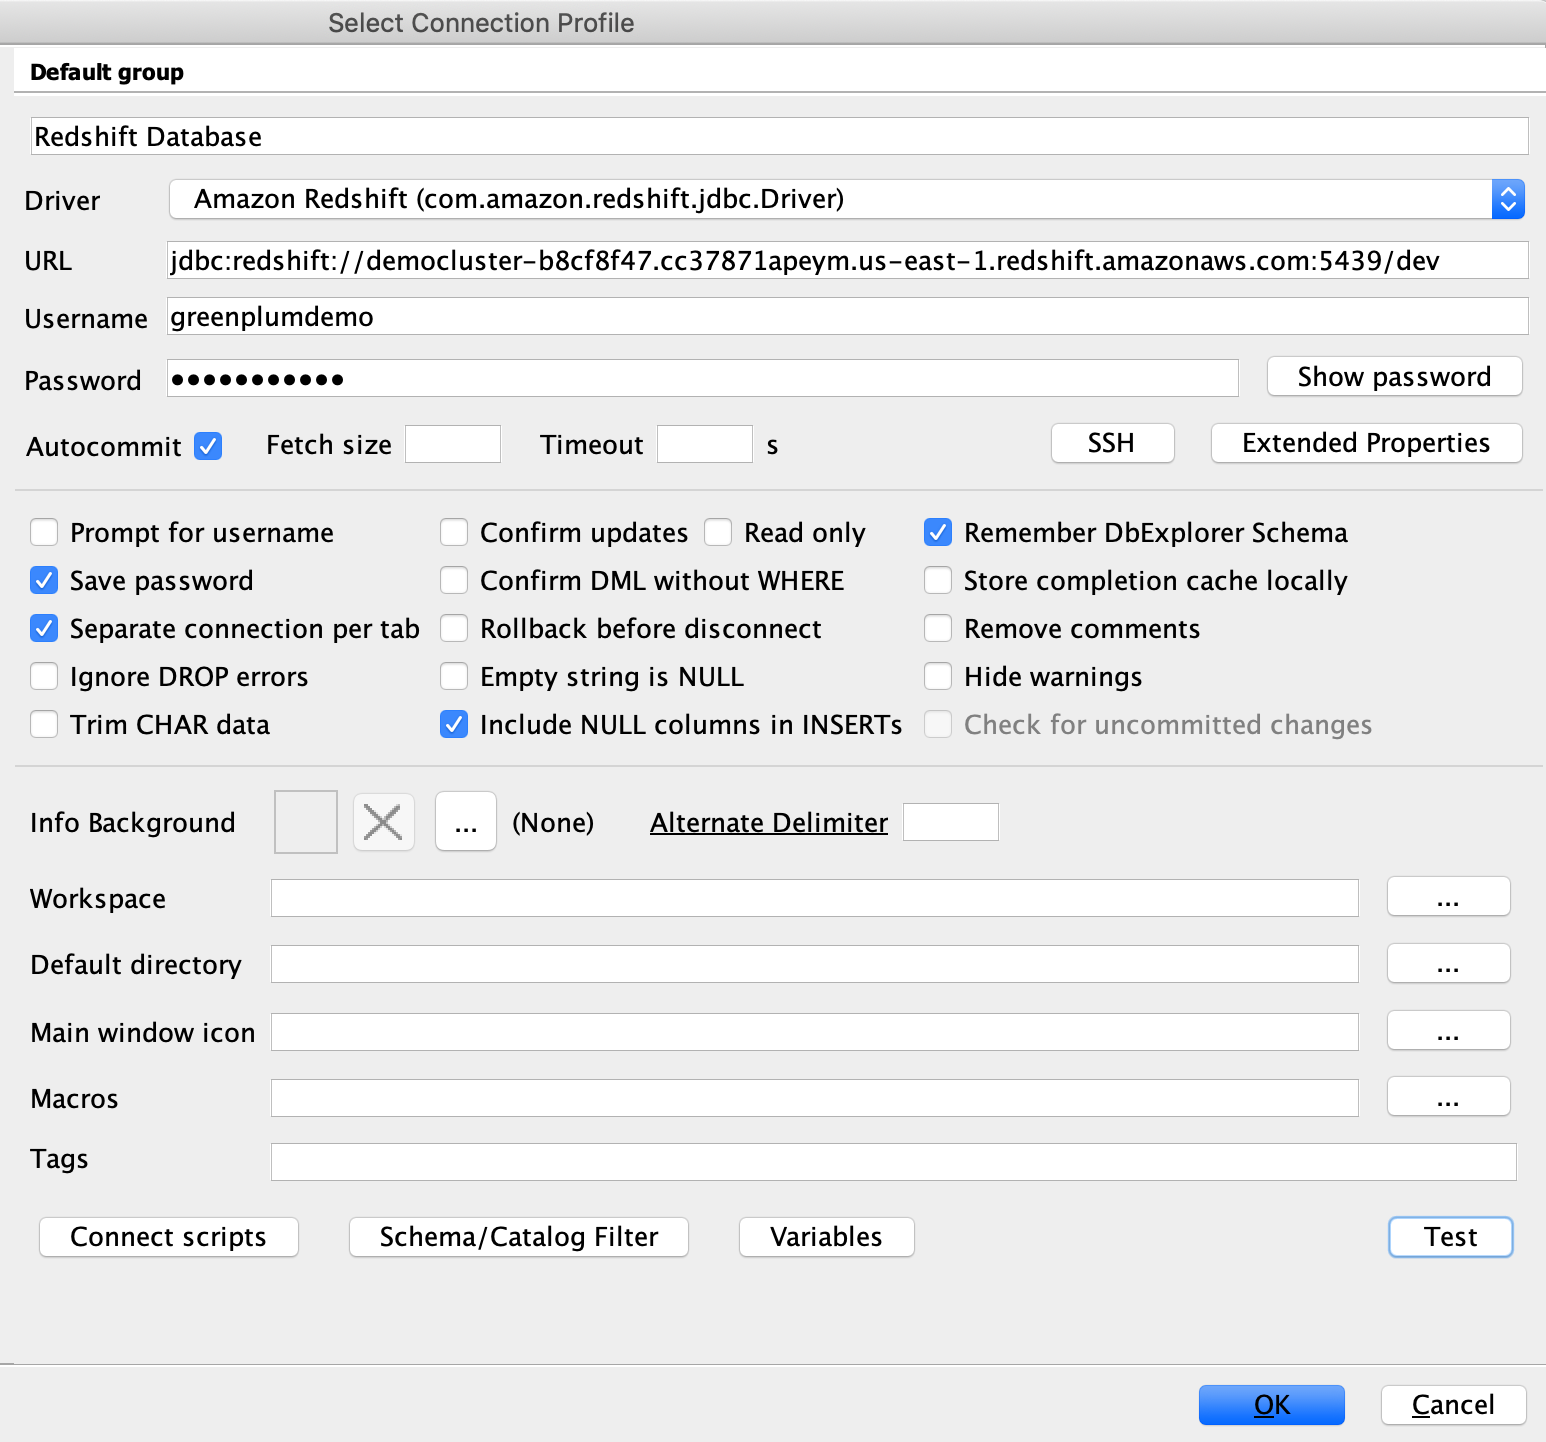
| Marie then provides the connectivity settings and connects to the database |
On the connectivity screen, select inputs:
Click |

|
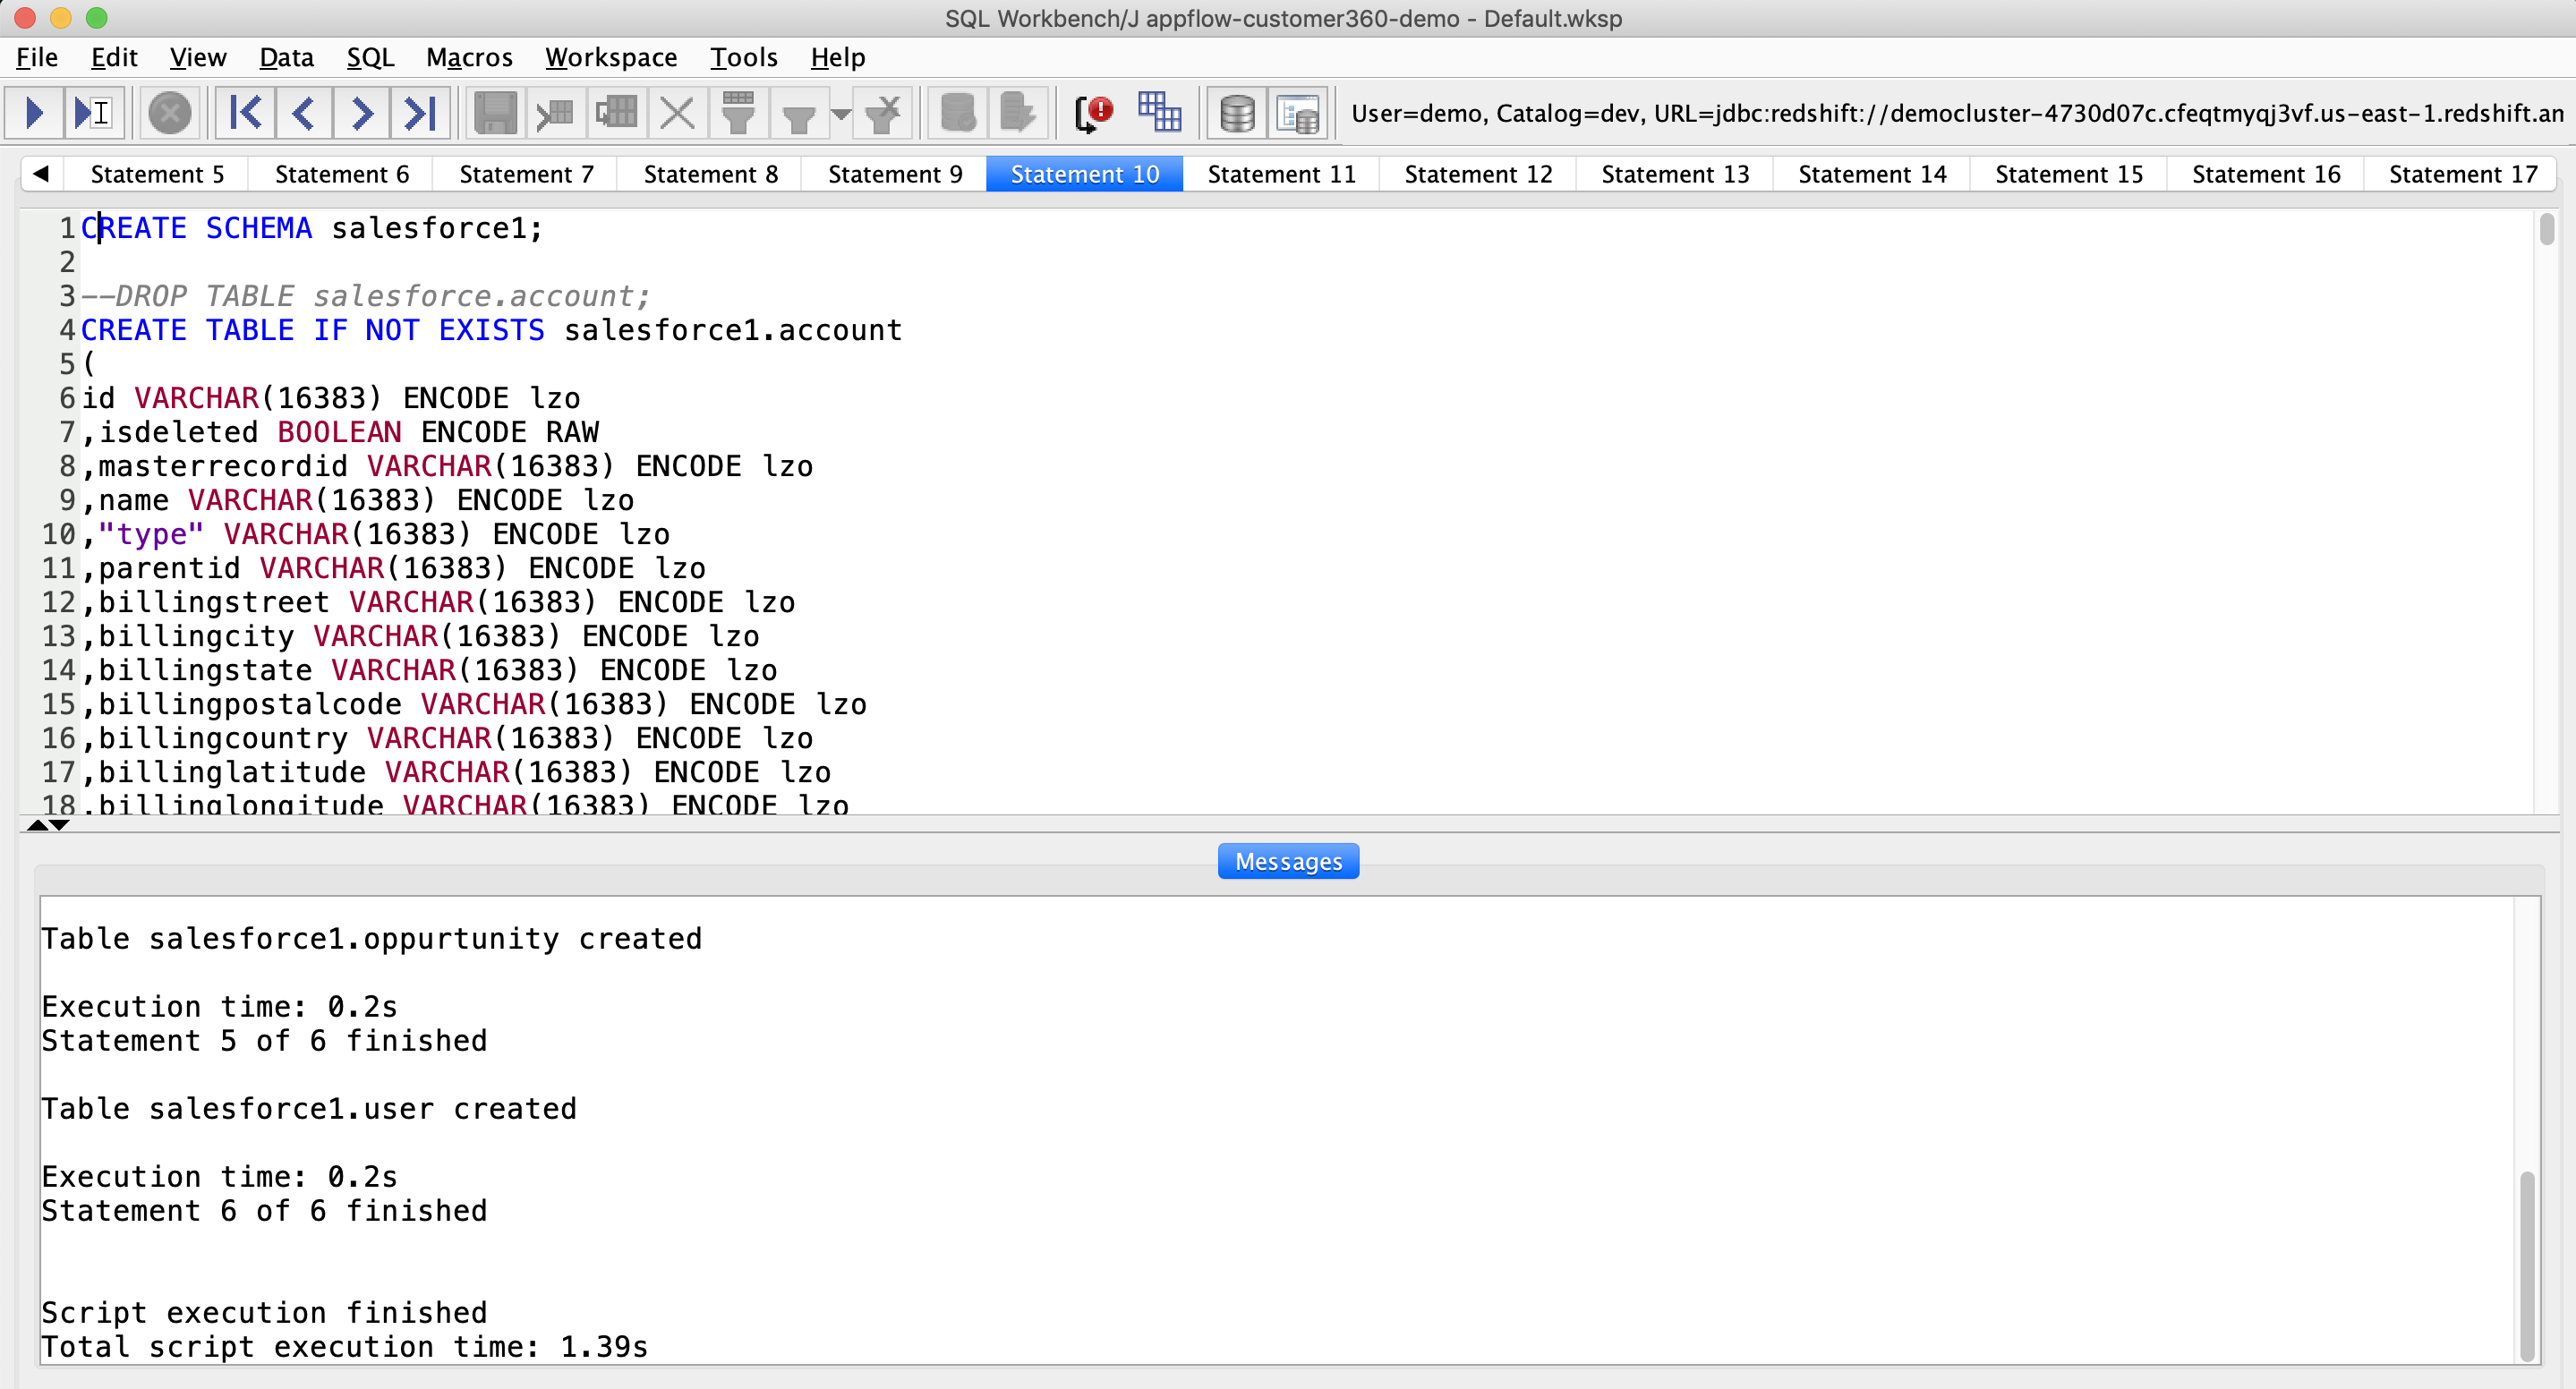
| Marie creates the table by executing the table DDL | Copy and paste the below DDL in SQL Workbench and execute it |
|
Create Dataflow
| Say | Do | Show |
|---|---|---|
| Next, Marie will create AppFlow Data Flows to move data from Salesforce to Redshift |
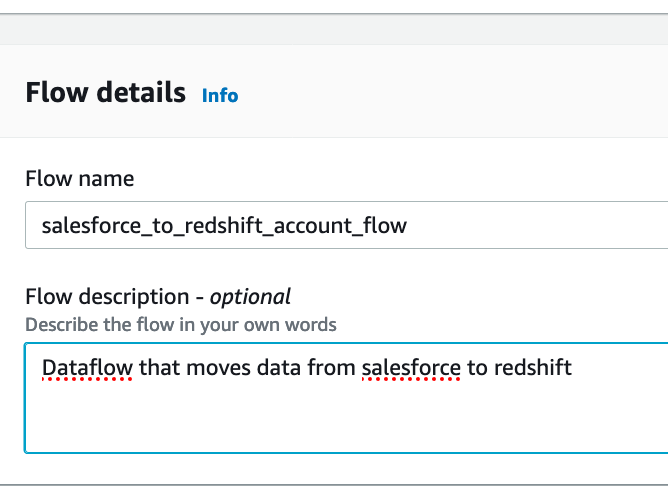
From the menu on the left click on Flows and click Create Flow
Enter Click |
|
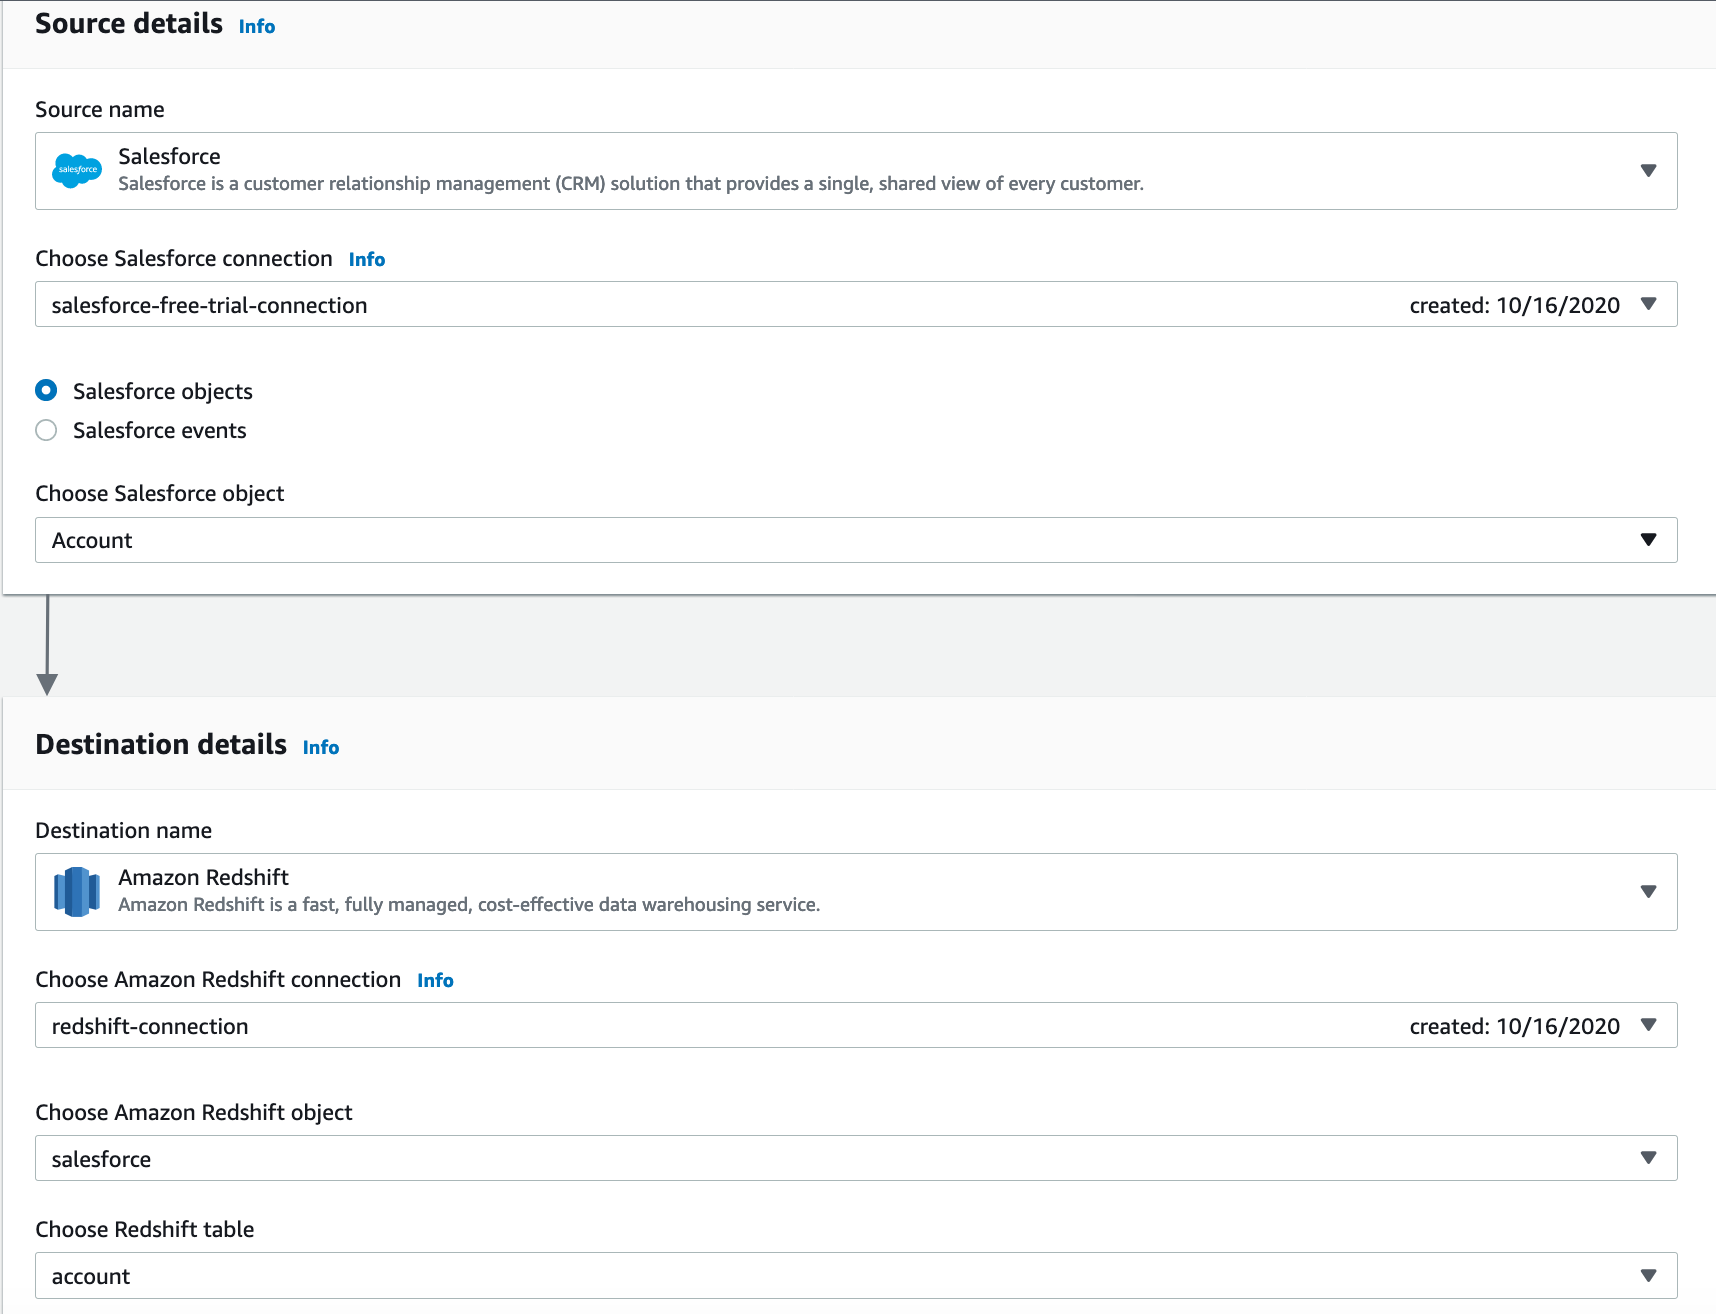
Now, Appflow displays the Salesforce objects and Redshift tables to choose from. Marie makes necessary selections for the Account Object in Salesforce
|
Enter source details as shown below:
Enter destination details as shown below: Leave all other default options selected and click |
|
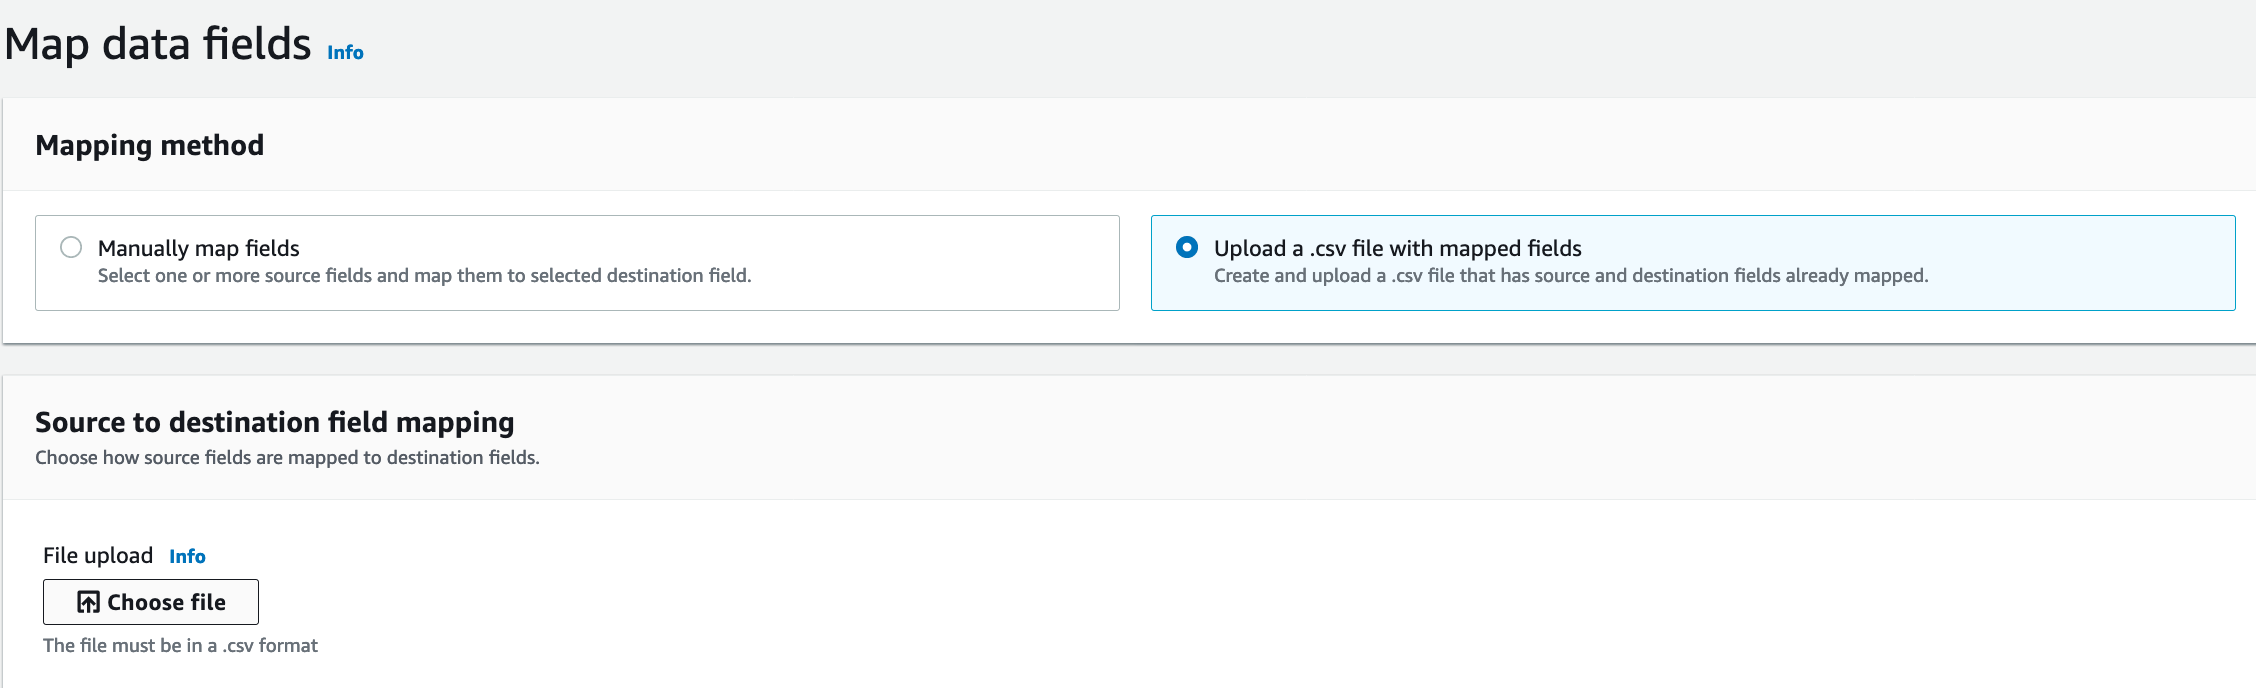
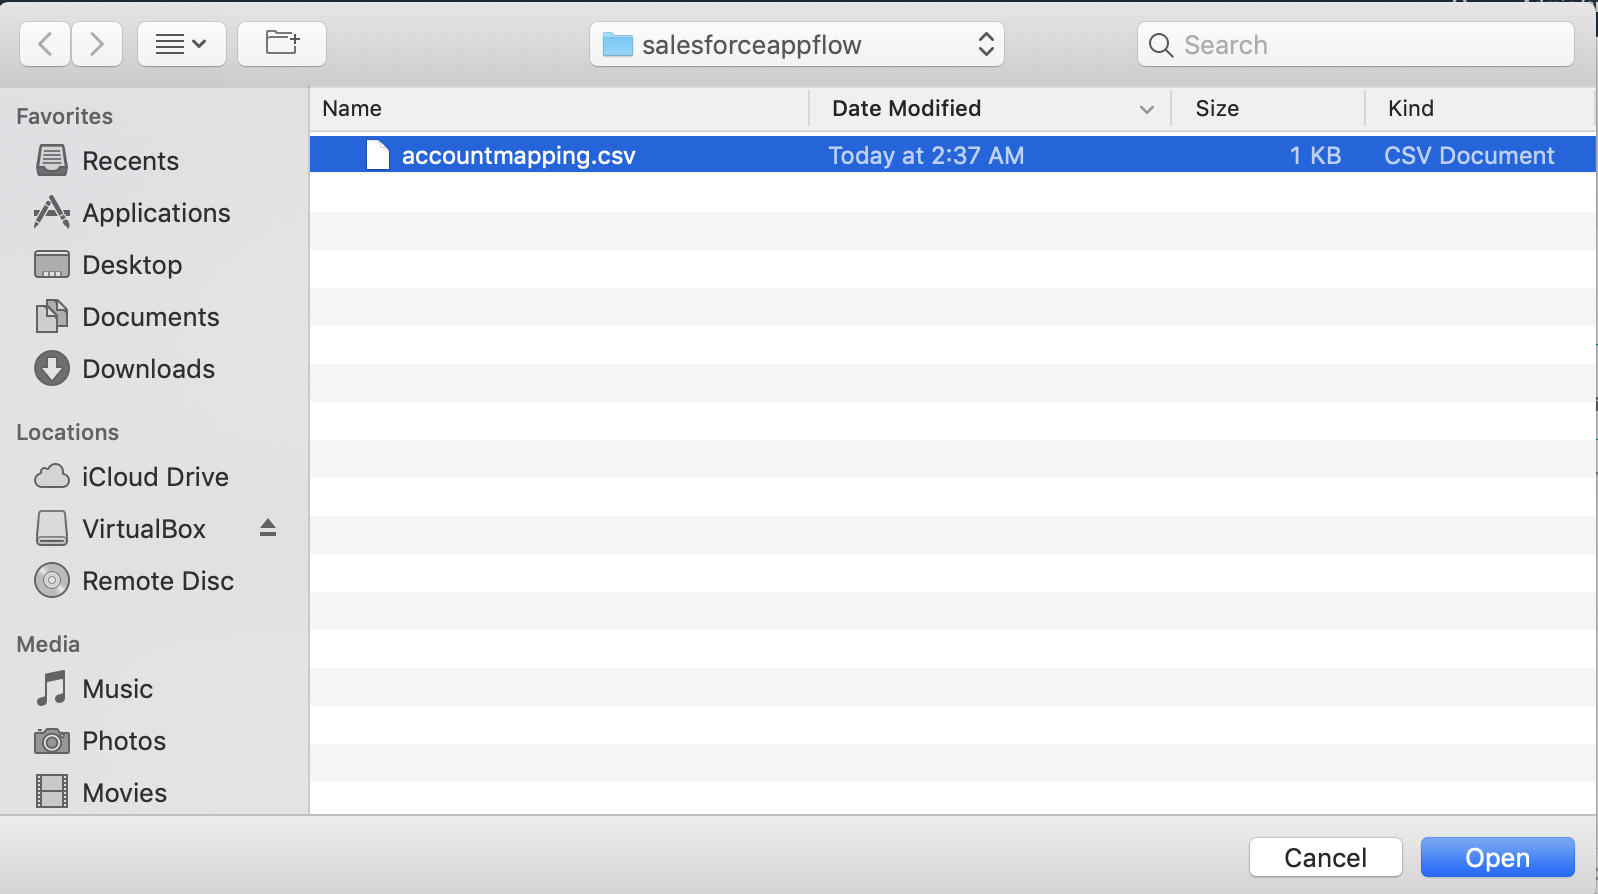
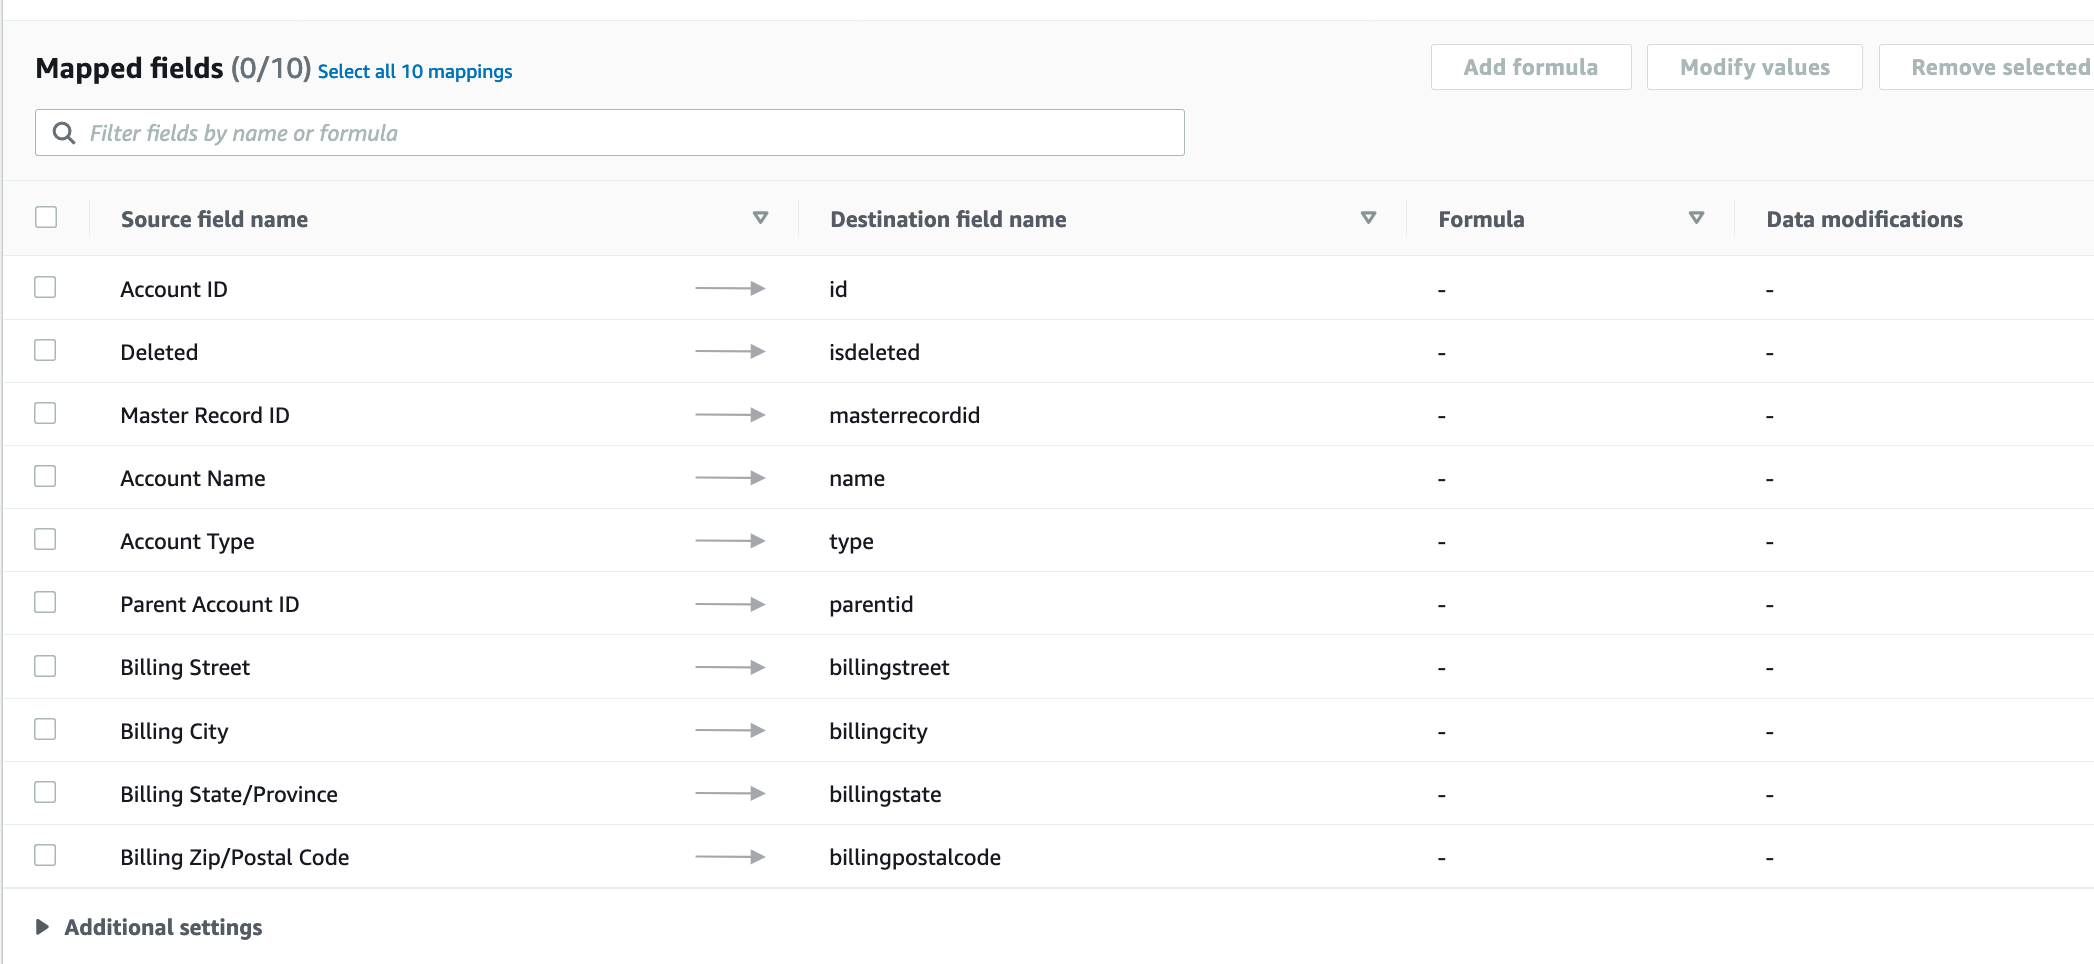
In the next screen, Marie can see all the available fields from Account Object in Salesforce and salesforce.account table in Redshift. Marie can either choose to do the mapping using the UI or upload a mapping file. In this demo, we are going to upload a mapping file
|
Choose Upload a .csv file with mapped fields option for Mapping method
Click on |
|
Next, Marie wants to add some validations to ensure that bad data doesn’t flow into Redshift. Specifically, she wants to ignore records with NULL Account ID. Alternatively, she can also choose to Terminate Flow if a validation fails
|
Expand Validations section at the bottom of the page and Click on Add Validation
Enter the below details: |


|
| Now, Marie wants to mask PII data. Red Import has defined Street Address and PhoneNumber as PII. Marie will find those fields and masks them. She can choose to mask either all values or first # characters or last # characters |
In the Mapped Fields search box, search for Street
Select Similarly, search for Select Click on In the window that pops up, choode Select Click Click |


|
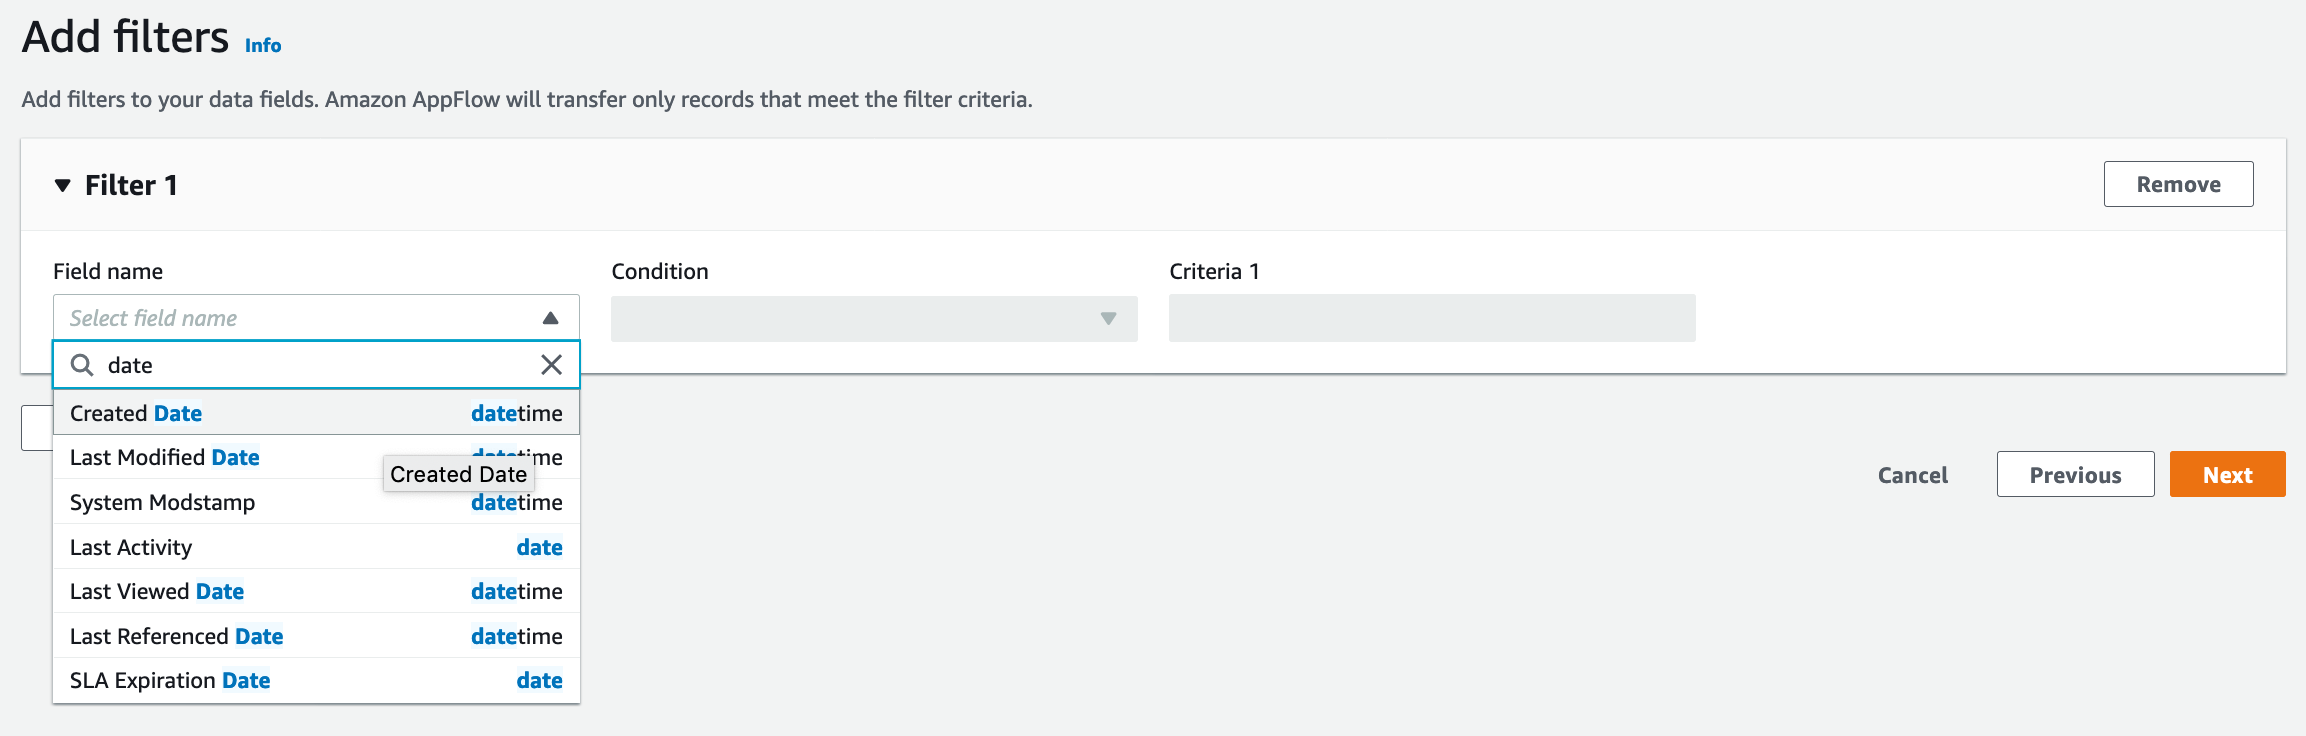
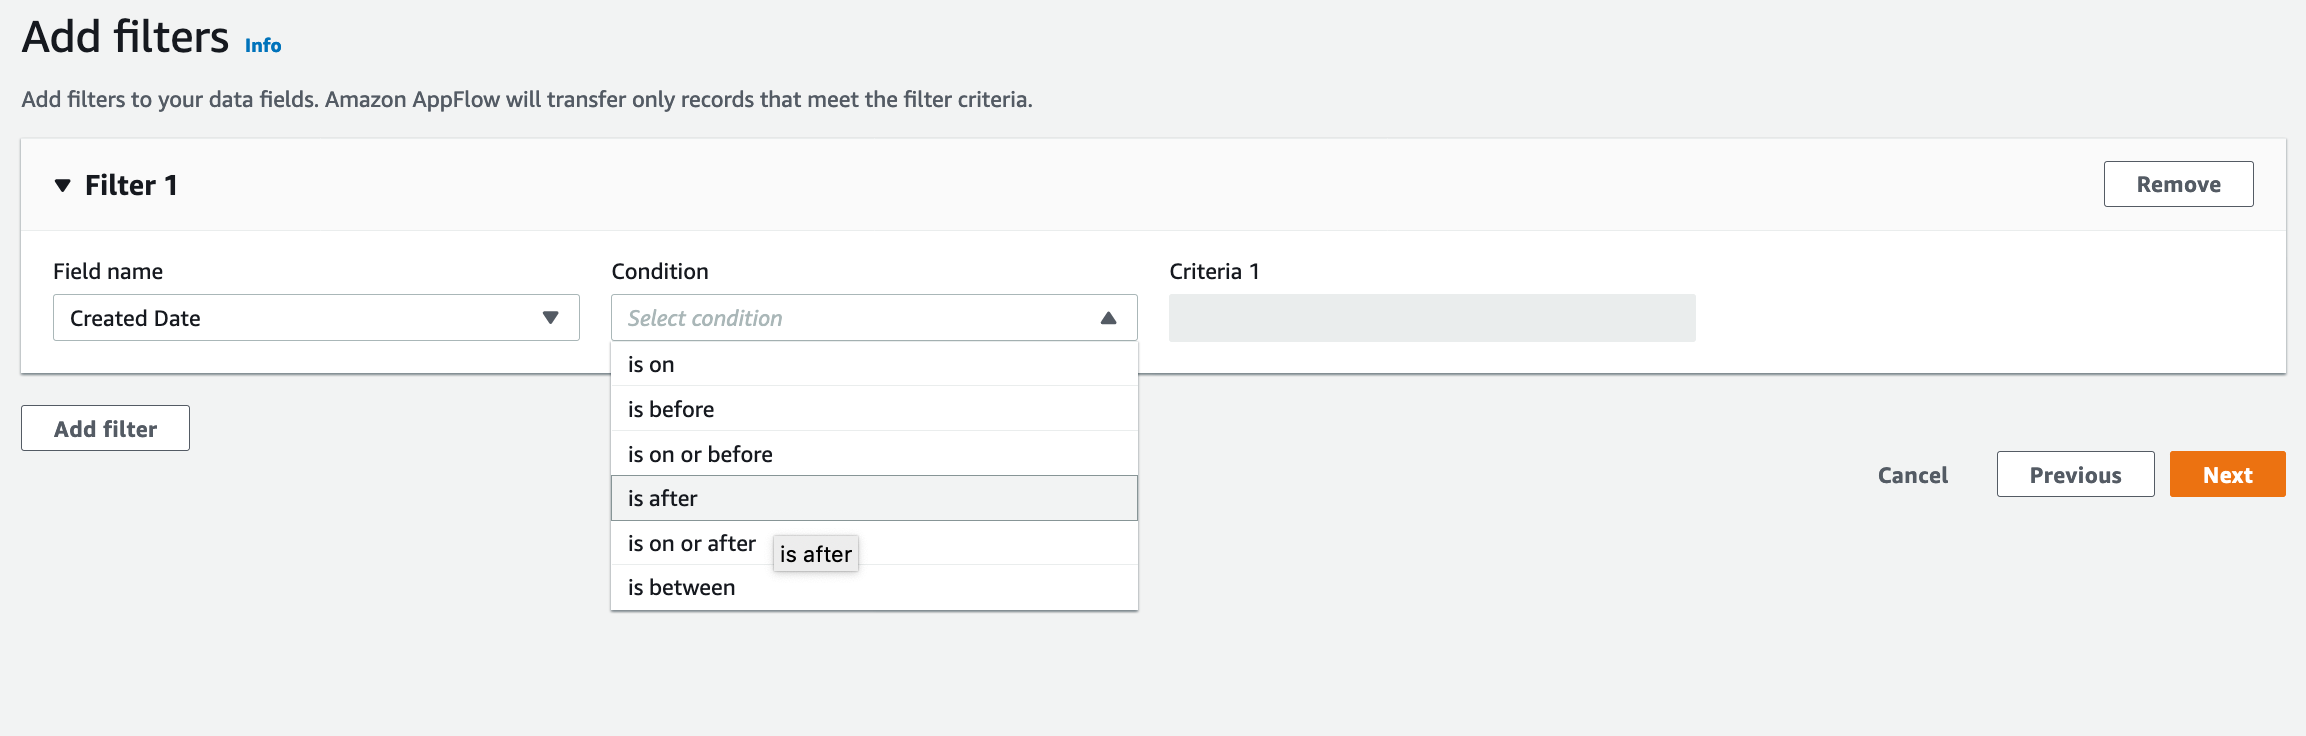
| As a next Step Marie wants to apply filters to source data in order to fetch current year data only |
Click on Add Filter button
Choose Choose Choose Current year’s Jan 1 date in Criteria 1 Click |


|
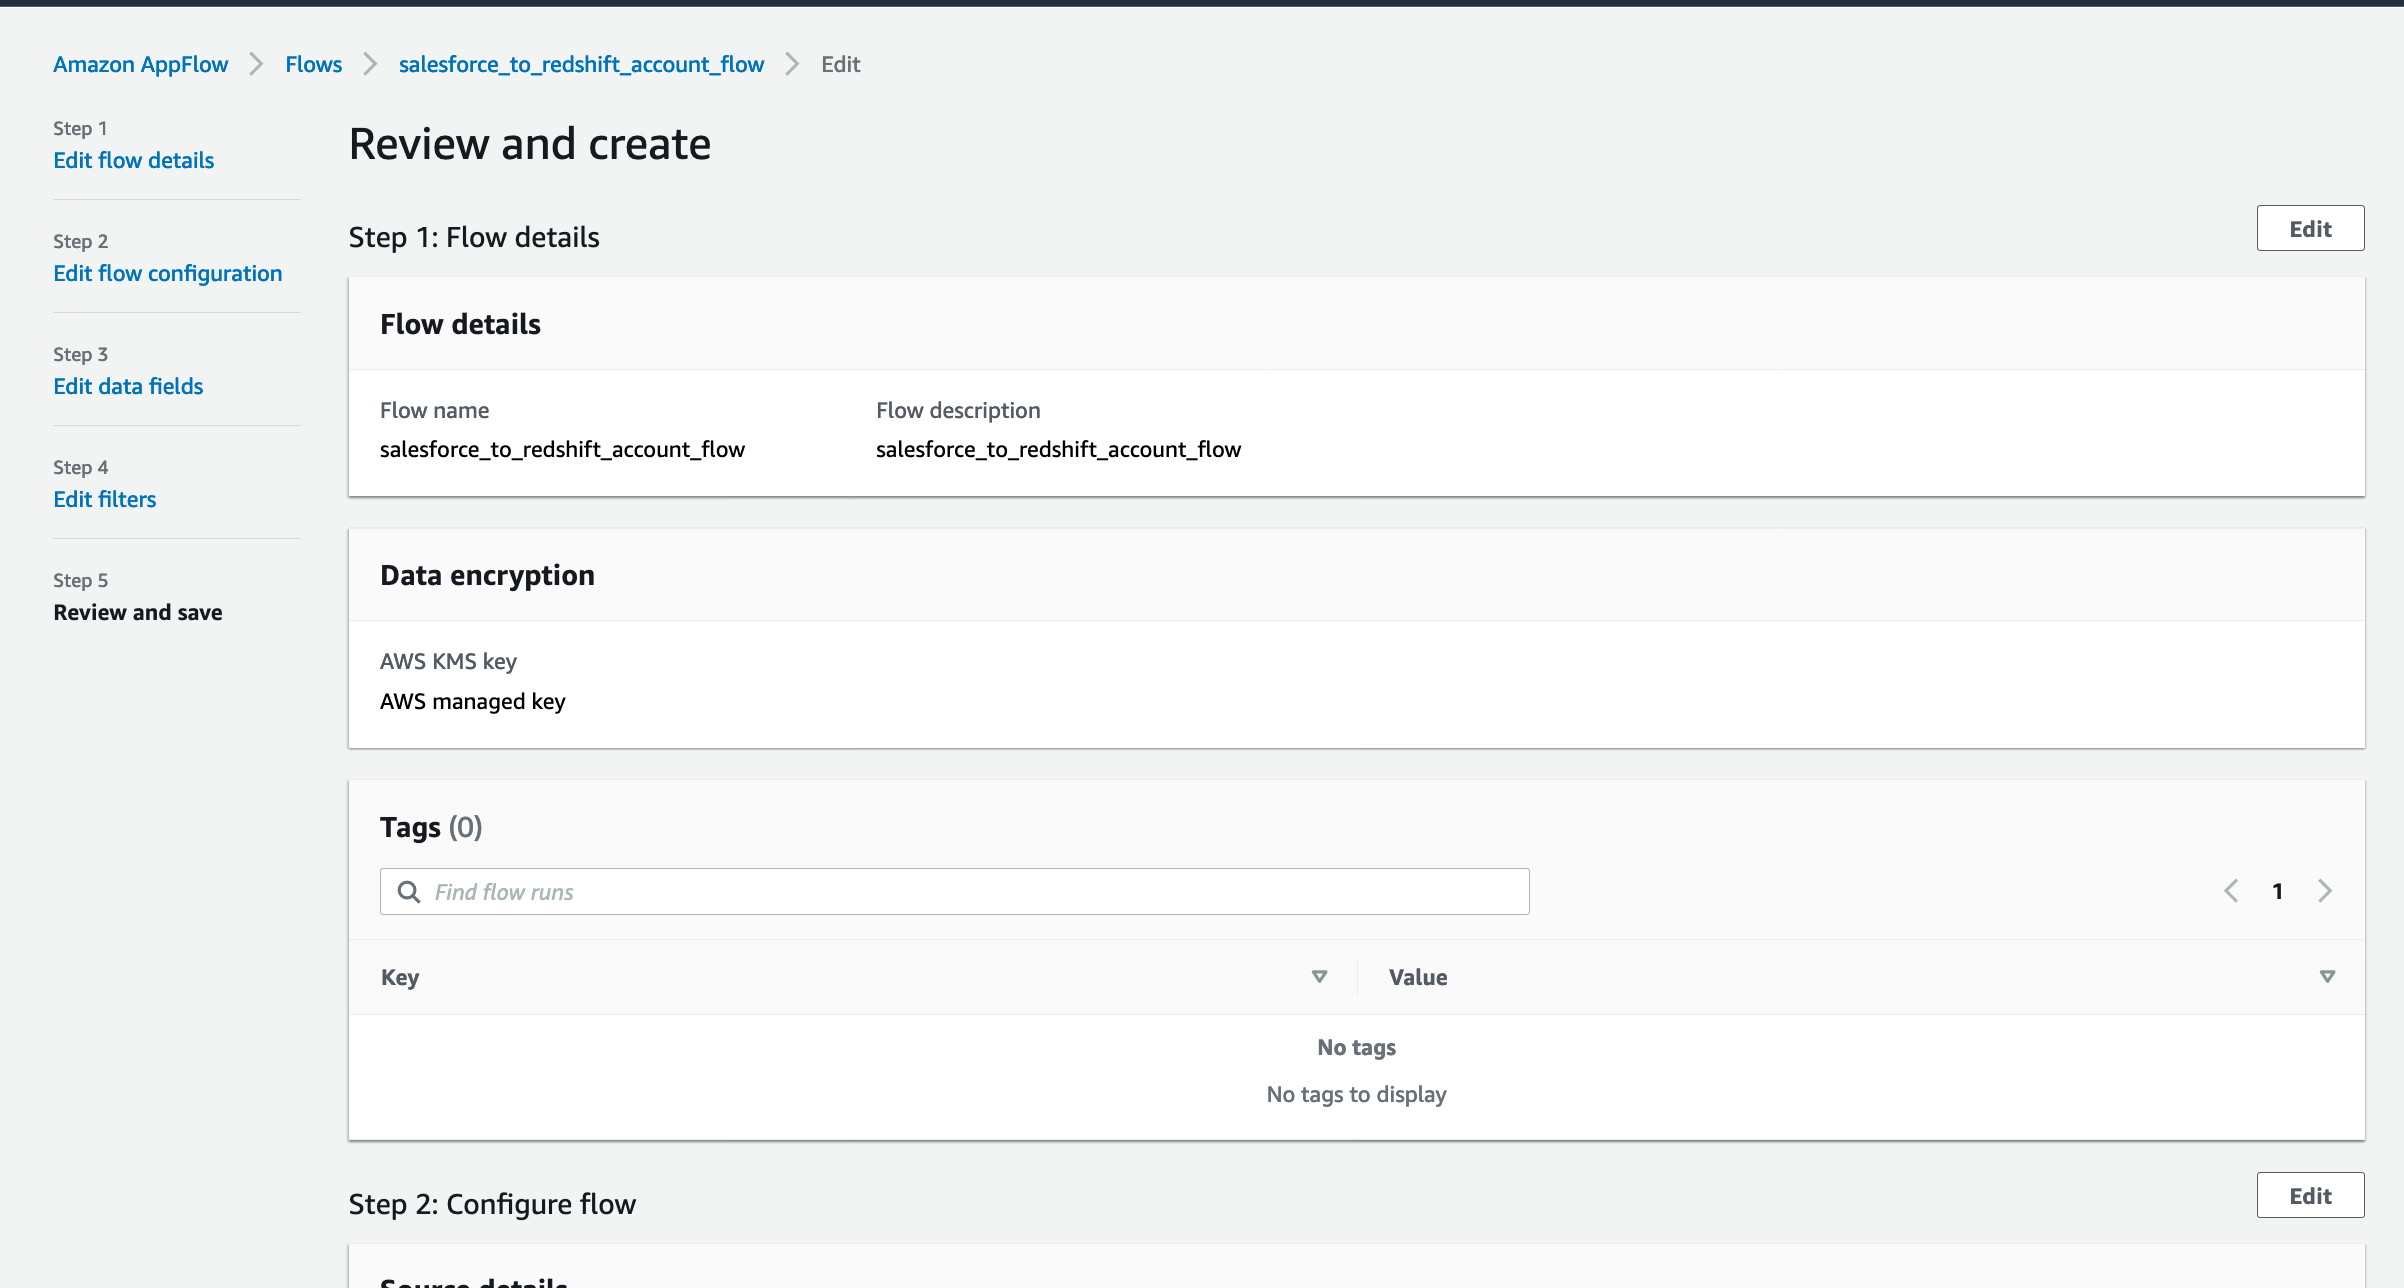
| Marie does a final review and creates the dataflow |
Review and click on Create Flow
|
|
Execute DataFlow
| Say | Do | Show |
|---|---|---|
| Marie now executes the Data flow she created to load data from Salesforce to Redshift. Once the dataflow is successfully executed, marie can see the number of records processed and size of data transferred |
Go to Flows > salesforce_to_redshift_account_flow
Click Navigate to |

|
Validate Data
| Say | Do | Show |
|---|---|---|
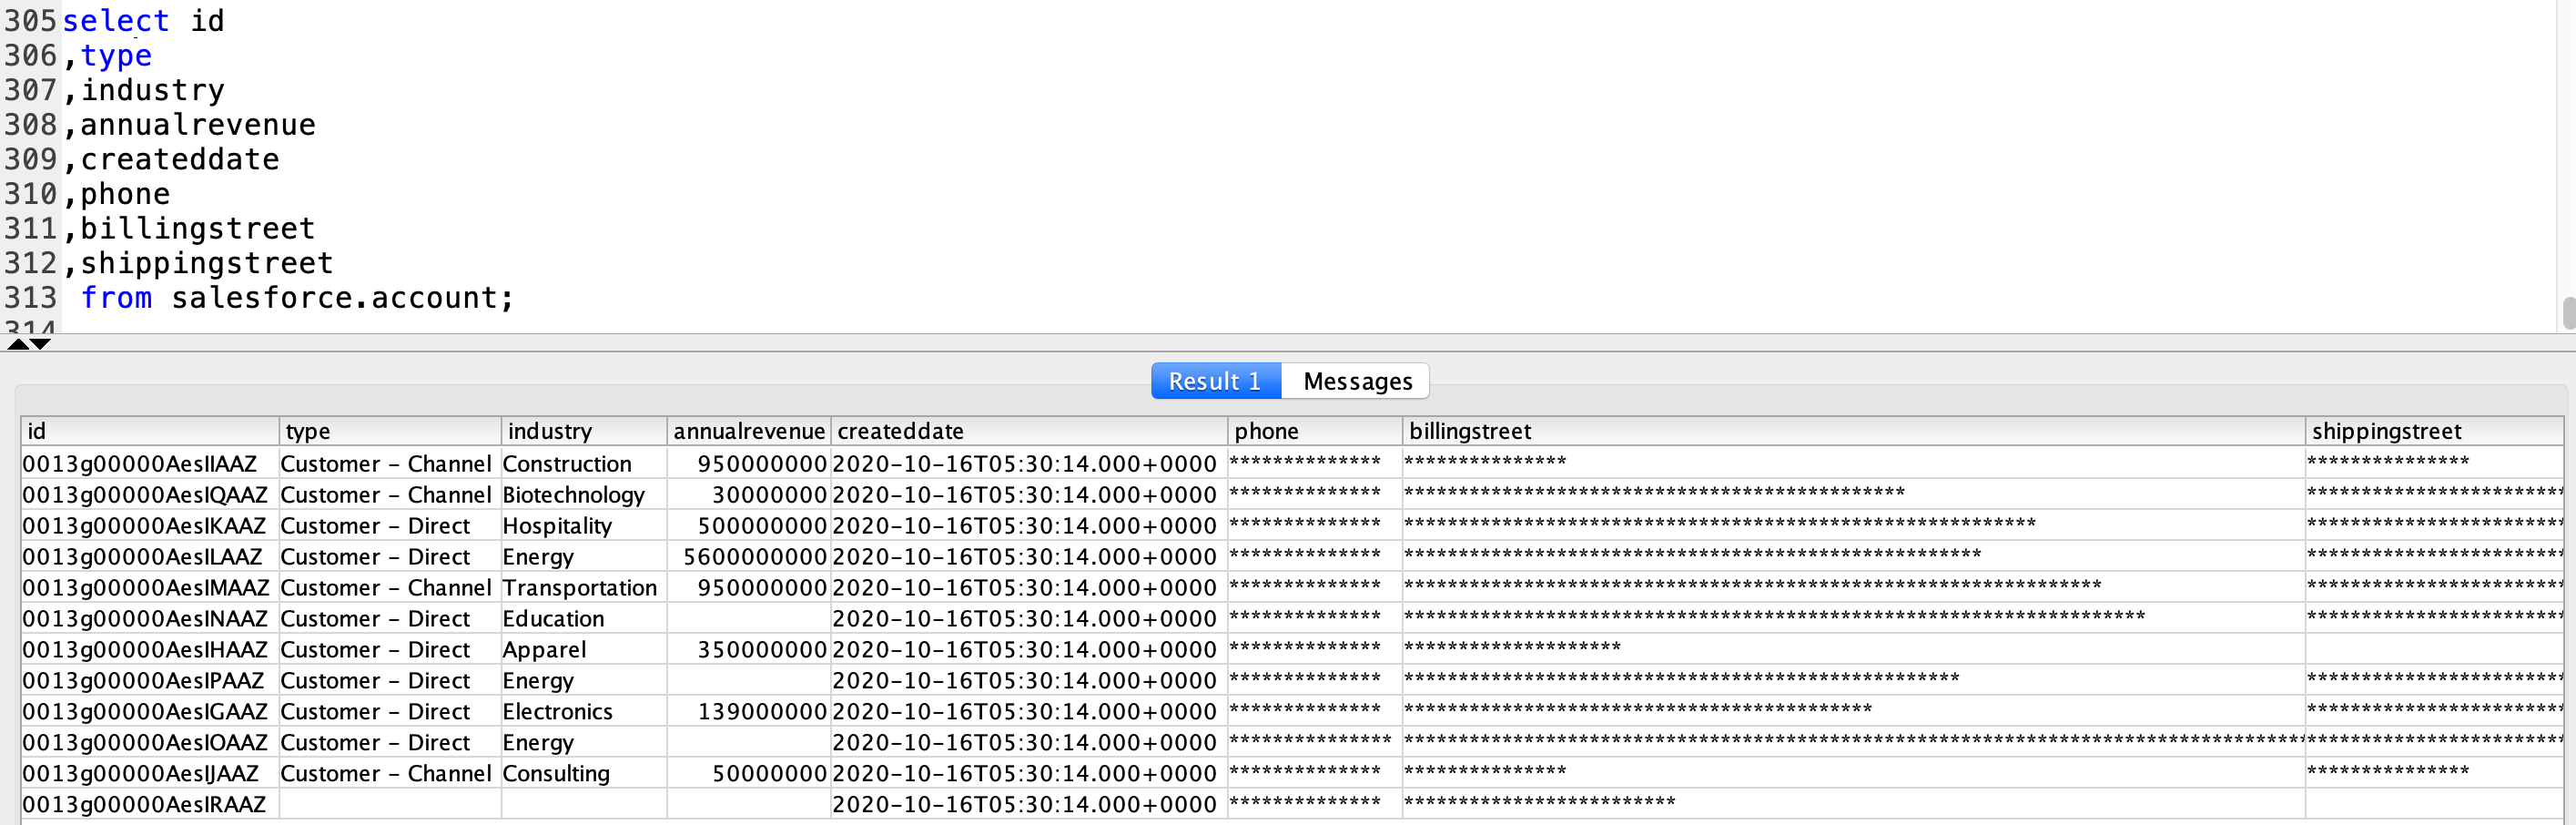
Finally, Marie will connect to Redshift and runs queries to validate the data loaded into Redshift. She validates that the fields billingstreet, shippingstreet,
phone are masked. She validates that the id field doesn’t have any null values and createddate is current year date
|
Using SQL Workbench, run the below query
|
|
Before you Leave
If you want to re-run the demo, make sure you run the following cleanup steps:
- Delete Redshift tables/views
drop schema salesforce cascade;
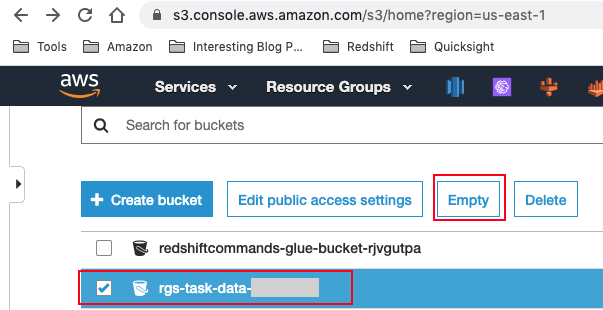
- Navigate to S3 and empty your <TaskDataBucketName> bucket.
If you are done using your cluster, please think about deleting the CFN stack or Pausing your Redshift Cluster to avoid having to pay for unused resources.