Redshift: How to build a successful demo for your customers > Preparing your Demo > SageMaker Studio Considerations
SageMaker Studio Considerations
If the demo you are running requires Sagemaker Studio, complete the following setup first.
These steps should be run after the SageMaker Studio demo Cloud Formation has finished running.
| Step | Visual |
|---|---|
| Once the Studio stack is created, navigate to SageMaker Studio. Find the “rs-demo-scientist” User Profile, and click on the “Open Studio” link. This will launch the Studio’s JupyterLab environment in a new browser tab (might take 2-3 minutes) |  |
On the new JupyterLab window, navigate to File–>New–>Terminal to open a new Terminal Window as shown |
 |
Type this S3 sync command in the new terminal window to download the demo notebooks to a local studio-demo folder: aws s3 sync s3://redshift-demos/sagemaker/studio/ ./studio-demo |
 |
On the left File Browser navigation, click on the refresh button. Navigate to the studio-demo/setup.ipynb notebook file, and double-click to open it. Make sure that the Python 3 (Data Science) kernel is selected. In the first code cell of the notebook, assign the stack_name string variable the name of the main Cloud Formation template |
 |
Run all cells in the notebook. This step will ensure that the other notebooks will have the correct Redshift configuration parameters populated. You should see outputs as shown. Your Studio demo environment is now ready! You can close the setup.ipynb notebook, and double-click to open the desired demo notebook from the left File Browser navigation. |
 |
Change the JupyterLab Theme to JupyterLab Light to match the theme of the screenshots in this demo. |
 |
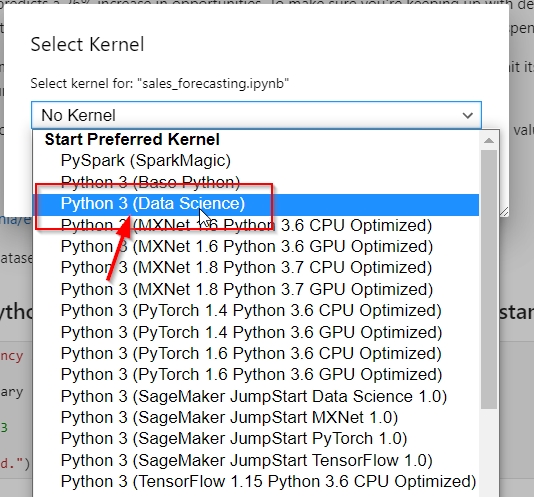
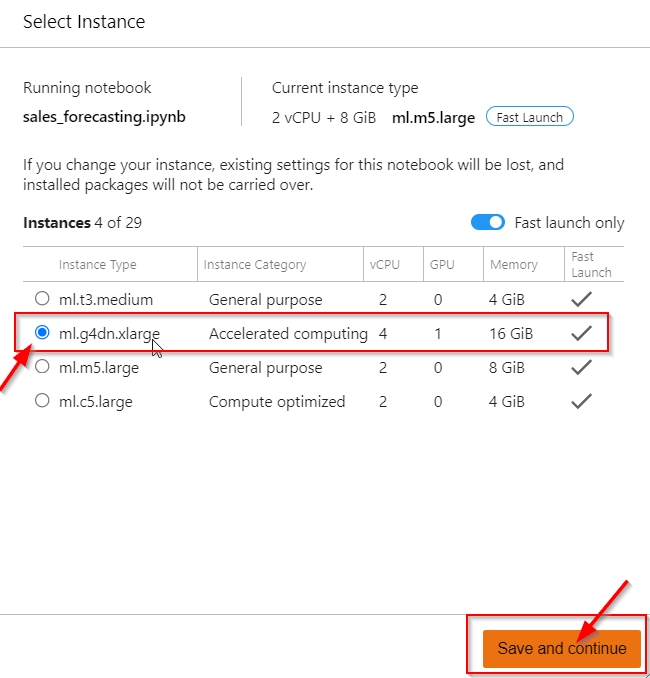
Open notebook sales_forecasting.ipynb. Change the notebook Kernel to Python 3 (Data Science) , and the Instance Type to ml.g4dn.xlarge, if not already configured as such |
    |
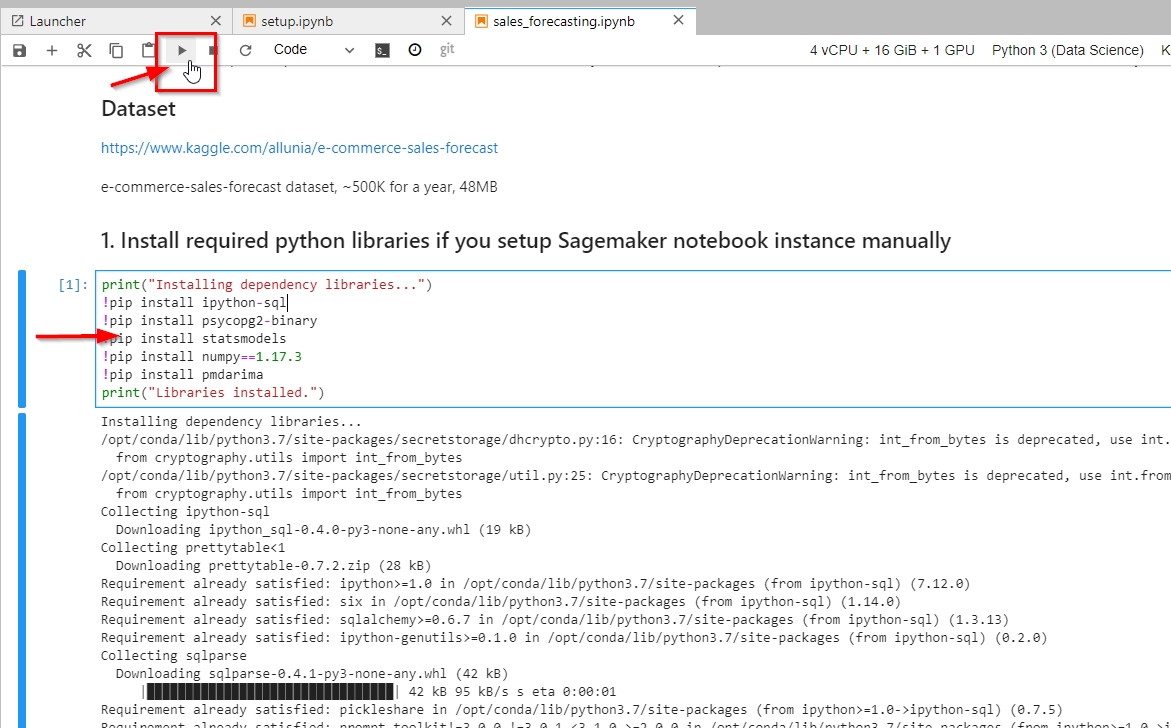
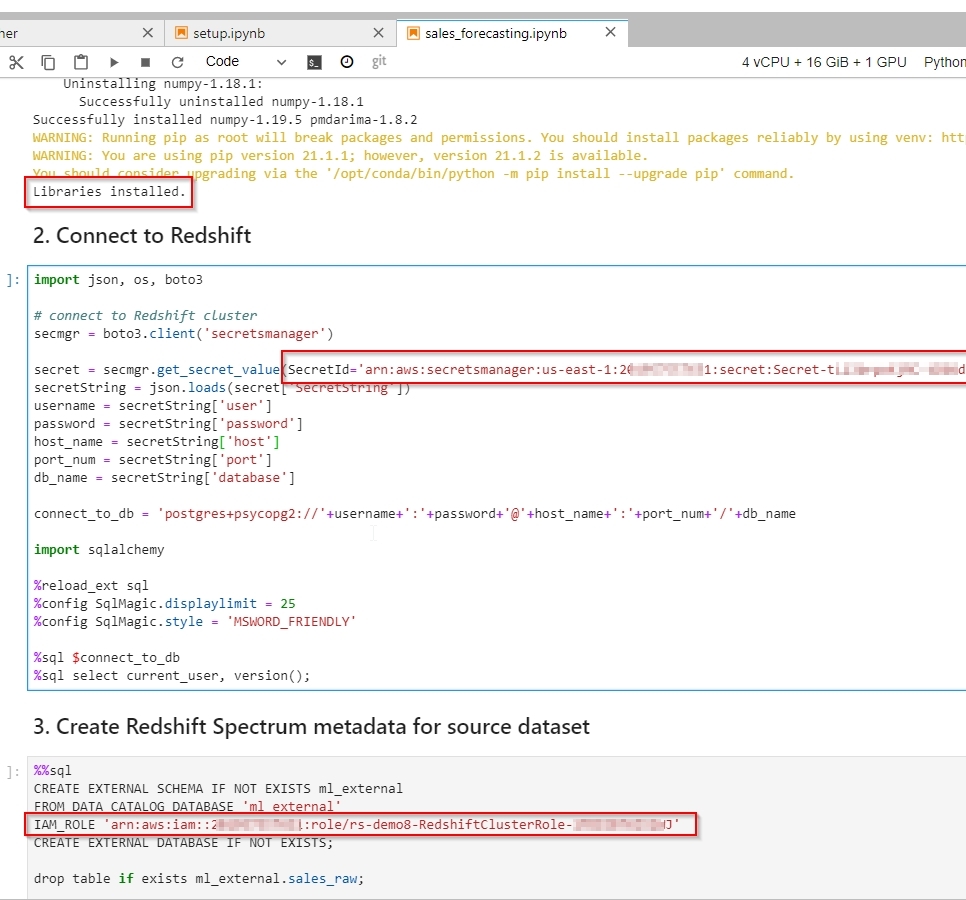
Run the first code cell to install all dependencies. Also, confirm that the SecretId and IAM_ROLE values are properly configured in cells 2 and 3 as shown below. |
  |